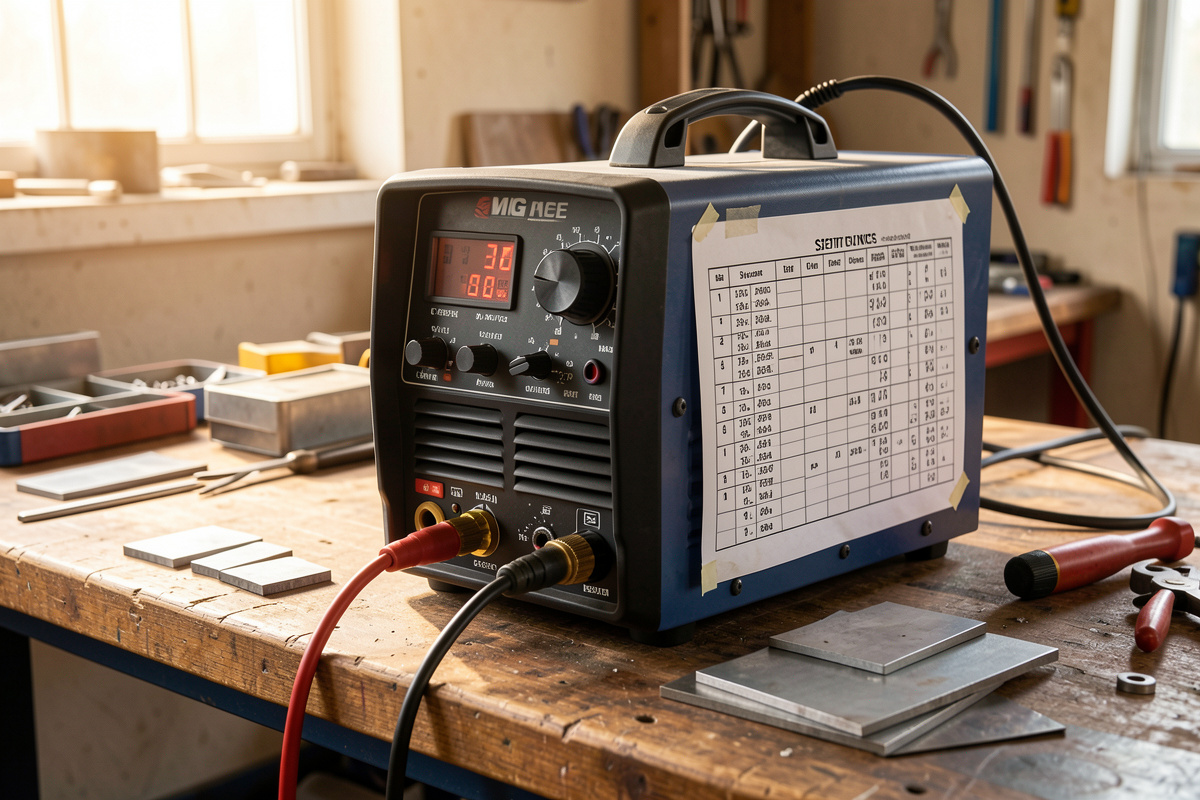

A flux-core settings chart is a starting point, not a law: for .030 gasless wire, run roughly 17 volts and low-mid wire speed on 2 mm steel, 18–19 volts on 3 mm, and 20–21 volts climbing into 5 mm. I set the chart number on my machine, then tune by the sound of the arc — a steady bacon-sizzle means I’m home.
Here’s the trap every beginner falls into, myself included: they treat the number printed inside the machine door as gospel, weld cold and ropey all day, and conclude flux-core is junk. It isn’t. Voltage taper, wire diameter, stickout length, even a long extension cord all shift where the real sweet spot sits. The chart gets you into the ballpark. Your ears and the puddle put you in the seat.
Below is the chart I actually work from, plus exactly how I dial off it for my own bench. Pair this with the flux-core welding guide for the full process picture.
What Voltage and Wire Speed for Flux-Core by Thickness?
Voltage sets the arc length and bead width; wire speed sets the amperage and how much metal you deposit. For gasless .030 wire, both climb together with thickness — under-volt and you stub the wire and pile cold metal; over-volt and you undercut the edges and sling spatter. The two dials must move in balance.
These are my bench starting points for self-shielded E71T .030 wire on a typical 140–200 amp home inverter. Wire-speed numbers are relative (machines label them 1–10 or in ipm), so I give a low/mid/high band you translate to your own dial. Verify against your machine’s door chart, then trust your ear.
| Steel Thickness | Wire Dia. | Voltage (approx.) | Wire Speed | Passes |
|---|---|---|---|---|
| 1.5 mm (16 ga) | .030 | 15–16 V | Low | Stitch/tack only |
| 2 mm (14 ga) | .030 | 16–17 V | Low–mid | Single |
| 3 mm (1/8 in) | .030 | 18–19 V | Mid | Single |
| 4 mm (5/32 in) | .030 | 19–20 V | Mid–high | Single |
| 5 mm (3/16 in) | .030 / .035 | 20–21 V | High | Single/multi |
| 6 mm (1/4 in) | .035 | 21–22 V | High | Multi-pass |
| 8 mm+ (5/16 in) | .035 | 22–24 V | High | Multi-pass, beveled |
Notice the top row: 1.5 mm sheet is where the chart basically gives up and says “don’t run a continuous bead.” That’s honest. Flux-core wants to dig, and thin sheet can’t take it — I cover the workarounds in flux-core on thin metal.
How Do You Read the Arc to Fine-Tune Settings?
You tune flux-core by sound and puddle, not by staring at the dial. A correctly set arc makes a steady, even crackle — the classic frying-bacon sizzle. Too cold, it pops, stutters, and the wire stubs into the plate. Too hot, it roars, spits big spatter, and undercuts the toes of the bead.
I set voltage first to the chart, lay a test bead on scrap of the same thickness, and listen. If it stutters, I nudge wire speed down or voltage up a touch; if it’s blowing and undercutting, I back voltage off. One variable at a time. The last time I rushed this and cranked both dials at once chasing a “hotter” arc, I ended up with a bead that undercut on one edge and cold-lapped on the other — worse than where I started. Move one dial, run a bead, judge, repeat.
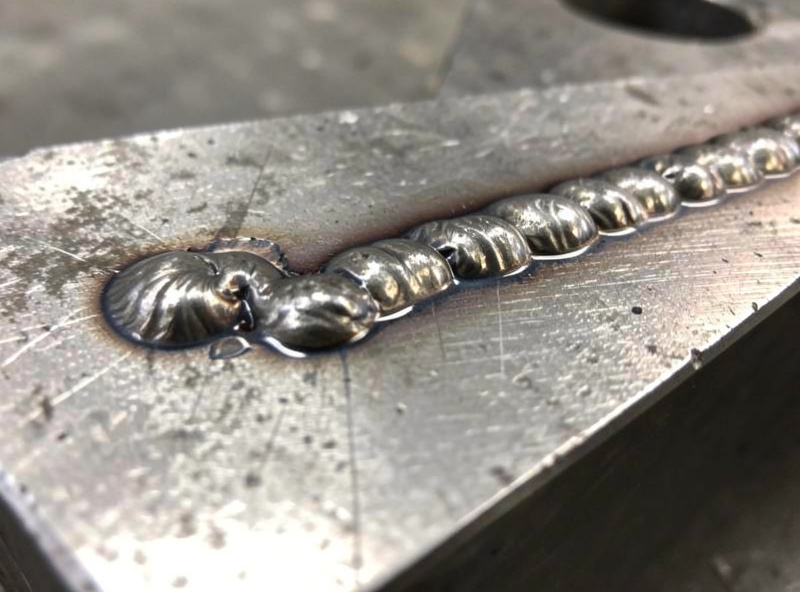
The finished bead tells the truth the arc hinted at. Chip the slag and look: even ripples, a slight crown, and full tie-in at both toes means you nailed it. A tall, narrow, humped bead sitting on top of the metal is cold — more heat or slower travel. A wide, sunken, undercut bead is hot. This is the same read-the-puddle skill the whole flux-core guide is built on.
Why Does Stickout Change Your Flux-Core Settings?
Stickout — the length of wire past the contact tip — matters more on flux-core than on gas MIG. Longer stickout preheats the wire through resistance, which lowers the effective amperage at the arc. Flux-core wants 13–19 mm (1/2 to 3/4 inch) of stickout, roughly double what solid wire likes.
This is why two welders with identical dial settings get different beads: one is holding a tight MIG-style stickout and running effectively hotter and spatterier, the other is holding the long flux-core stickout and getting a stable, preheated arc. When I switched from solid wire to gasless and kept my old tight stickout, my beads spat and the nozzle clogged within minutes. Backing the gun off to a proper long stickout fixed it before I touched a dial.
Practical version: rest into a comfortable long stickout and keep it consistent. If your arc feels erratic even at chart settings, check your stickout before you blame the numbers. A wandering stickout gives wandering results, which is why so many “my settings are wrong” problems are really “my gun distance is wandering” problems. Contact-tip-to-work distance is a setting too — just one you hold with your hand.

Does Your Machine and Cord Affect Flux-Core Settings?
Yes — the same dial number behaves differently on different machines and power supplies. Inverter voltage taper, input voltage sag on a long extension cord, and even a tired wall circuit all shift the real arc energy. A chart number that’s perfect in the shop can run cold at the end of a thin 15-metre cord.
I feed my MIG-PRO205DS through an Iron Box heavy-gauge extension cord for exactly this reason — a thin cord starves the inverter and the arc goes soft and stubby, which reads as “wrong settings” when the real problem is voltage drop at the outlet. If you’re welding at the far end of the property off a skinny orange cord, that’s your first suspect, not your dials. Size the cord to the machine and the run.
Machine-to-machine variation is why I never trust another welder’s exact numbers, only their thickness-to-heat logic. My “18 volts on 3 mm” and your machine’s “18 volts” may not be the same arc. Learn the relationship — thicker needs hotter, cold stubs, hot undercuts — and you can dial in any machine in three test beads. The numbers in the chart above are a map; your bench is the territory.
Do You Push or Drag Flux-Core — and How Does It Change the Bead?
You drag (pull) flux-core, and that travel direction is as much a “setting” as any dial. Dragging at a 10–15 degree angle keeps the slag flowing behind the puddle where it belongs and puts more heat and penetration into the joint. Push flux-core like solid-wire MIG and the slag runs ahead, gets welded in, and your carefully dialed settings still give you a garbage bead.
This is the fix that improved my flux-core more than any voltage tweak. When I first came off gas MIG I kept pushing out of habit, and no dial setting cleaned up the beads — they cold-lapped and trapped slag along the toes. The day I turned the gun around and started dragging, the same numbers suddenly produced sound, tied-in welds. Drag angle and settings work together; a perfect chart number with a push angle is still a bad weld.
Travel speed rides alongside. Too slow and the puddle gets huge and the slag can roll ahead even on a drag; too fast and the bead humps up thin and cold. I aim for a steady pace where the puddle trails maybe 3–5 mm behind the wire and the ripples stack evenly. If your bead looks right but has slag problems, look at your angle and speed before you touch the voltage — I go deep on that failure mode in flux-core slag inclusions.
Do You Change Settings for Vertical and Overhead Welds?
Yes — out-of-position flux-core runs cooler than flat. For vertical and overhead joints, drop your voltage and wire speed roughly 10–15% below your flat-position chart number so the puddle stays small and controllable and doesn’t sag under gravity. A puddle that’s perfect flat will run and drip the moment you tip the joint vertical.
Self-shielded flux-core is actually well-suited to vertical-down on thin material and vertical-up on thicker structural joints, but both demand a tighter, cooler puddle than flat work. On a vertical-up fillet on 5 mm angle I back the machine off from my flat setting, use a slight upward weave to shelf the metal, and let each ripple freeze before adding the next. Fight gravity with heat control, not with speed.
The honest caveat: position welding is a hand-skill layered on top of settings, and no chart substitutes for practice on scrap tipped to the real angle. I still run a vertical test coupon before committing to a vertical joint on a project, because the setting that works flat almost never transfers unchanged. Dial cooler, practice the coupon, then weld the real thing.
What’s the Fastest Way to Dial In on a New Job?
The fastest reliable method is the three-bead test: set the chart voltage and mid wire speed, run a bead on scrap of the exact thickness, then adjust one dial and run a second, and a third. Ninety seconds of scrap saves you re-doing a real joint. I do this at the start of every session, even on metal I’ve welded a hundred times.
Cut the scrap from the same stock when you can — a 3 mm off-cut behaves like your 3 mm workpiece. Clamp it flat with my Bessey GSCC clamps so it doesn’t move as it heats, drag the gun at a 10–15 degree angle, and hold that long stickout steady. Chip the slag, break the coupon in a vise if you’re unsure of penetration, and look at the fusion line. A cheap habit that has saved me countless ruined workpieces.
Write your winning numbers on the scrap with a paint marker and toss it in a settings box. Over a year you build a physical library of dialed-in coupons for every thickness and wire on your bench — worth more than any printed chart because it’s calibrated to your exact machine, cord, and hand. That box is how a starting-point chart turns into muscle memory. From there, the technique problems — slag inclusions and spatter — are what you troubleshoot next.
One authority worth bookmarking: wire manufacturers publish their own parameter guides tuned to each product, and Lincoln Electric’s technical resources and the AWS A5.20 filler-metal specification behind every E71T wire are the sources I cross-check my bench numbers against. When your chart and the datasheet disagree, run the test bead and let the puddle settle it.
Related Reading
- Flux-Core Welding Guide: Settings, Polarity, and Technique
- Flux-Core Polarity: Why Gasless Wire Runs Electrode-Negative
- Flux-Core on Thin Metal: How to Stop Burning Through
- Why Flux-Core Wins Outdoors: Welding in Wind Without a Bottle
- Taming Flux-Core Spatter: Settings, Anti-Spatter, and Cleanup
What voltage should I use for .030 flux-core wire?
For .030 self-shielded flux-core, run about 16 to 17 volts on 2 mm steel, 18 to 19 volts on 3 mm, and 20 to 21 volts up into 5 mm. Treat these as starting points and fine-tune by the sound of the arc and the look of the bead.
How do I know if my flux-core settings are too cold?
A cold flux-core arc pops and stutters, the wire stubs into the plate, and the bead sits tall and humped on top of the metal without tying into the edges. Increase voltage slightly or slow your travel speed until the arc crackles steadily.
How much stickout should I use for flux-core?
Flux-core likes a long stickout of about 13 to 19 mm, roughly a half to three-quarters of an inch. That is roughly double what solid-wire MIG uses. The extra length preheats the wire and stabilizes the arc.
Why do the same settings weld differently on my machine?
Voltage taper, wire diameter, stickout, and voltage drop across a long extension cord all shift the real arc energy. That is why another welder’s exact dial numbers may not match yours. Learn the thickness-to-heat relationship and dial in with a quick test bead.

Discussion (0)