
Aluminum burns through and warps because it conducts heat about four times faster than steel and gives almost no color warning before it collapses. Beat it with three tools: preheat thick stock to even the temperature gradient, travel fast so heat cannot spread, and tack-and-skip your welds to distribute distortion. On thin sheet, skip preheat entirely and win on speed and stitch welds alone.
My first aluminum burn-through happened in real time and I still remember the feeling — bead, bead, bead, and then the plate was simply gone under my nozzle, a hole where metal used to be, with no orange glow to warn me it was coming. Steel tells you it is getting hot: straw, blue, orange, then it sags. Aluminum sits there looking identical right up until it drops through. That single fact — no color warning on a metal that overheats four times faster — is why heat management on aluminum is a skill you build deliberately instead of a thing that just happens. Here is the system I run so I do not put holes in parts anymore.
Why Does Aluminum Warp So Much More Than Steel?
Aluminum conducts heat roughly four times faster than mild steel and expands about twice as much per degree, so the heat you put into one spot races across the entire part and the whole thing expands and contracts dramatically. That widespread, uneven expansion and contraction is what physically pulls panels into a banana or a taco. Steel keeps heat more local, so it moves less.
Picture the difference. On steel, a weld bead heats a zone maybe an inch or two wide and the rest of the plate stays relatively cool, so distortion is contained. On aluminum, that same heat floods outward fast, so a much larger area expands, and when it cools and shrinks it drags the surrounding metal with it. Combine high conductivity with high thermal expansion and you have a metal almost engineered to warp. I taco’d a perfectly good tool-cart panel early on by running one continuous bead straight down it — by the time I finished, the far end had curled up like a potato chip. The fix was not more skill at the arc; it was a completely different heat strategy, the same principles behind general welding distortion control techniques but pushed harder because aluminum is the worst-case metal for it.
Should You Preheat Aluminum Before Welding?
Preheat thicker aluminum — roughly 1/4 inch and up — to about 250 to 300°F to shrink the temperature gap between the cold heat-sink of the part and your molten puddle. On thin sheet under 1/8 inch, do not preheat; it is already close to burn-through and preheating just gets you there faster. Preheat is a thick-metal tool, not a universal one.
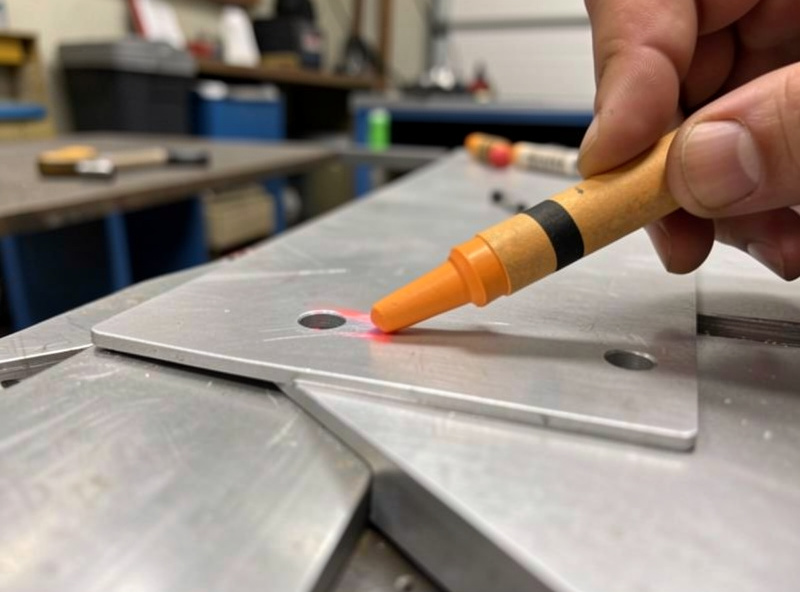
The logic of preheating thick aluminum is that a cold, heavy part acts like a giant heat sink — it pulls warmth out of your puddle so fast that the start of a weld never fuses while you crank the heat trying to compensate, and then you are running dangerously hot by the time the part finally warms up. Preheating to 250 to 300°F takes that fight away: the whole part starts closer to welding temperature, so your fusion is even from the first inch. But respect the ceiling. Never exceed about 300°F on most structural aluminum — overheating past roughly 400°F can degrade the heat-treated temper of alloys like 6061 and weaken them permanently. I use a 300°F Tempil temperature-indicating crayon: it melts and smears when the metal hits its rated temperature, so I get a real reading instead of a guess. A propane torch or a hot plate brings the part up; the crayon tells me when to stop. Below is roughly how I decide.
| Thickness | Preheat? | Target temp | Primary anti-warp tactic |
| Under 1/8 in | No | Ambient | Fast travel, stitch welds, backing bar |
| 1/8 to 3/16 in | Optional | ~200°F if cold shop | Tack and skip, moderate speed |
| 1/4 in | Yes | 250–300°F | Preheat plus staggered passes |
| 3/8 in and up | Yes | 250–300°F | Preheat, multipass, control interpass temp |
Keep an eye on interpass temperature on multipass thick welds too — let the part cool back toward your preheat range between passes rather than stacking heat until it is soft.
How Does Travel Speed Beat Burn-Through?
Fast, steady travel is your single best defense against burn-through on thin aluminum, because it delivers enough heat to fuse without giving the spot time to overheat and drop through. Lingering is the enemy — the instinct to slow down when a puddle looks scary is exactly backwards on aluminum, where slowing down is what melts the hole.
This connects straight back to running hot settings: you run high voltage and wire speed and move fast, so the energy is high but the dwell time in any one spot is short. It feels counterintuitive — hot and fast — but that combination fuses the joint while outrunning the heat spread. When a thin-sheet puddle starts getting wide and shiny and threatens to sag, the fix is to speed up, not to turn the heat down, because turning it down drops you out of fusion. I dial that hot-and-fast balance the way I lay out in my aluminum MIG settings guide; here the point is that travel speed is a heat-control lever, not just a cosmetic one. On genuinely thin stuff, even fast continuous travel is too much heat, which is where stitch welding comes in.
What Are Stitch Welds and Skip Welding?
Stitch welding means running short weld segments — an inch or so — then stopping to let the area cool, instead of one continuous bead. Skip welding means jumping around the joint, welding a segment here, then a segment a foot away, so heat never concentrates. Together they spread heat and distortion out across the whole part instead of dumping it in one line.
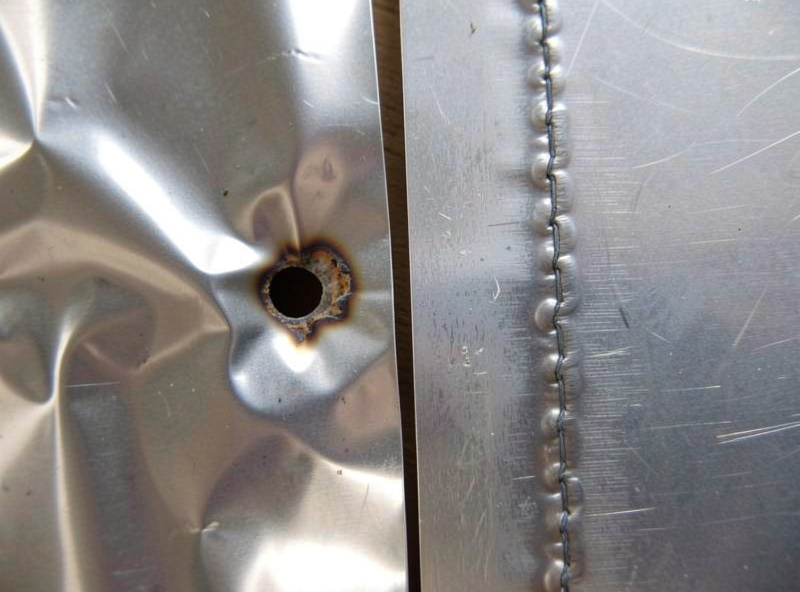
This is the technique that saved my sheet-metal work after the tool-cart taco. Instead of one bead down a panel, I tack every few inches first to lock the geometry, then run short stitches, deliberately jumping around — weld two inches at one end, hop to the middle, hop to the far end, come back — so no single area soaks up continuous heat. The part stays cool enough to hold its shape, and the finished seam, once tied in, is every bit as sound. It is slower in clock time and far faster in total time once you count the warped parts you are no longer straightening or scrapping. The auto-body world lives on this exact idea for the same reason, and the heat-shrink recovery tricks in my stopping warp on auto panels writeup carry over directly to aluminum sheet.
Can a Backing Bar Stop Burn-Through?
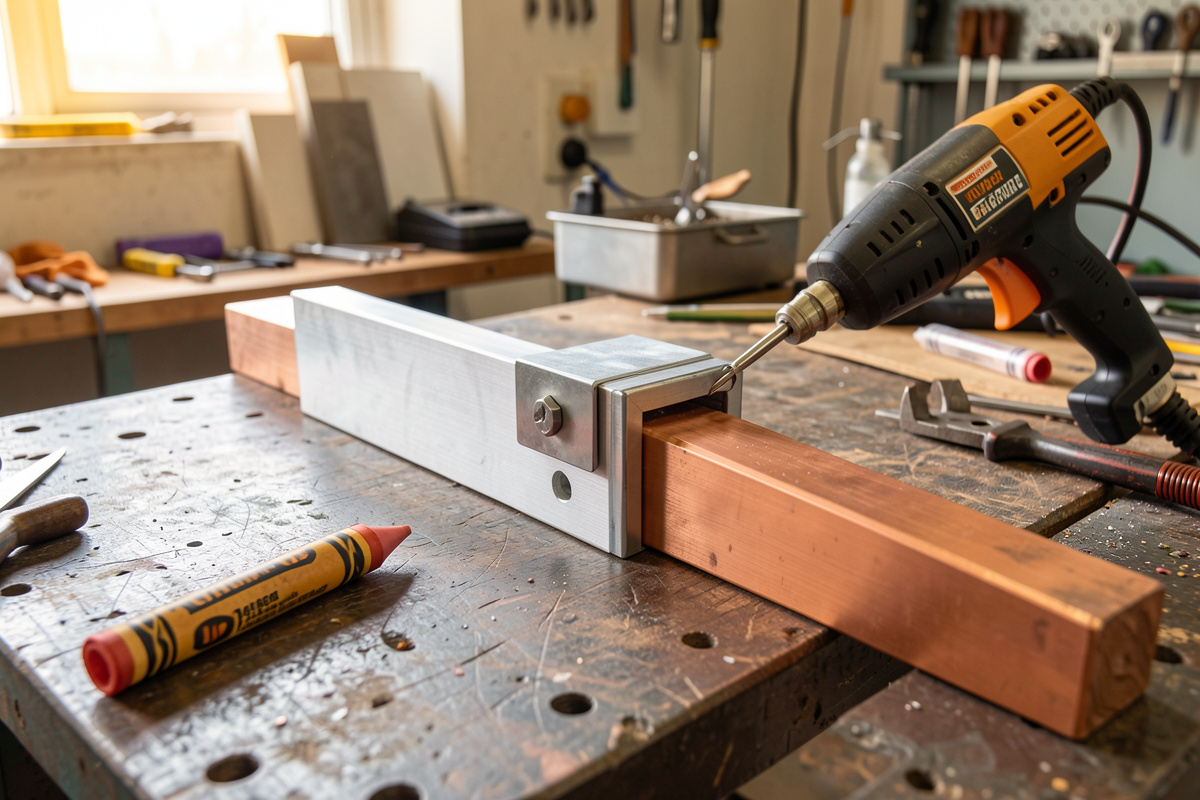
Yes — clamping the aluminum to a copper or aluminum backing bar under the joint gives the excess heat somewhere to go and physically supports the puddle so it cannot sag through. Copper is ideal because it conducts heat away fast and molten aluminum will not stick to it. A backing bar can be the difference between welding thin sheet cleanly and putting a row of holes in it.
A heat-sink backing bar does two jobs at once: it pulls heat out of the joint from below, keeping the surrounding metal cooler and reducing warp, and it acts as a chill dam that supports the back of the puddle so gravity and arc force cannot blow through. I keep a length of thick copper bar and some heavy aluminum angle for exactly this, clamped tight under the seam with my Bessey clamps so there is no air gap robbing the contact. On an aluminum boat hull — the project the whole bench points toward — backing and clamping strategy is going to matter as much as the welding itself, because thin hull plate over long seams is warp waiting to happen. The tighter the part is fixtured and backed, the less it can move as it heats and cools.
How Do You Fix Aluminum That Already Warped?
Mild warp can sometimes be pulled or clamped back with mechanical force while supported, but aluminum does not respond to heat-straightening the way steel does — you cannot reliably heat-shrink it back because of that temper-damage ceiling. The real answer is prevention: fixture tightly, sequence your welds, and manage heat so it never warps in the first place. Un-warping aluminum is far harder than not warping it.
This is where aluminum genuinely humbles you compared to steel. On steel, Mike can heat-shrink a warped panel flat with a torch and a wet rag, working the metal back with controlled heat. Aluminum will not take that treatment predictably — heat it enough to move it and you risk pushing it past the temper ceiling and weakening it, and it lacks the color feedback that makes steel heat-straightening controllable. So while you can sometimes coax a lightly warped aluminum part back with careful clamping and mechanical persuasion, the honest lesson I have internalized is that the fix happens before the arc, not after. Every bit of this cluster — from the clean prep that lets you weld efficiently to the right filler and the hot-and-fast workflow — is aimed at putting the least heat necessary into the part. Respect aluminum’s heat trap up front and you spend your time welding instead of straightening. What I would do starting today on any warp-prone panel: tack it to a backing bar, stitch and skip, keep a temp crayon handy, and move faster than feels comfortable — that combination has kept my last dozen sheet-metal jobs flat.

Discussion (0)