
To MIG weld thin sheet metal without blowing holes, you fight one enemy: heat that has nowhere to go. The fix is the smallest wire you own (0.023 inch), the lowest stable voltage, a push angle, and short stitch welds with cooling pauses — that combination lets you join 22-gauge steel with zero burn-through.
Thin sheet is where most beginners quit MIG in frustration, and I get it — the first time you melt a coin-sized hole into an 18-gauge panel you feel like the machine is broken. It is not. Sheet metal punishes the exact habits that work fine on 1/4-inch plate: too much heat, too much dwell, dragging the gun, welding in one long pass. I have blown through more thin steel than I care to admit learning this, and the techniques below are what finally let me build clean enclosures and patch panels. Start from the MIG welding complete guide for the fundamentals, then come back here for the thin-gauge specifics.
Why Thin Steel Burns Through
Burn-through happens because thin sheet has almost no thermal mass to absorb and conduct away the arc’s heat. A 1/4-inch plate sinks heat in every direction; 22-gauge steel (about 0.03 inch) saturates in a fraction of a second, the puddle gets fully molten through the thickness, and gravity drops it out as a hole. Everything in thin-gauge welding is heat management.
The number that matters is heat input, and you control it three ways: amperage (set by wire speed), arc-on time, and how fast you spread that heat across the panel. On plate you can be sloppy with all three. On sheet, any one of them tipping too high makes a hole. That is why the answer is never a single magic setting — it is a system of low power, fast travel, and interrupted arc time working together. Once you internalize that thin sheet is a heat budget you are constantly spending, the technique stops feeling like luck. The related failure, wire that keeps melting back and burning through at the tip, is its own problem I cover in why your MIG welder keeps burning through wire.
Wire Size and Gas for Thin Sheet
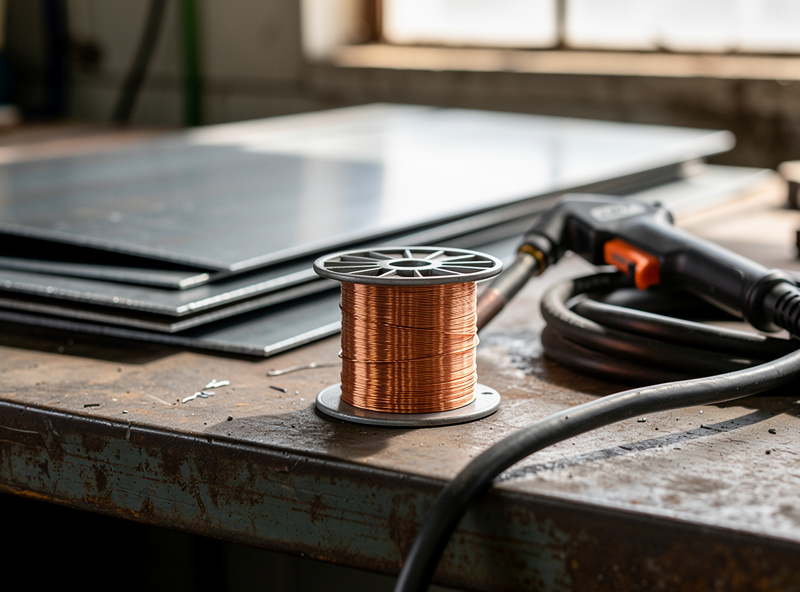
Drop to 0.023-inch (sometimes labelled 0.024) solid wire under C25 gas for anything thinner than about 16 gauge. Smaller wire needs less amperage to melt, so it lets you run a stable arc at the low heat thin steel demands. Solid wire under shielding gas, not gasless flux-core, because flux-core runs hotter and is built for thickness.
This is the single highest-leverage change for sheet metal. My everyday rolls are 0.030 and 0.035 ER70S-6 for general fab, but I keep a dedicated roll of 0.023 on hand purely for thin work, and switching to it transforms what is possible on a panel. The thinner wire reaches a clean short-circuit transfer at 30 to 60 amps, exactly the window 18 to 24 gauge wants. Gas matters too: stick with C25 (75/25) for the soft, low-spatter arc — straight CO2 runs hotter and harder and works against you on sheet. And never reach for self-shielded flux-core here; it is a great outdoor and thick-steel wire, but it dumps too much heat for sheet and the comparison in gas vs gasless MIG explains why gas wins for thin material.
Machine Settings for 18 to 24 Gauge
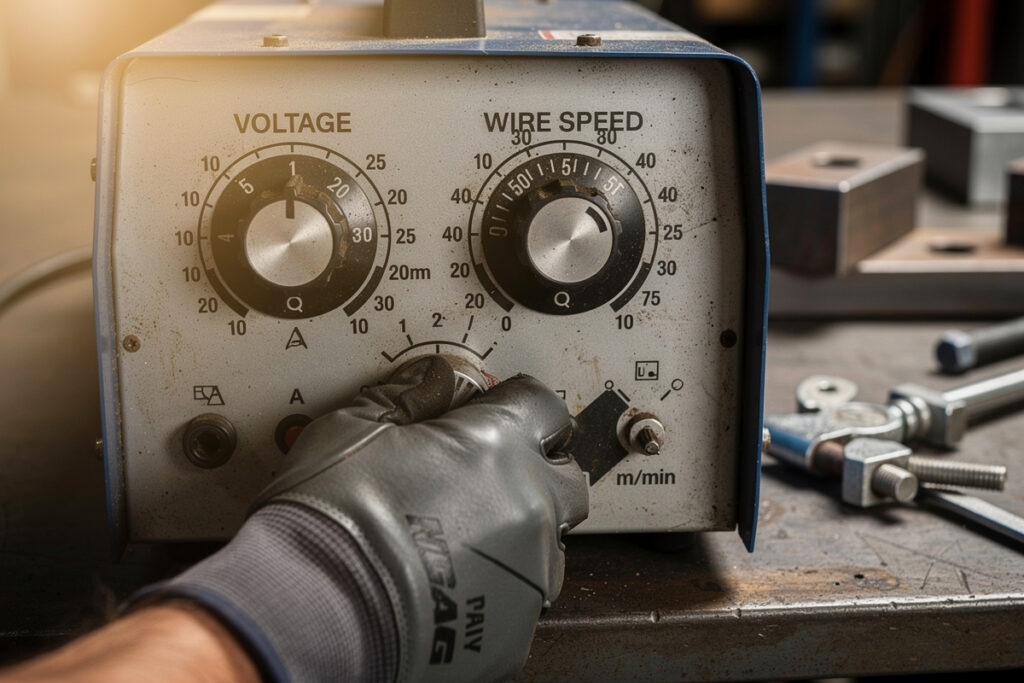
Set voltage low — roughly 14 to 16 volts — and match wire speed to keep a tight, crackling short-circuit arc. The goal is the lowest stable arc your machine will hold without stubbing the wire into the work. On a 120V home unit, the lowest one or two voltage taps with moderate wire speed is the thin-sheet zone.
The table below is my starting point on the MIG-PRO; treat it as a baseline and tune by sound and result on scrap of the same gauge before you touch the real part. If the wire stutters and stubs, nudge wire speed up; if it pops and spatters or the puddle floods, you are too hot — drop voltage a tap. The full cross-thickness reference lives in my MIG settings chart, but thin sheet deserves its own tight window because the margin between “fused” and “hole” is so small.
| Gauge (steel) | Thickness | Wire | Voltage | Technique |
|---|---|---|---|---|
| 24 ga | 0.025 in | 0.023 in | 13.5–14.5 V | Tack/stitch only, copper backing |
| 22 ga | 0.030 in | 0.023 in | 14–15 V | Short stitches, skip around |
| 20 ga | 0.036 in | 0.023 in | 14.5–15.5 V | Stitch, brief cooling pauses |
| 18 ga | 0.048 in | 0.023–0.030 in | 15–16.5 V | Short continuous or stitch |
| 16 ga | 0.060 in | 0.030 in | 16–17.5 V | Continuous, normal travel |
Disclosure: HomeWelder is reader-supported. As an Amazon Associate I earn from qualifying purchases made through links in this article, at no extra cost to you. I only point to gear I actually use or would buy for my own shop.
Technique: Stitch, Tack, and Skip
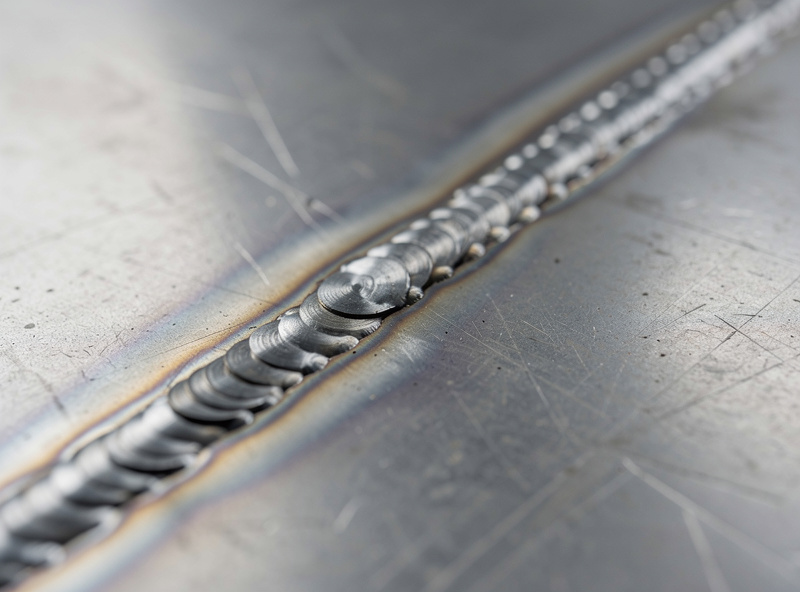
The master technique for thin sheet is the stitch weld: short bursts of arc, half a second on, then off, advancing a little each time so the panel never heat-soaks. Skip around the joint instead of welding straight through it — lay a stitch here, jump six inches away for the next, and let each spot cool. Continuous beads on sheet are how you warp and blow holes.
Here is how I run a thin seam. I tack every inch or so first to lock the fit, because thin steel pulls and gaps the moment it heats. Then I stitch: trigger a short burst onto the leading edge of the last tack, release, watch the orange fade, and place the next burst overlapping it. The beads literally stack like coins, each one fusing into a cooled neighbor instead of a glowing puddle. Jumping around the part keeps any one area from soaking up enough heat to drop out or warp. It feels slow, but a panel done this way is flat and hole-free, where a single greedy pass would be a wavy mess with burn-throughs. Travel fast when the arc is on — dawdling is what melts sheet.
Backing Bars and Heat Sinks
A copper or aluminum backing bar clamped behind the joint is the cheat code for thin sheet. Copper does not fuse to steel and pulls heat out of the weld zone fast, so it both supports the molten puddle (no drop-out) and sinks excess heat. With a backing bar you can close gaps and weld a gauge thinner than you otherwise could.
I keep a length of thick copper bar and a couple of scrap aluminum blocks at the bench purely for this. Clamp the copper tight against the back of a seam or a hole you are filling, and the puddle has something solid to bridge to instead of falling through air — the copper chills it the instant it forms and refuses to weld itself to your part. For filling an accidental burn-through, backing copper behind the hole turns an ugly blowout into a fillable spot. Plain steel clamps and a heavy steel bench also act as heat sinks; clamping your sheet flat to a big mass of metal drains heat and fights the warping that thin gauge loves to do. Fixturing is half the battle on sheet, which is why I lean on the same clamps and magnets covered in my welding clamps and magnets guide.
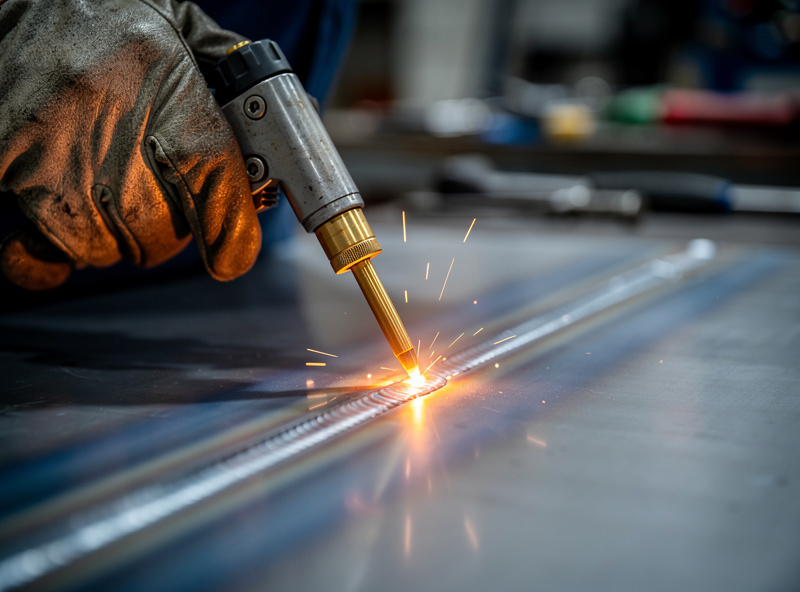
Gun Angle and Travel Direction
Push the gun on thin sheet, do not drag it. A push (forward) angle of about 10 to 15 degrees throws the arc force ahead of the puddle, giving a wider, shallower, cooler weld with less penetration — exactly what thin material needs. Dragging digs deeper and concentrates heat, which is the last thing you want on a panel.
Penetration is the enemy on sheet; you want fusion across the joint, not a deep dig that punches through. The push angle spreads heat and rides the arc over the top, and it lets you see the joint ahead of the puddle so you can keep travel fast and straight. This is the opposite of what you do on thick plate, and getting the angle wrong is a quiet cause of burn-through that beginners miss while they obsess over voltage. I break down the full trade-off in my dedicated guide to push vs pull MIG technique — on sheet, push wins almost every time.
The Gear That Saves Thin Sheet
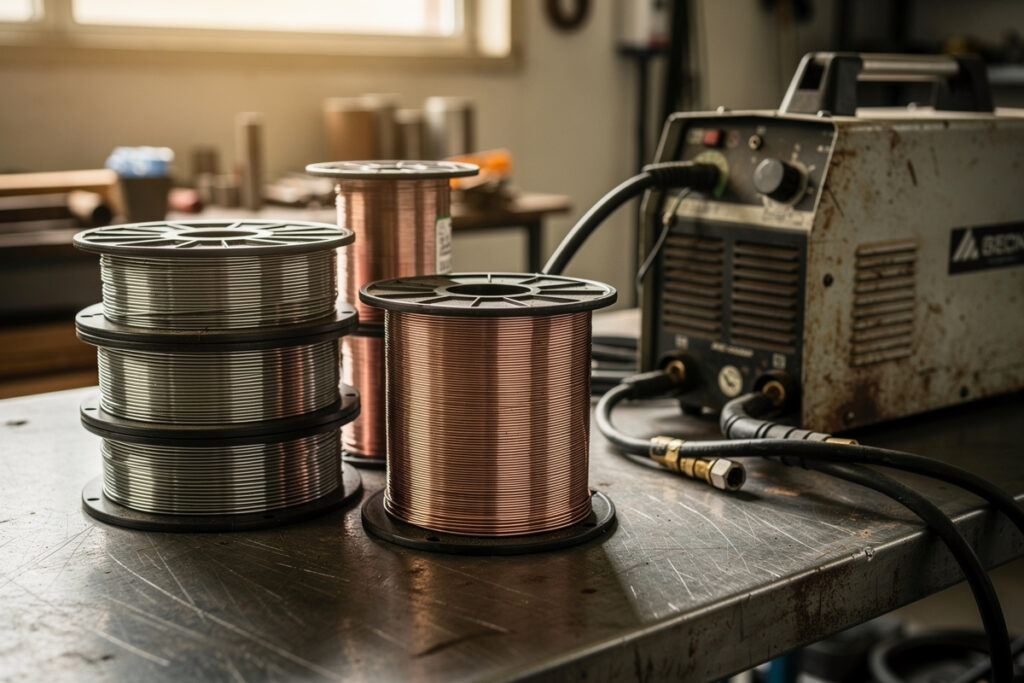
Three cheap things make the difference: a roll of 0.023 wire, a copper backing bar, and contact tips sized to the small wire. None of it is exotic, and together they move thin-gauge welding from a hole-punching nightmare to a learnable skill. Bargain wire and the wrong tip size cause feed problems that masquerade as technique failures.
I run 0.023 ER70S-6 for everything thin — a roll of 0.023-inch ER70S-6 MIG wire lasts a long time on the small jobs it is for. The backing trick needs mass, and a copper welding backing bar chills and supports the puddle so you stop dropping the floor out of your panels. And the wire change is pointless without the matching consumable — a pack of 0.023 contact tips keeps that fine wire feeding smooth instead of arcing inside an oversized bore. Pair those with the clamps you already own to keep the sheet flat, and 18 to 24 gauge stops being scary.
Frequently Asked Questions
What MIG settings stop thin metal from burning through?
Use 0.023-inch wire, set voltage low (about 14 to 16 volts), push the gun, and stitch-weld in short bursts with cooling pauses. The combination keeps heat input low so a 22 to 24 gauge panel fuses without the puddle melting fully through and dropping out as a hole.
What size MIG wire is best for thin sheet metal?
0.023-inch (0.024) solid wire is best for sheet thinner than 16 gauge. It melts at lower amperage, letting you hold a stable short-circuit arc at the 30 to 60 amps thin steel needs. Step up to 0.030 only at 16 gauge and thicker where more heat is safe.
Should I push or pull when welding thin sheet?
Push the gun on thin sheet, angled about 10 to 15 degrees forward. Pushing gives a wider, shallower, cooler weld with less penetration, which is exactly what thin material needs. Dragging digs deeper and concentrates heat, raising the risk of burning through the panel.
How does a copper backing bar prevent burn-through?
Copper does not fuse to steel and conducts heat away fast. Clamped behind a joint, it supports the molten puddle so it cannot drop through, and it chills the weld zone. That lets you close gaps and weld a gauge thinner than you safely could without backing.
Why does my thin sheet warp when I weld it?
Warping comes from concentrated, continuous heat. Welding one long bead expands a narrow strip that contracts as it cools and pulls the panel out of shape. Tack first, stitch-weld in skipped segments, and clamp the sheet to a heavy steel or copper mass to sink heat and hold it flat.
Can I weld sheet metal with flux-core wire?
You can, but it is the wrong tool. Self-shielded flux-core runs hotter and is designed for thicker steel and outdoor work, so it burns through thin sheet easily. For 18 to 24 gauge, use 0.023 solid wire under C25 shielding gas, which runs cooler and far more controllable.
Discussion (0)