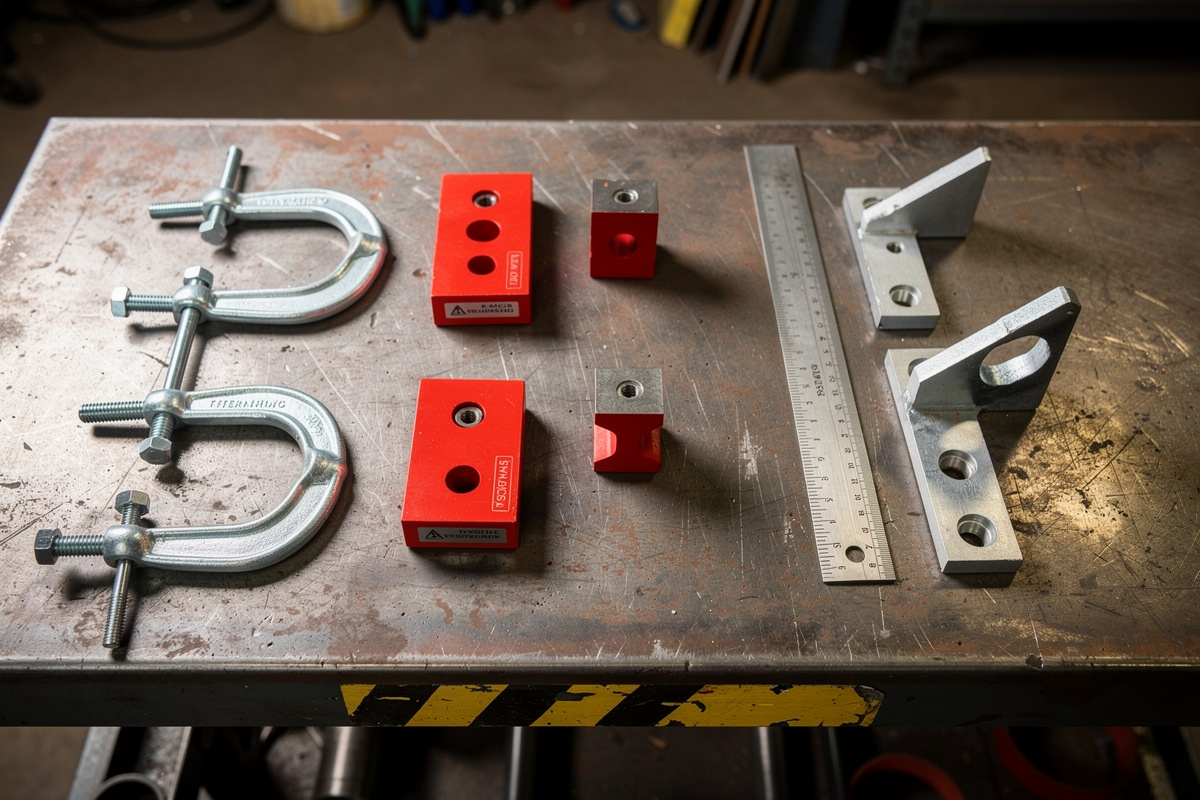
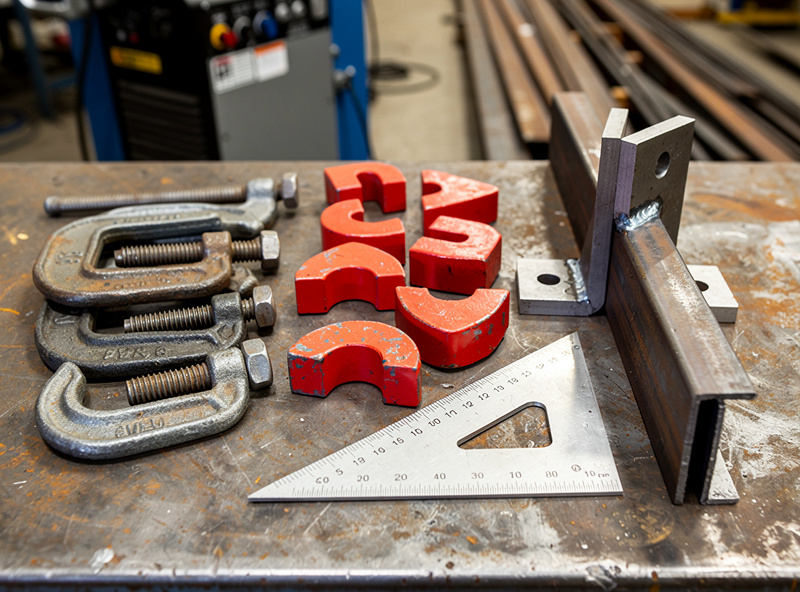
Four tool categories hold steel in position while you weld: C-clamps for heavy fixturing pressure, welding magnets for 90-degree angles on the fly, speed and framing squares for measuring and marking, and corner clamps for box and frame corners.
A beginner needs at minimum two 6-inch C-clamps, four welding magnets rated for at least 25 pounds of holding force, and one magnetic or aluminum speed square — roughly 60 dollars total for the set that changes weld quality more than any 60-dollar welder upgrade. Skip fixturing and the best machine in your garage cannot fix a crooked joint. The 22-dollar mistake that taught me this lesson is two paragraphs down.
The reason fixturing tools matter more than welder upgrades at the beginner level is simple: a perfectly set welder cannot compensate for a 1/8-inch gap between joint faces. Good fixturing produces tight, square joints that weld cleanly at any reasonable setting. Bad fixturing produces gaps and misalignment that even a master welder fights. My friend Mike, who has been welding for decades, put it this way the first time he watched me try to tack a workbench frame freehand: “Spend 60 dollars on clamps before you spend 600 dollars on a better welder. The clamps make the cheaper welder work. The expensive welder cannot fix a crooked joint.” Two weeks later I cooked my first Bessey clamp solid — forgot to anti-seize the screw threads before a half-day MIG session, walked out to a 22-dollar paperweight when the spatter and heat had welded the thread to the body. From that day forward the can of copper anti-seize lives on the welding cart, two feet from the clamps. For the complete list of shop tools, the essential welding equipment guide covers everything. For setup context, see how to set up a home welding workshop.
As an Amazon Associate I earn from qualifying purchases.
C-Clamps: The Heavy-Duty Fixturing Tool
A C-clamp is a cast-iron or forged-steel clamp shaped like the letter C with a threaded screw that tightens against the workpiece. For welding, C-clamps hold pieces together for tack-welding, clamp the workpiece to the welding table, and force misaligned pieces into alignment. The pressure a C-clamp generates — hundreds of pounds from a hand-tightened screw — pulls 1/8-inch gaps closed and holds pieces flush while you tack.
What to buy for a home welding shop:
- Two 6-inch C-clamps (15-25 dollars each): The workhorse size. 6-inch throat depth reaches across 1.5-inch square tube and 3-inch flat bar, and the clamping pressure handles everything up to 1/4-inch plate. I run two Bessey CDF406 6-inch drop-forged C-clamps as my daily fixturing pair — Bessey’s own spec sheet lists a 6,900-lb clamping force on that line, and three years in, neither has cracked or sprung. Start with two; add more as projects demand.
- Two 4-inch C-clamps (10-15 dollars each): For tight spaces, small brackets, and detail work where a 6-inch clamp is overkill. Lighter and faster to position.
- Forged steel vs cast iron: Forged steel clamps (Wilton, Bessey) cost 5-10 dollars more than cast iron (Harbor Freight) but survive spatter drops and the occasional “tighten it with the cheater bar” abuse. Cast iron clamps crack under high torque; forged steel bends. For a home shop, cast iron C-clamps from Harbor Freight at 8 dollars each work fine for years of normal use — just do not use a cheater bar on the handle.
Spatter protection: C-clamp threads collect spatter and seize. Coat the screw threads with anti-spatter spray or a thin layer of copper anti-seize before each project, and wire-brush the threads after. A seized clamp under load is a safety failure, not just a maintenance failure — you cannot back the pressure off a fixture that’s holding a hot workpiece if the screw won’t turn. A seized C-clamp is a permanent paperweight.
Welding Magnets: The 90-Degree Quick-Fix Tool
Welding magnets hold two pieces of steel at a fixed angle — usually 90 degrees, but multi-angle magnets offer 45, 90, and 135 degrees — using powerful rare-earth or ferrite magnets embedded in a steel frame. They are the fastest way to set up a 90-degree T-joint or corner: stick the magnet to both faces, the pieces snap into alignment, and you tack-weld the joint without holding anything. Remove the magnet before running the full bead because heat kills magnet strength.
Magnet types and what to buy:
- Arrow-style 90-degree magnets (10-15 dollars for a pair): The classic triangular magnet with a 45-degree hypotenuse and two 90-degree faces. Holds pieces at exactly 90 degrees for T-joints and outside corners. Rated for 25-50 pounds of holding force. I keep a 4-pack of YesWelder 25 lb arrow welding magnets on the welding cart — strong enough to hold 1/8-inch angle iron square against the table for a tack, weak enough to pop off cleanly when the joint is set. Structural codes hold root-gap tolerances on prequalified joints far tighter than a magnet alone can hit — magnets set the angle, they don’t set the gap. Buy a 4-pack for 20-25 dollars.
- Multi-angle magnets (15-25 dollars each): Adjustable magnets with locking angles at 45, 90, and 135 degrees for miters, acute brackets, and angled bracing. The moving parts collect spatter and eventually seize; buy one for the occasional angle job, not for daily 90-degree work.
- Magnetic squares (15-25 dollars): A square-shaped magnet that holds inside and outside corners simultaneously. More precise than arrow magnets for squaring box corners. I use two Strong Hand MS45 magnetic squares on opposite corners of every rectangular frame I build — the 65-lb max pull force listed on the manufacturer spec keeps the frame square while I tack all four corners, even with one corner hanging off the edge of the welding table.
Magnet limitations: Magnets lose holding force permanently above roughly 175 degrees Fahrenheit — one hot tack is enough to degrade them over time. Never leave magnets on the joint during the full weld bead. They only work on ferrous metals (steel, iron) — magnets do not hold aluminum, stainless steel (some grades are non-magnetic), copper, or brass. They cannot correct a 1/8-inch gap — magnets hold position, they do not create clamping pressure like a C-clamp. A loose joint with a magnet on it is still a loose joint.
Speed Squares and Framing Squares: Measuring and Marking
A square is a measuring and marking tool that also serves as a quick fixturing reference — hold a speed square against the joint to check 90 degrees before tacking, or clamp a framing square to the table to use as a 90-degree fence for aligning multiple pieces. Squares do not hold anything; they tell you whether the thing you are holding is straight.
What to buy:
- Aluminum speed square (8-12 dollars): A triangular square with a fence lip that hooks onto the edge of flat bar, angle iron, or tube. Use it to mark 90-degree and 45-degree cut lines and to check joint square before tacking. The aluminum version survives the welding environment better than plastic. Do not use it as a welding jig — aluminum melts at 1,200 degrees, and spatter permanently pits the surface.
- Magnetic speed square (12-18 dollars): Same as above but with magnets embedded in the fence edge so it sticks to the workpiece while you mark or check square. Worth the extra 4-6 dollars over the non-magnetic version.
- Steel framing square (10-15 dollars): A large L-shaped square for checking square on bigger projects — workbench frames, gates, anything larger than 12 inches. Hold it against the corner and check that both legs sit flush against the workpiece. A framing square also serves as a straightedge for marking long cut lines.
- Combination square (15-20 dollars): A ruler with an adjustable head that slides along the blade for marking consistent offsets. Use for marking hole center locations, notch depth, and weld seam placement at a consistent distance from an edge.
Corner Clamps: For Boxes and Frames
A corner clamp is a specialized 90-degree clamp with two jaws at a right angle and a single screw that tightens both jaws simultaneously. It holds two pieces in a perfect 90-degree corner — outside corners for box frames, inside corners for enclosures — with more precision and clamping force than a magnet. Corner clamps are the tool for building steel boxes, cabinets, and frame corners where square matters more than speed.
Corner clamp selection:
- Steel corner clamp (15-25 dollars each): Holds round tube, square tube, and angle iron in a 90-degree corner. The jaws typically open to 2-3 inches wide, handling most home-shop tubing sizes. Buy two for opposing corners of a rectangular frame.
- Vise-grip corner clamp (20-30 dollars): A locking-pliers design that clamps onto the joint with one-hand operation. Faster to position and release than screw-type corner clamps but slightly less precise. Good for tacking speed on production-style projects.
Fixturing Accessories: The Small Things That Prevent Big Problems
Three small fixturing accessories that cost under 30 dollars total and prevent the most common beginner assembly problems:
- Feeler gauge set (5-8 dollars): Thin metal strips in precise thicknesses (0.001 to 0.035 inch) for setting root gap on butt joints. A 0.0625-inch (1/16-inch) feeler gauge is the standard root gap for 1/8-inch plate butt joints. Slide the feeler gauge between the plates before tacking to set the gap precisely, then remove before welding.
- Welding finger / heat shield (5-10 dollars): A spring-loaded steel clamp with a heat-resistant pad that lets you hold small pieces near the weld zone without burning your glove hand. Used for positioning small brackets, tabs, and detail pieces that are too small for a C-clamp or magnet.
- Copper or aluminum chill bar (10-15 dollars for scrap): A chunk of copper or aluminum (1/2-inch thick, 1-2 inches wide, 6 inches long) clamped behind a butt joint root gap to prevent burn-through. The weld puddle does not stick to copper or aluminum, so the backing bar supports the puddle from behind while the joint fills. Essential for butt joints on material under 1/8 inch.
Tool Comparison: Which Fixturing Tool for Which Job
| Job | Primary Tool | Backup/Check |
|---|---|---|
| Tack two pieces at 90 degrees (small) | Welding magnet | Speed square to check |
| Force a 1/8-inch gap closed | C-clamp | Tack immediately, release |
| Square a 4-foot frame | Corner clamps on 2 corners | Framing square on all 4 |
| Hold a bracket for tacking | Welding magnet | C-clamp if magnet slips |
| Set root gap for butt joint | Feeler gauge + C-clamp | Chill bar behind gap |
| Mark 45-degree miter cut | Speed square | Combination square |
| Hold small detail piece | Welding finger | Needle-nose pliers (not ideal) |
If You Buy Three Things, Buy These
If shop budget caps you at 60 dollars and three items, mine would be: two Bessey CDF406 6-inch C-clamps (the workhorse pair), a 4-pack of YesWelder 25 lb arrow magnets (90-degree tacks without holding anything), and one Strong Hand MS45 magnetic square (square box corners in seconds). With those three on the cart, roughly 80% of home projects fixture cleanly on the first try — and the can of copper anti-seize next to them is the 4-dollar add-on that keeps the Besseys alive for a decade instead of a season.
Frequently Asked Questions
How many C-clamps does a beginner welder need?
Start with two 6-inch C-clamps for general fixturing. Add two 4-inch clamps for tight spaces once projects demand them. A C-clamp every 6-12 inches along a long joint is the rule for preventing thermal distortion during welding, so larger projects eventually need 6-8 clamps.
Why do welding magnets lose their strength over time?
Heat permanently degrades rare-earth and ferrite magnets above roughly 175 degrees Fahrenheit. Every hot tack weld near a magnet reduces its holding force slightly. Remove magnets before running the full weld bead, store them away from the welding table heat zone, and replace them when they no longer hold pieces firmly — typically every 1-2 years of regular use.
Can I use regular magnets instead of welding magnets?
No — welding magnets are designed with a steel frame that directs the magnetic field to the contact faces, maximizing holding force at the joint. A bare magnet from a hardware store lacks the steel frame and holds at a fraction of the force. The steel frame also survives spatter hits that would destroy a bare magnet’s surface.
What is the difference between a speed square and a framing square?
A speed square is a 7-inch triangular square with a fence lip for marking 90 and 45-degree lines on flat bar, angle iron, and tube. A framing square is a large L-shaped square (typically 16×24 inches) for checking square on frames, gates, and large assemblies. Speed squares handle small marks; framing squares handle large verification.
How do I prevent C-clamp threads from seizing from welding spatter?
Coat the screw threads with anti-spatter spray or a thin layer of copper anti-seize compound before each welding session. Wire-brush the threads clean after each project. Replace the clamp if the threads seize — a seized C-clamp is dangerous when under tension and cannot be safely released.
How do I clamp aluminum or stainless steel for welding if magnets don’t work?
Use C-clamps, corner clamps, and bar clamps for all non-ferrous metals. Welding magnets only work on magnetic (ferrous) metals like mild steel and iron. Stainless steel is non-magnetic in the 300-series (304, 316) and weakly magnetic in the 400-series — assume magnets will not hold and clamp mechanically.
Related Articles
- Essential Welding Equipment Guide
- How to Set Up a Home Welding Workshop
- Welding Table Buying Guide
- Angle Grinder Guide for Welders
- Welding for Beginners: Complete Guide
- Common Beginner Welding Mistakes
- Welding Gloves and Jacket Guide
- Welding Gas Guide
- 10 First Welding Projects
- About Kenny Nyhus Fadil
Discussion (0)