The 11 mistakes below cost beginners more welding hours than any others — cheap helmets, dirty metal, inconsistent stickout, wrong polarity, no grind prep, and six more. Fix even the top five and roughly 80% of bead problems disappear inside one practice session.
I made four of these five mistakes in my first month — the only one I skipped was polarity because my friend who has been welding for decades caught it before I plugged in the machine. The rest cost me roughly 15 hours of frustration that disappeared the moment each mistake was corrected. The pattern across all beginner mistakes is the same: they are not talent problems, they are information problems. The weld is bad for a specific, fixable reason, and once you know the reason, the fix takes 60 seconds. For the vocabulary to describe what is going wrong, see the welding terms glossary. For the full troubleshooting reference, the welding troubleshooting guide covers every defect in detail.
Safety Mistakes That Beginners Do Not Know Are Mistakes
The safety mistakes are the category that cause actual injury, not just ugly welds. Three mistakes dominate: buying a 40-dollar auto-darkening helmet, welding in a cotton hoodie with the sleeves rolled up, and welding galvanized steel without a respirator because “it’s just a few tacks.” Each of these has a specific, painful consequence that hits within hours of the mistake.
Mistake 1: Buying the cheapest auto-darkening helmet. A 40-dollar helmet from the bargain bin has a real darkening sensor, but the sensor response time is slow enough (1/2000 second versus 1/25000 second on a real four-sensor unit) that your eyes receive a flash of arc radiation before the lens darkens on every arc start. Multiply that by 200 arc starts in a practice session and you have arc eye by evening — the sensation of sand in your eyes that peaks around 3 a.m. and keeps you awake until dawn. The fix is a helmet with four sensors (not two) and a rated response time under 1/10000 second — all certified to ANSI Z87.1+ for impact and arc-radiation protection. A real four-sensor unit that hits this spec on a beginner budget is the YesWelder LYG-M800H (roughly 80-110 dollars, 1/25000-second response). Step up to the Lincoln Viking 3350 or Miller Digital Infinity (both real four-sensor units, 400-550 dollars) if you want a larger lens and a wider adjustable shade window — genuine upgrades, but not required to clear the safety threshold. The cost difference between the bargain bin and a real four-sensor helmet is roughly the price of one urgent-care co-pay.
Mistake 2: Welding in synthetic clothing. A polyester hoodie or synthetic athletic shirt catches spatter differently than cotton — it melts rather than burns, and molten plastic adheres to skin. A single dime-sized spatter ball landing on a polyester sleeve becomes a second-degree burn with embedded plastic that needs a doctor to remove. The fix is leather (welding jacket or apron) covering everything above the waist, plus all-cotton or denim pants. Anything synthetic anywhere within 3 feet of the arc is a burn waiting to happen. The welding safety guide covers PPE selection in detail; the welding burns first aid guide covers what to do when the mistake has already happened.
Mistake 3: Skipping the respirator on galvanized steel. Welding galvanized (zinc-coated) steel produces a white zinc oxide plume that smells metallic and causes metal fume fever — flu-like symptoms (chills, fever, nausea, body aches) that hit 4-10 hours after exposure, peak around 18 hours, and resolve within 24-48 hours. A single session of welding galvanized without a respirator is enough to trigger it. The fix is a P100 half-face respirator — a 3M 6200 or 7502 with 2091 P100 cartridges — worn under the helmet. OSHA 29 CFR 1910.252(c) sets the welding-fume baseline for occupational exposure, and StatPearls’ metal fume fever review documents the zinc-oxide mechanism and onset timeline. No amount of shop ventilation handles the zinc oxide plume safely at the breathing zone — only a respirator does.
Technique Mistakes That Make Every Bead Worse
Three technique mistakes account for roughly 70% of beginner bead problems: inconsistent stickout, watching the arc instead of the puddle, and skipping the weld-prep grind. Each one is invisible to the beginner because the mistake feels like “this is just how welding is” until someone points out the fix and the bead instantly improves.
Mistake 4: Inconsistent stickout. Beginners hold the MIG gun 3/4 inch to 1.5 inches from the work, varying the distance with every weave and every pause. Stickout directly controls amperage — longer stickout = higher electrical resistance = lower amperage = less penetration. A bead run with stickout that varies from 3/8 to 1 inch has sections that penetrated and sections that sat on top, and the welder blames the machine instead of the distance. The fix is drilling the 3/8-inch stickout into muscle memory: hold the gun consistently at 3/8 inch (roughly the diameter of the contact tip itself), and check stickout every time you reposition. My friend who has been welding for decades made me hold a 3/8-inch wooden dowel against the contact tip for the first 50 practice beads to calibrate the distance — annoying, but it worked. I still tape a 3/8-inch reference mark on the gun cable of my YesWelder MIG-PRO205DS to reset the muscle memory whenever I come back from a few weeks away.
Mistake 5: Watching the arc instead of the puddle. The arc is bright and hypnotic and the puddle is just a small orange dot behind it, so beginners watch the arc. But the puddle is where the weld actually happens — the arc just provides the heat. Watching the arc means you miss the puddle’s trailing edge shape (pointed teardrop = too fast, wide flat pool = too slow) and the wetting action (is the puddle flowing into both sides of the joint or piling up on one?). The fix is conscious puddle-watching: after striking the arc, shift focus 1/4 inch behind the arc to the molten puddle, and track the puddle edge as it solidifies. This takes roughly 2-3 practice sessions to feel natural and 10 sessions to become automatic.
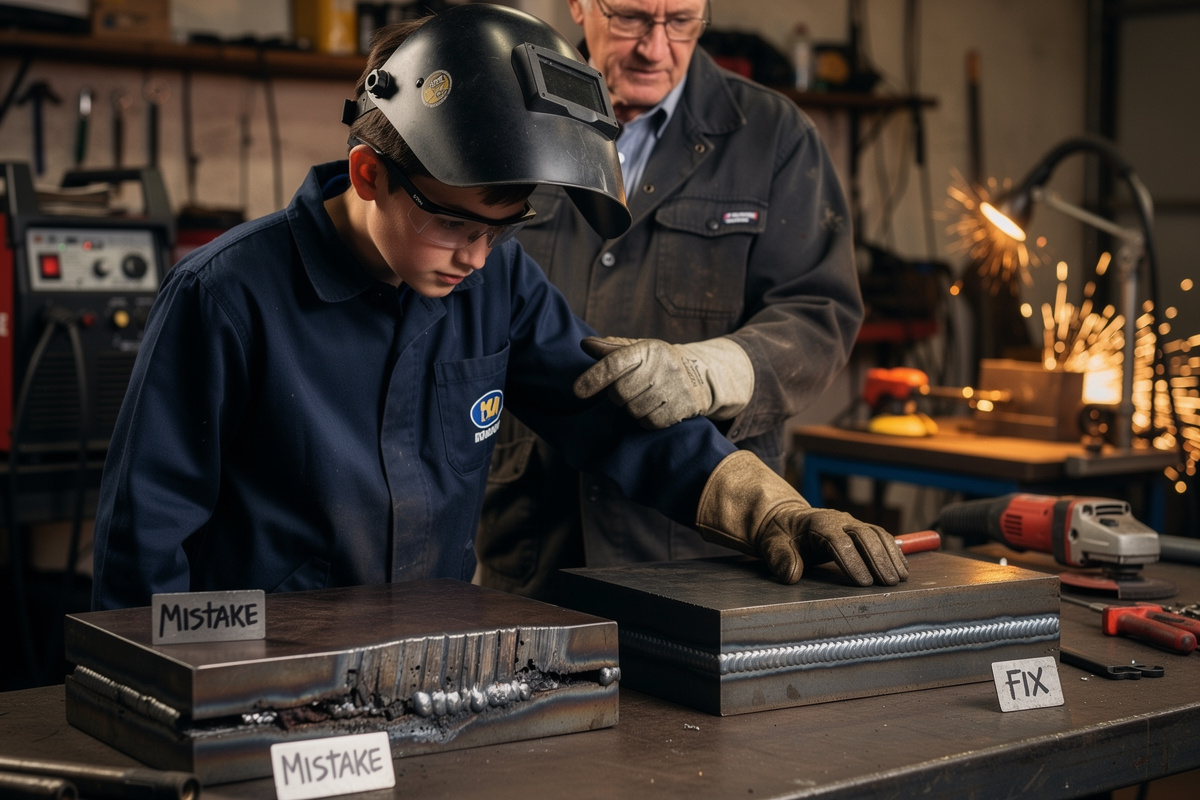
Mistake 6: Welding on dirty metal without grinding first. Mill scale (the gray-black oxide layer on new steel), rust, paint, and oil all contaminate the puddle and cause porosity, lack of fusion, and unstable arcs. Beginners see a YouTube welder strike an arc on slightly dusty steel and produce a perfect bead, assume surface prep does not matter, and weld on mill-scale-covered flat bar straight from the metal supplier. The bead looks like a sponge — pitted, porous, and weak. The fix is 60 seconds with an angle grinder and a flap disc: grind the weld joint area down to bright shiny metal on both sides, about 1/2 inch wide along the joint path. Clean metal tells the truth — if the bead still looks bad after grinding the joint clean, the problem is technique or settings, not contamination.
Equipment Mistakes That Sabotage Every Session
Equipment mistakes are the most frustrating because the welder looks like it should work and the problem is invisible until you know where to look. Three equipment mistakes dominate: wrong polarity on flux-core, wrong drive roll for the wire type, and insufficient gas flow for the nozzle size.
Mistake 7: Running flux-core wire on MIG polarity (DCEP) instead of flux-core polarity (DCEN). Flux-core (self-shielded) wire requires electrode-negative (DCEN) polarity — the current flows from the work to the wire. Solid MIG wire requires electrode-positive (DCEP) — the current flows from the wire to the work. Most home MIG welders ship set to DCEP for solid wire. If you load flux-core wire without swapping the polarity terminals inside the machine, the arc sputters, penetration evaporates, and the bead looks like popcorn. The fix is opening the side panel of the welder and swapping the two polarity leads (usually labeled “+” and “–”) to the DCEN configuration per the manual. This takes 90 seconds and is the first thing to check when a flux-core bead looks inexplicably bad.
Mistake 8: Wrong drive roll for the wire type. MIG welders use knurled (V-groove with teeth) drive rolls for flux-core wire and smooth U-groove drive rolls for solid wire. Running solid wire through knurled rolls chews up the wire surface and deposits metal shavings into the liner, causing erratic feed and eventual liner clogging. Running flux-core through smooth rolls allows the wire to slip because the hollow flux wire has less crush resistance. The fix is swapping the drive roll (a 2-minute job) any time you switch between solid and flux-core wire. I run Lincoln SuperArc L-56 ER70S-6 on the smooth roll for gas-MIG and Lincoln NR-211-MP on the knurled roll for flux-core — labeling each spool with the roll type and polarity it needs saves the “why is this welding terribly?” diagnostic loop on every switch.
Mistake 9: Setting gas flow too low or too high. The correct gas flow rate for short-circuit MIG is 20-30 cubic feet per hour (CFH) — roughly 10-15 liters per minute. Below 15 CFH, the shielding gas coverage is incomplete and porosity appears at the edges of the bead. Above 35 CFH, the gas flow creates turbulence that pulls atmosphere into the shielding zone, also causing porosity. Beginners often crank the flow to “be safe” and cause the same problem they were trying to prevent. The fix is setting the flowmeter to 20-25 CFH and checking that the flow ball actually floats at that rate — a kinked gas hose or empty cylinder can show flow on the gauge with no gas at the nozzle. Test by holding the nozzle close to your cheek (with the welder off) and feeling for gentle gas flow.
Practice Mistakes That Slow Progress
Practice mistakes do not ruin welds — they ruin the learning curve. They make the 20-hour path to basic competency take 40 hours because the practice itself is inefficient. Two mistakes dominate: practicing on random scrap of varying thickness and condition, and practicing without a specific, measurable goal for each session.
Mistake 10: Practicing on rusty, contaminated, or random-thickness scrap. A beginner loads the welder with whatever scrap is in the pile — a piece of 16-gauge bed frame, a chunk of 1/4-inch plate with surface rust, a bracket with old paint — and wonders why every bead looks different. The bead changes because the material changed, not because the technique changed. Learning welding on variable material is like learning handwriting while someone changes the paper thickness and pen type every 5 minutes. The fix is buying 20 feet of clean 1/8-inch flat bar (roughly 10-15 dollars) and practicing exclusively on that material for the first 10 hours. Consistent material at consistent thickness produces consistent feedback. Once you can weld 1/8-inch mild steel cleanly, then add other materials.
Mistake 11: Practicing without a goal. “I’m going to practice welding” is not a practice session — it is an hour of running random beads with no feedback loop. A real practice session has one specific goal: “Today I am running 20 straight beads on 1/8-inch plate, checking stickout consistency on every bead, and the goal is zero burn-through.” At the end of the session, you count burn-throughs and track the number. The fix is writing down one goal before every practice session and recording the result after. The log is not about being precious — it is about forcing deliberate attention. A session with a goal and a result is worth three sessions of random bead running.
The Five-Minute Pre-Weld Checklist That Prevents These Mistakes
Run this checklist before every practice session or project and 80% of these mistakes will never happen:
- Polarity confirmed for the wire type you are using (DCEN for flux-core, DCEP for solid MIG).
- Gas flow set to 20-25 CFH (solid MIG) or correctly turned off (flux-core — running gas with flux-core wastes gas and creates turbulence that hurts the weld).
- Drive roll matches wire type (knurled for flux-core, smooth U-groove for solid).
- Joint ground to bright shiny metal for 1/2 inch on each side of the weld path.
- Helmet shade set to 10-11 for the amperage you are running, auto-darkening mode confirmed working with a test trigger (look at a bright light and confirm the lens darkens).
- Stickout reference checked — hold the gun at 3/8 inch from a scrap piece and lock that hand position in memory.
- No synthetic clothing anywhere on your body — leather jacket or welding apron, cotton or denim pants, leather boots (not sneakers with mesh tongues that catch spatter).
Seven items, 90 seconds to run through. The first 30 practice sessions, run this list before every arc strike. After that, it is habit and you can skip the written list — but the 90 seconds of verification prevents the 2 hours of frustration that follow a mistake you did not catch. For the full safety context behind PPE and ventilation, see the welding safety guide.
Frequently Asked Questions
What is the most common beginner welding mistake?
Inconsistent stickout — varying the distance from the MIG gun contact tip to the workpiece — is the most common beginner mistake. Stickout directly controls amperage and penetration. Keeping it at exactly 3/8 inch for every bead is the single biggest technique improvement a beginner can make in their first week of practice.
Why are my MIG welds so spattery as a beginner?
Beginner spatter is typically caused by three things in combination: wrong voltage-to-wire-speed balance, stickout that is too long, and dirty base metal. Set voltage and wire speed to the mid-range recommendation for your material thickness, hold 3/8-inch stickout consistently, and grind the joint clean before welding. Spatter drops by roughly 50% with those three fixes.
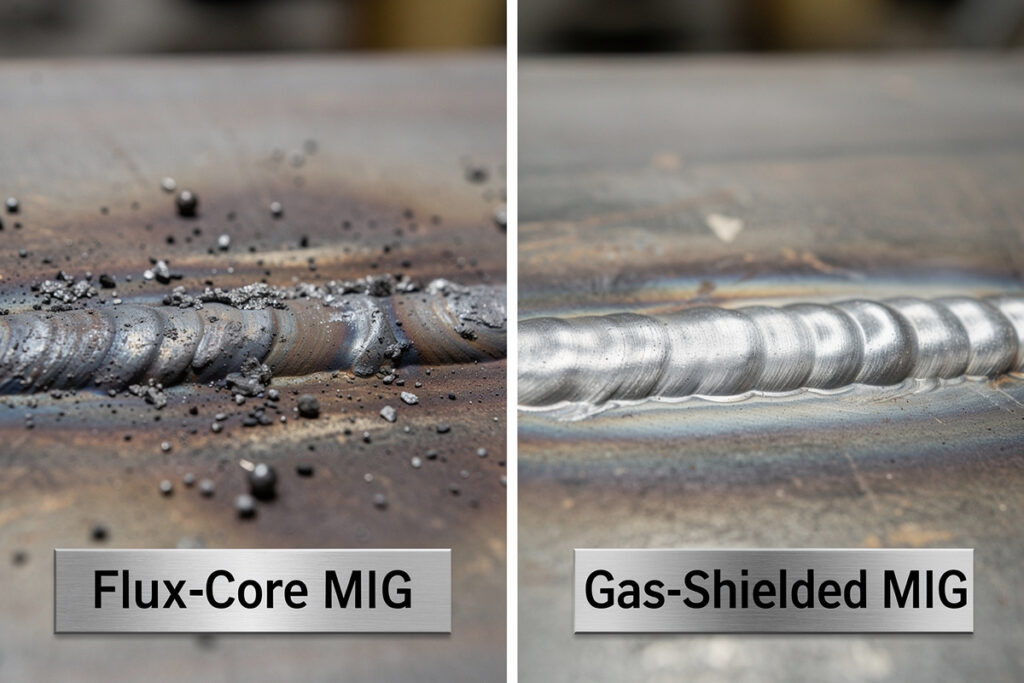
Should I use gas or flux-core wire as a beginner?
Flux-core is cheaper and simpler to start with because no gas cylinder is needed, but it produces more spatter, more smoke, and requires slag chipping after every bead. Gas-shielded MIG costs roughly 180 dollars more upfront for cylinder rental but produces cleaner welds with less cleanup. Most beginners who start on flux-core switch to gas within their first year.
Why does my weld bead look like it has tiny holes in it?
Tiny holes or bubbles in the bead are porosity, caused by gas trapped in the solidifying puddle. The three most common beginner causes are insufficient shielding gas flow, wind blowing gas away from the arc, or welding on contaminated metal (rust, paint, mill scale, oil). Clean the joint to bright metal, check gas flow is 20-25 CFH, and close the garage door against wind.
Is it normal for my first welds to look terrible?
Yes — every welder’s first 50 beads look like a seagull walked through wet concrete. The difference between people who learn and people who quit is whether they push through hours 3-8, which is the peak frustration zone where welds are improving too slowly to notice. By hour 10, beads straighten out. By hour 20, they look like welding.
Why do I keep burning through thin metal?
Burning through thin metal (under 1/8 inch) is caused by too much voltage, too slow travel speed, or both. Reduce voltage by one step, increase travel speed, and switch from a pull angle to a push angle — pushing directs heat forward instead of into the puddle. For 16-gauge sheet metal, use the lowest voltage setting on your machine and tack-weld every 1-2 inches instead of running a continuous bead.
Related Articles
- Welding for Beginners: Complete Guide
- Welding Troubleshooting Guide
- Welding Terms Glossary
- How Long Does It Take to Learn Welding?
- 10 First Welding Projects That Teach Core Skills
- Welding Safety Guide
- MIG Weld Spattery Causes and Fixes
- How to Set Up a Home Welding Workshop
- MIG Welding Complete Guide
- About Kenny Nyhus Fadil


Discussion (0)