Setting up a home welding workshop takes one weekend, a 240V dedicated circuit (30-50 amps), and roughly $600 beyond the welder itself. Start with the electrical panel, not the welder — every other layout decision rides on whether the workspace can deliver clean 240V to the welding zone.
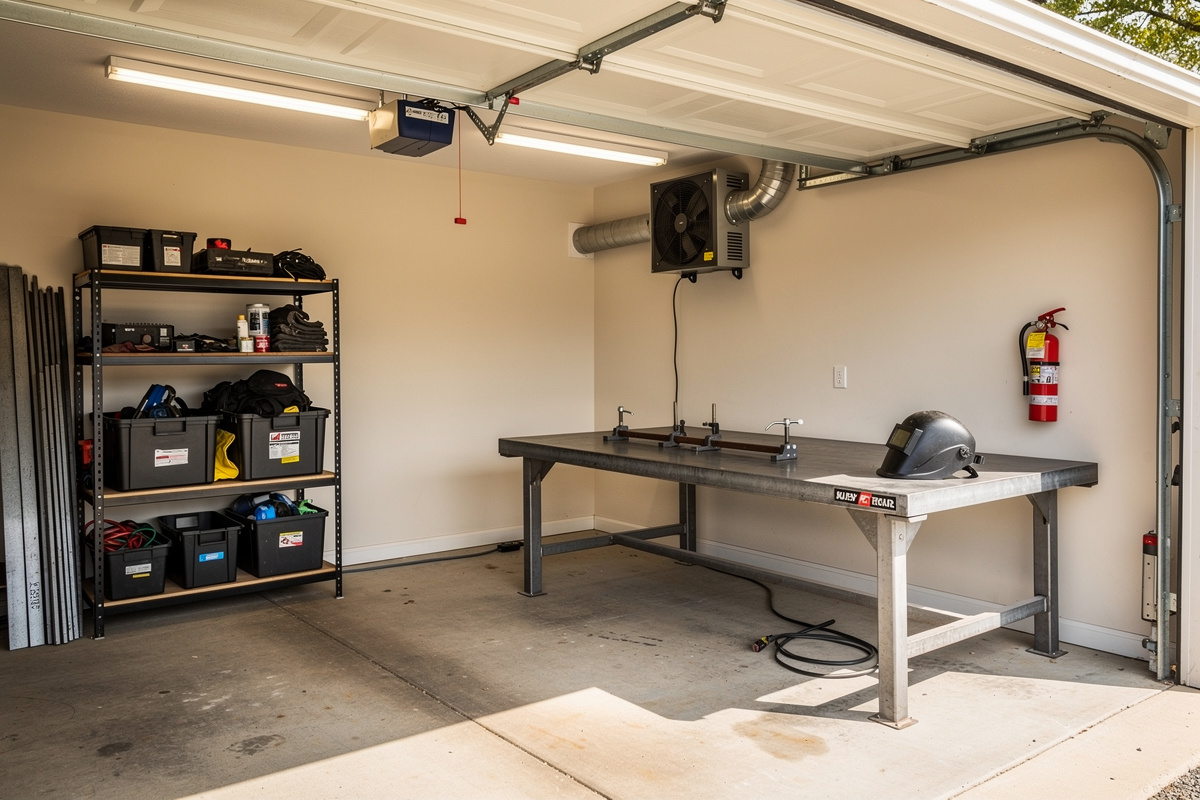
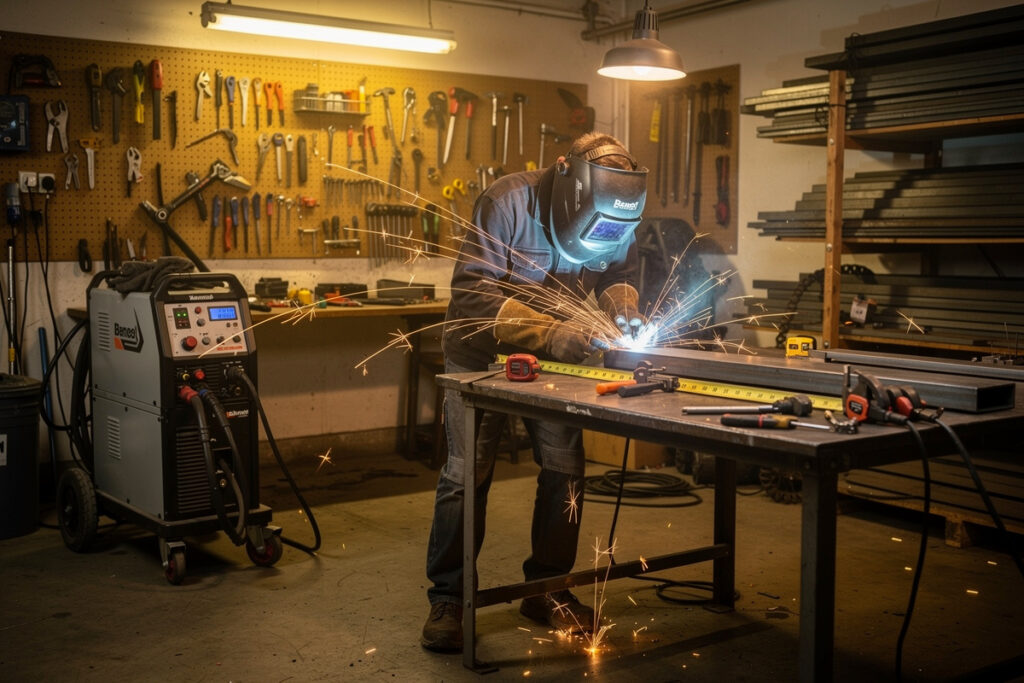
I set up my workshop in a single-car garage bay that already housed a CNC router, a 3D printer, and a laser engraver — the polymath’s problem is fitting four disciplines into one room without any of them tripping over the others. The welder added a new constraint: fire safety and ventilation that the other tools did not demand. The layout I landed on after three rearrangements is a U-shaped workflow that puts the welding table in the center, metal storage on the left wall, finishing and grinding on the right, and the welder cart on casters so it can move to wherever the next project demands it. This article walks through every decision a beginner needs to make before striking the first arc, from breaker sizing to fume extraction to the specific layout that keeps a multi-discipline workshop functional. For the broader beginner picture, see the welding for beginners guide.
Electrical Power: The One Decision You Cannot Skip
A 240V dedicated circuit on a 30-to-50-amp breaker is the single requirement that separates a real welding workshop from an expensive paperweight sitting in a corner. Most residential garages in North America have one or two 120V 15-amp circuits shared with lights and outlets. Plugging even a 120V flux-core MIG into a shared circuit risks tripping the breaker on every third bead — and if the lights go out during a weld, you are holding a live arc in total darkness.
The electrical checklist in order of importance:
- 30A 240V circuit for the welder: A 30-amp circuit covers all 200A-class home MIG and stick welders. If you plan to run a 250A multi-process machine at full output later, wire a 50A circuit now — the cost difference is roughly 40 dollars in wire and breaker. My friend who has been welding for decades told me the same thing: “Wire 50A once and never think about it again. Wire 30A now and pay an electrician twice when you outgrow it in year two.”
- Separate 120V 20A circuit for grinders and tools: An angle grinder pulls 8-12 amps at startup and trips a shared 15A circuit the moment the compressor cycles on. Dedicate at least one 20A outlet to grinding.
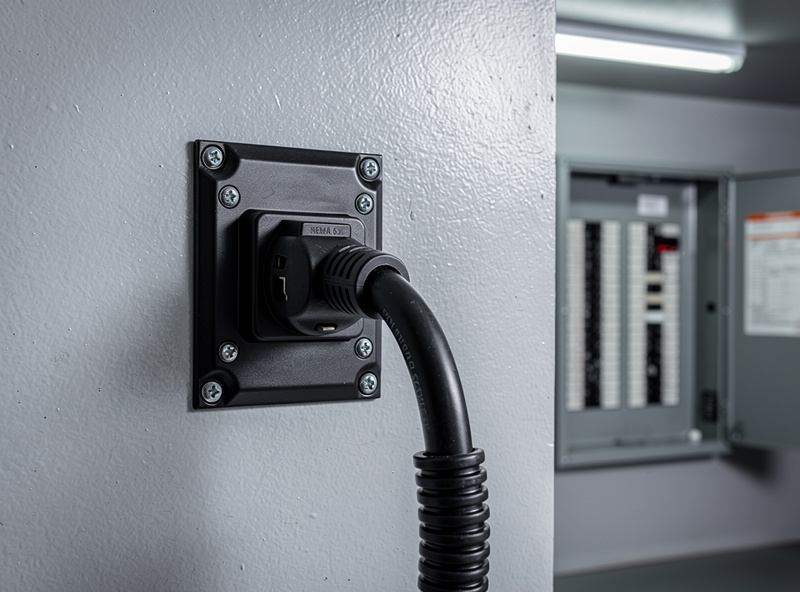
- GFCI protection on the hand-tool outlets, not the welder receptacle itself: The NEC’s GFCI rules in 210.8 apply to 125V, 15-20A receptacles — a 240V/30-50A welder receptacle falls outside that voltage/amperage window, so it is not the same GFCI-required class as a standard outlet. What the shop does need, per the 2023 NEC’s Article 630.8 addition specifically for welding work areas, is GFCI protection on every 125V 15-20A receptacle used for hand tools or portable lighting near the welder — the cords in that zone take slag and foot-traffic damage the rest of the shop’s outlets do not.
- NEMA 6-50R outlet for 240V: This is the standard welding outlet. NEMA 14-50 (the EV-charger outlet) works too but requires a neutral wire the welder will not use. 6-50R is cheaper and simpler.
- Extension cord sizing: If the welder needs to move, a 50-foot 8-gauge extension cord rated for 50A costs around 100 dollars. 10-gauge cords work for 30A machines. Do not use a standard orange extension cord for a welder — the voltage drop alone kills arc stability.
The cost of running a new 240V circuit from a nearby panel is roughly 300 to 600 dollars for a licensed electrician in 2026, assuming the panel has spare capacity. If the panel is full or on the opposite side of the house, budget 800 to 1,500 dollars. The cost to start welding at home guide covers this in detail. For the equipment that actually connects to that circuit, see the first year welding equipment checklist.
Space Requirements: Minimum Dimensions That Actually Work
A functional welding workshop needs a minimum 8-by-8-foot clear floor area centered on the welding table — roughly the size of a small bedroom. This gives you enough room to walk around the work, position the welding cart with 6 feet of lead reach, and avoid tripping over cords and hoses mid-bead. My workshop started as a 7-by-9-foot corner of the garage, and the first month was basically obstacle-course welding — I tripped over the grinder cord twice before rebuilding the layout entirely.
The minimum dimensions that work for a single welder setup:
- Welding zone floor: 8 feet by 8 feet clear. Smaller than this and you physically cannot walk around a 4-foot project from all sides. The welding table sits in the center of this zone.
- Material storage: 3 feet by wall depth. Steel stock — angle iron, square tube, flat bar — needs vertical storage against a wall to keep it off the floor where it becomes a trip hazard. A simple rack with 3-4 horizontal arms handles a home-shop steel inventory.
- Grinding zone: 4 feet by 4 feet, separated by at least 6 feet from the welding table. Grinding throws sparks 15-20 feet in every direction. If the grinding happens next to the welding table, hot sparks land on the fresh weld and on the welder itself. Separate them.
- PPE and consumables station: a dedicated shelf or wall pegboard within arm’s reach of the welding table. Helmet, gloves, jacket, wire brush, chipping hammer, MIG pliers — these need a home five steps from the table or they live on the floor and get kicked under the workbench.
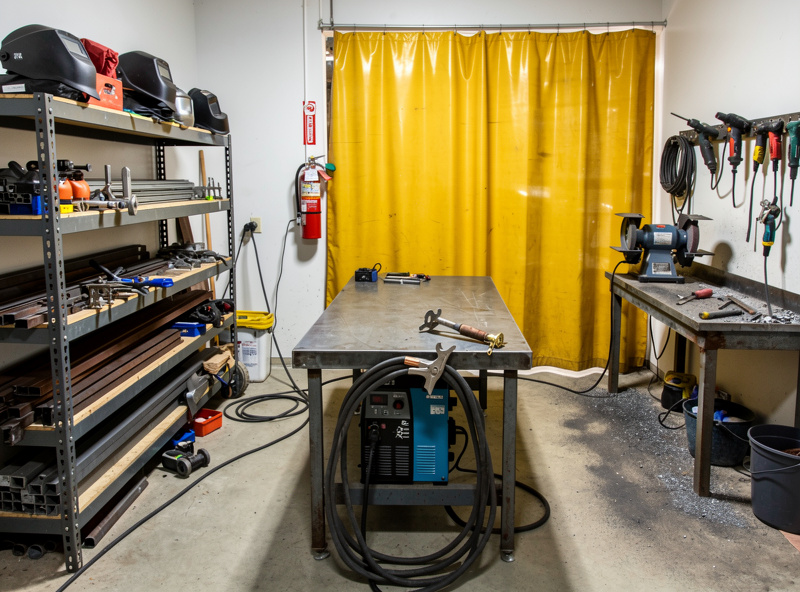
If the workshop shares space with other tools — a CNC, a printer, a woodworking bench — the welding zone needs physical separation. A welding curtain or fire-resistant blanket on a ceiling-mounted track costs 60-100 dollars and keeps grinding sparks away from the electronics and sawdust. My workshop has a simple welding curtain on a shower-rod track that slides closed in five seconds and has prevented at least one near-fire with sawdust next to the CNC enclosure. Read our welding safety guide for curtain material and fire-rating specifics.
Ventilation: The Thing Most Beginners Skip and Regret
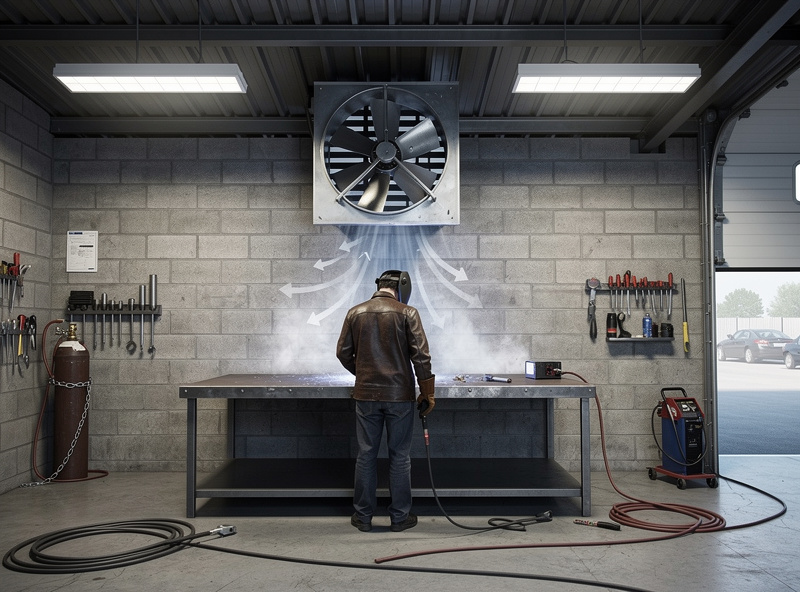
Welding fume ventilation is not optional — it is the difference between finishing a project day with clear lungs and waking up at 3 a.m. with a throat that feels sandpapered. A cross-draft pattern is the minimum viable home setup: fresh air enters from behind the welder and exits through a fan on the opposite wall, pulling fumes away from the breathing zone rather than across it. A 12-inch through-wall exhaust fan pushing 800-1,200 CFM costs 80-150 dollars and covers a single-car garage volume effectively.
Ventilation layout rules that have not failed me yet:
- Airflow direction is behind-to-front, never side-to-side. The fan goes on the wall opposite the welder’s back, so fumes travel away from your face. Side-draft ventilation pulls fumes across your breathing zone — worse than no ventilation at all.
- Makeup air must come from somewhere. If the garage door is closed, an exhaust fan creates negative pressure that pulls fumes back into the room. Crack a window or door on the opposite side of the fan for makeup air.
- Position the fan at fume height, not ceiling height. Welding fumes are hot and rise, but the column of hot gas expands and cools within 5-6 feet. A fan at 5-6 feet off the floor captures the widest fume cloud.
- For galvanized steel, add a respirator. No amount of shop ventilation handles the zinc oxide plume from welding galvanized safely. A P100 half-face respirator under the welding helmet is mandatory for any zinc-coated metal.
- A box fan in a window is better than nothing but worse than a through-wall fan. Box fans do not move enough CFM to clear a garage in under 5 minutes. They work for tack-welding a few brackets; they do not work for a 2-hour project session.
My setup uses a 1,200-CFM through-wall fan with a louvered exterior vent that closes when the fan is off to keep cold air out in the Swedish winter — which runs roughly six months of the year. The total cost was 160 dollars plus two hours of cutting a 14-inch hole through the garage wall. The welding ventilation guide covers fan sizing calculations and specific product recommendations.
Layout Zones: A U-Shaped Workflow That Moves Metal Left to Right
The layout that has worked through a dozen projects now is a left-to-right U-shape: raw metal enters on the left wall rack, moves to the center welding table, then exits right to the grinding and finishing zone before heading to the assembly bench or out the door. This is the same flow any fabrication shop uses, scaled down to a single garage bay. Metal never crosses back over itself, and hot work stays physically separated from finishing work.
The four-zone layout:
- Zone 1 — Metal storage and cutting (left wall): Vertical rack for steel stock, chop saw on a stand, and a small shelf for drop pieces and cut-offs. The chop saw lives here because it produces hot sparks in a predictable direction — toward the wall, away from the welding table. An angle grinder with cutoff wheels handles anything the chop saw cannot.
- Zone 2 — Welding (center of room): Welding table in the center, welder cart on casters parked next to it. The cart holds the machine, the gas cylinder strapped securely, and a small shelf for consumables. A welding curtain track runs across the ceiling above this zone to pull closed when grinding starts in Zone 3.
- Zone 3 — Grinding and finishing (right wall): A second small steel table or sawhorse setup for grinding. Nothing flammable within 15 feet of this zone — no cardboard, no sawdust, no paint cans. The angle grinder, flap discs, and wire brushes live on a pegboard above this station.
- Zone 4 — Assembly and cool-down (front of room, near door): A flat workbench for laying out parts, clamping sub-assemblies, and letting finished welds cool before handling. Nothing hot comes near this bench — it is the only clean surface in the workshop and it stays that way.
This layout separates incompatible processes and lets two people work without crossing into each other’s spark radius — useful when my friend who welds for a living stops by and we tackle opposite ends of a project simultaneously. For the specific projects this layout supports, see our DIY welding projects guide.
Safety Zone: Fire Extinguisher, Exit Path, and the Things That Burn
The safety equipment in a welding workshop has one job: buy you ten seconds to put out a fire before it becomes the fire department’s problem. The layout rules for safety are non-negotiable: a Class C fire extinguisher mounted on the wall between the welding zone and the exit door, a clear path to that door with nothing on the floor, and a fire-resistant blanket or welding curtain separating hot-work zones from combustibles.
Safety layout checklist:
- Fire extinguisher: Class C (electrical fires) or ABC, 5-10 pound, mounted on the wall between the welding table and the exit. Not under the table, not in a cabinet — on the wall at chest height, pin facing you, no obstructions.
- Exit path: The walkway from the welding table to the exit door must stay clear. No extension cords across it, no material racks blocking it, no project parts leaning against the wall. If you cannot back out of the workshop without looking down, the path is not clear.
- Flammable storage: No gasoline, propane, paint thinner, or solvent anywhere within 35 feet of the welding zone — this is the minimum separation distance set by OSHA 29 CFR 1910.252(a). If the garage also stores a lawn mower or gas cans, build a small ventilated metal locker for them — a 50-dollar steel job box with vent holes drilled in the sides works.
- Floor surface: Bare concrete is ideal. If the floor has epoxy coating, cover the area under and around the welding table with a welding blanket or sheet of 1/8-inch steel plate. Hot slag burns through epoxy in seconds.
- Fire watch after welding: Stay in the workshop for at least 1 hour after the last weld — NFPA 51B’s 2019 update raised the minimum fire watch from the older 30-minute rule to a full hour after NFPA data showed nearly half of hot-work fires ignite more than 30 minutes after the work ends. Smoldering fires in rags, sawdust, or insulation can take well past 30 minutes to produce visible flame. I set a timer on my phone and use the hour for cleanup and tool organization.
The welding safety guide covers the full PPE and fire prevention picture. The welding burns first aid guide is the reference for when something goes wrong despite the layout. For evaluating the difficulty of the learning curve before committing to a full workshop, read is welding hard to learn.
Lighting: You Cannot Weld What You Cannot See
Welding demands more light than any other shop task because you are viewing the work through an auto-darkening helmet at shade 10-13 — roughly 99.9% light reduction. The welding arc itself lights the puddle, but seeing the joint, the wire stickout, and the surrounding workpiece before striking the arc requires bright, shadow-free ambient light. Four 4-foot LED shop lights at 5,000 lumens each, positioned directly above and to the sides of the welding table, eliminate the “where is the joint?” head-bob that eats half the time on every beginner weld.
Lighting requirements that changed my weld quality overnight:
- 4,500-5,500K color temperature: Cool white LEDs render metal surface detail better than warm white. 5,000K matches daylight and reveals surface contamination, mill scale, and joint fit-up gaps that disappear under yellow light.
- At least 100 lumens per square foot at the welding table: A 4-by-4-foot welding table needs roughly 1,600 lumens directly above it, plus another 1,600 from side lighting to eliminate shadows.
- Position lights to avoid direct glare into the helmet: Lights mounted above and slightly behind the welder’s shoulders prevent reflections inside the helmet lens. Lights directly in front of the welder create glare that washes out the arc view.
- A portable magnetic-base LED work light for inside corners and under assemblies: A 30-dollar rechargeable LED with a magnetic base clamps to any steel surface and lights up the inside of a box frame or the dark side of a T-joint that your overhead lights miss.
The right setup has let me identify a 1mm root gap before striking the arc — the kind of detail that determines whether the weld penetrates or sits on top. Before the lighting upgrade, I was welding joints I could barely see and wondering why the bead wandered off the seam by the end of the pass. For the actual process of laying down those beads, the MIG welding complete guide covers technique; for managing what happens when the arc is live, the welding safety guide covers the complete PPE and fire picture.
The Complete Workshop Setup Checklist
Here is the full checklist in the order it should be tackled. Run through this before buying a single piece of equipment beyond the welder itself:
- Verify the electrical panel has space for a 30A or 50A 240V double-pole breaker.
- Hire an electrician to run 8-gauge wire to a NEMA 6-50R outlet at the welding station location.
- Install a dedicated 20A 120V circuit for grinders and tools.
- Clear an 8-by-8-foot floor area and mark the welding table center point with tape.
- Install four 5,000-lumen LED shop lights above and around the welding zone.
- Mount a through-wall exhaust fan at 5-6 feet height, opposite the welder’s back.
- Build or buy a vertical metal storage rack for the left wall.
- Mount the fire extinguisher on the wall between the welding table and the exit.
- Install a welding curtain track above the welding zone.
- Verify the exit path is completely clear from the welding table to the door.
- Remove all flammables from within a 35-foot radius of the welding zone.
- Position the welder cart with cylinder securely strapped, test all connections.
- Set up the PPE station — helmet, gloves, jacket — within arm’s reach of the table.
- Test ventilation with a smoke source — a lit incense stick works — and confirm airflow moves away from the operator position.
- Perform one test weld on scrap while checking that no breakers trip, no smoke backflows, and the arc is stable under full shop lighting.
Every step here prevents a specific failure mode that I have either experienced or watched someone else experience. The electrical step prevents mid-weld breaker trips. The ventilation step prevents the 3 a.m. throat-scrape. The extinguisher placement prevents the 10-second panic when a stray spark finds a rag you forgot was there. Skipping a step does not guarantee failure — it just rolls the dice. For the full safety context, see the welding safety guide. For the equipment that fills this workshop, the essential welding equipment guide covers every tool.
Frequently Asked Questions
Can I set up a welding workshop in a one-car garage?
Yes — a one-car garage provides roughly 200 square feet, which is more than the 64 square feet minimum welding zone. The key is separating the welding area from parked vehicles with a welding curtain or fire blanket and ensuring adequate through-wall ventilation since rolling up the garage door is not always practical in winter.
Do I need a 240V outlet for a home welding workshop?
Yes for any welder above 140 amps — which includes nearly all MIG welders that weld 1/8-inch steel or thicker. A NEMA 6-50R outlet on a 30-50A breaker costs roughly 300-600 dollars installed by an electrician in 2026 and is the single most important infrastructure investment in a home welding workshop.
What is the most common workshop layout mistake beginners make?
Putting the grinding station next to the welding table. Grinding throws sparks 15-20 feet that land on the welder, the gas cylinder, and the fresh weld. Separate grinding from welding by at least 6 feet with a welding curtain between them, and position the grinder so sparks throw toward a bare concrete wall, not toward equipment.
How much ventilation does a home welding workshop need?
A minimum of 800-1,200 CFM through a dedicated exhaust fan positioned at fume height (5-6 feet off the floor) on the wall opposite the welder’s back. Box fans in windows do not move enough air for anything beyond tack welding. A through-wall fan with louvered vent costs 80-150 dollars and is the permanent solution.
Can I weld in a basement workshop?
Welding in a basement is strongly discouraged because ventilation requirements are harder to meet, egress in a fire is restricted, and welding fumes and gases can accumulate in low-ceiling spaces. If a basement is the only option, a commercial-grade fume extraction arm vented directly outdoors, a hard-wired smoke and CO detector, and a clear egress window are mandatory.
What surface should my welding workshop floor be?
Bare concrete is ideal — it is non-flammable and handles dropped hot metal without damage. Epoxy-coated floors need a welding blanket or steel plate under the welding table because molten slag burns through epoxy within seconds. Never weld over wood, carpet, or rubber flooring mats.
Related Articles
- Welding for Beginners: Complete Guide
- Welding Safety Guide
- How Much Does It Cost to Start Welding at Home?
- First Year Welding Equipment Checklist
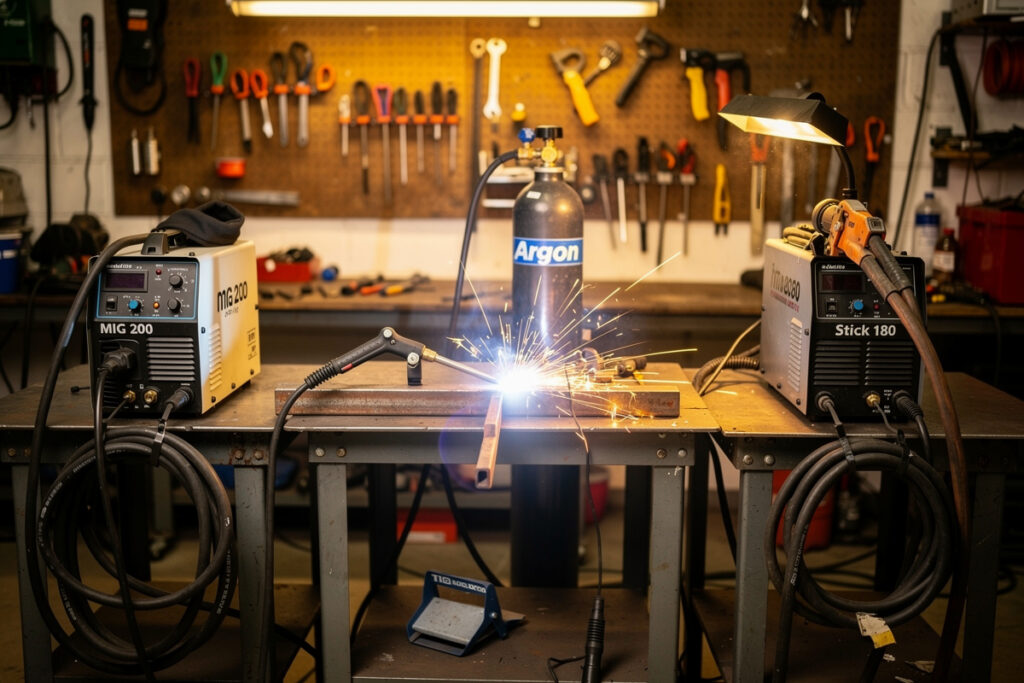
- MIG vs TIG vs Stick Welding
- Essential Welding Equipment Guide
- Is Welding Hard to Learn?
- Best Welding Helmet for Home Use
- DIY Welding Projects Guide
- About Kenny Nyhus Fadil
Discussion (0)