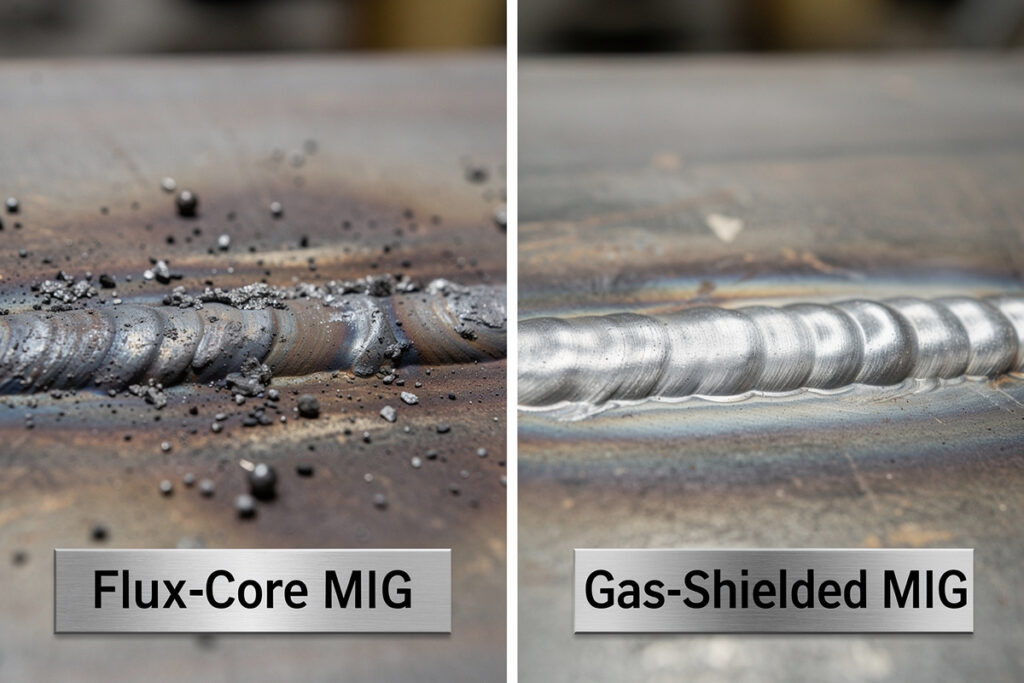
The minimum realistic cost to start welding at home in 2026 is about 600 dollars for a flux-core MIG setup including welder, helmet, gloves, and basic safety gear. A capable gas-shielded MIG with auto-darkening helmet runs 1,100 to 1,400 dollars.
I tracked every dollar I spent in my first year of welding because I assumed the marketing claim of “$200 to start” was honest. Total at the end of year one: $1,287 in equipment plus $186 in consumables. The single biggest swing was buying a $90 helmet that gave me arc eye through a defective sensor — replaced with a $140 unit that has worked five years. Skip the $30-$60 helmet tier; everywhere else, the budget options work fine. For broader context on the equipment landscape, see the welding for beginners guide; for the equipment itself, the essential welding equipment guide.
Most “how much does welding cost” articles either lowball with a 199 dollar Harbor Freight welder and call it done, or quote shop-grade equipment that no hobbyist needs. The realistic middle is what this guide covers — what the equipment actually costs new in 2026, what you can skip, and what every dollar gets you for the next 5-10 years of home projects. The single largest variable is process choice. MIG is cheaper to start, TIG is cheaper to run, and stick is the cheapest welder but the most expensive in consumables.
The Three Realistic Starting Budgets
Three budgets cover almost every beginner: the 600-dollar bare-minimum flux-core kit that gets you welding outdoors, the 1,200-dollar capable MIG kit that handles 90% of home projects, and the 2,500-dollar versatile multi-process setup that grows with your skills. Going below 600 dollars means a welder that will frustrate you within a month; going above 2,500 dollars buys features you will not use until year three.
Budget breakdowns by tier:
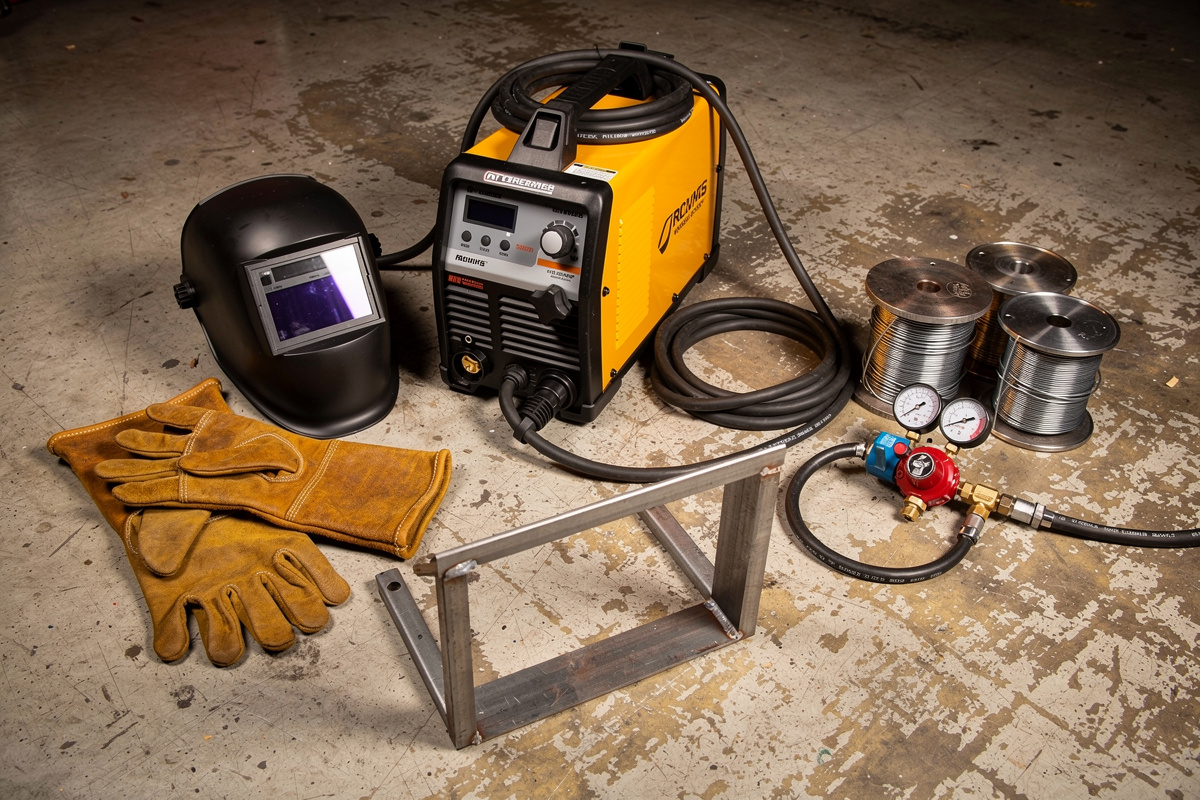
- Bare-minimum tier (~600 dollars): Flux-core 120V MIG welder (250), passive auto-darkening helmet (60), leather gloves (25), leather welding jacket (60), wire brush (10), chipping hammer (15), C-clamps and magnets (50), flux-core wire (40), eye protection (20), 8-pound CO2 fire extinguisher (70).
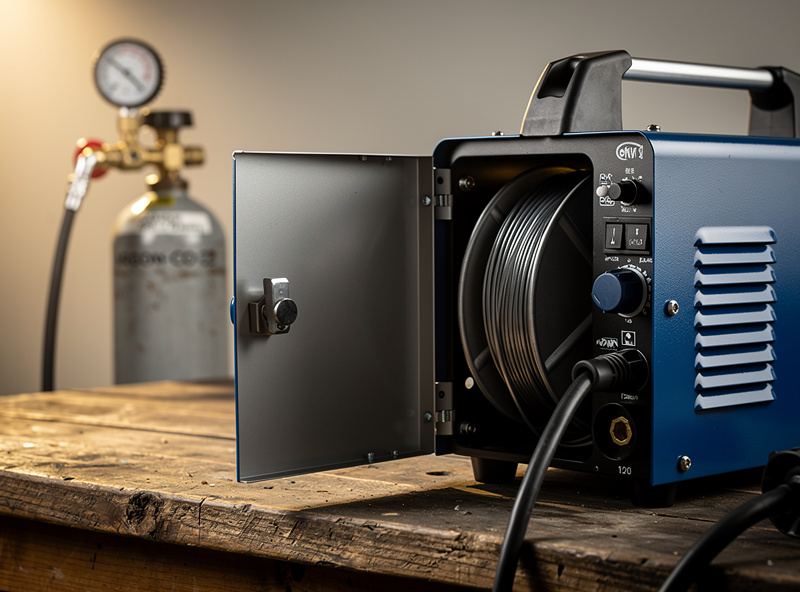
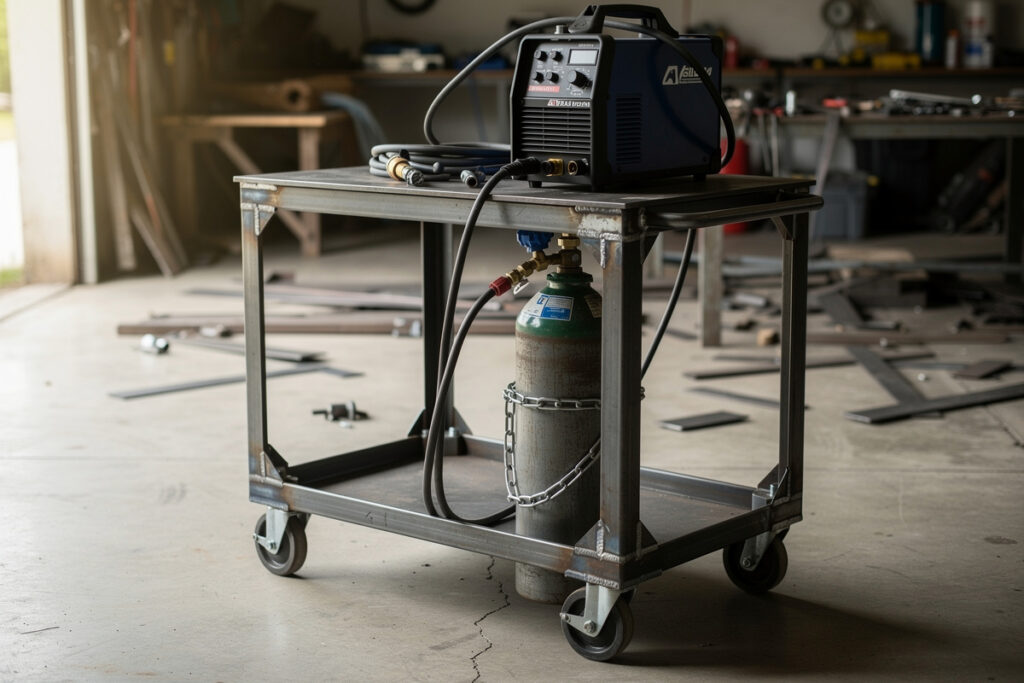
- Capable tier (~1,200 dollars): Gas-shielded MIG 120V/240V dual-voltage welder (550), 75/25 argon-CO2 cylinder rental (180 first year), pro auto-darkening helmet with sensitivity dial (150), leather gauntlets (40), full-coverage jacket (90), basic 24×24-inch welding table (100), C-clamps and magnets (60), wire feed and bottle of solid wire (50).
- Versatile tier (~2,500 dollars): Multi-process MIG/TIG/stick welder (1,200), 80 cubic foot argon tank (220), full PPE package (250), 36×48-inch welding table (450), Tungsten kit and cup set for TIG (80), grinder with cut-off wheels and flap discs (130), basic fixturing and chipping tools (170).
The capable tier is where most experienced hobbyists land within their first year. Even people who started bare-minimum almost always upgrade the helmet and add gas within 6-9 months because the difference in weld quality is dramatic. Read about specific welder picks in our best budget welder under 300 dollars guide.
What You Cannot Skip Without Hurting Yourself
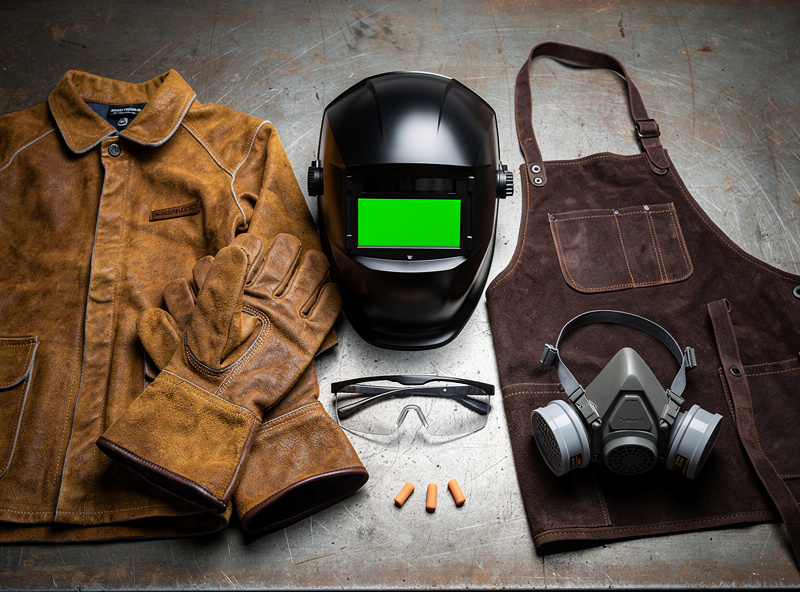
Four pieces of safety equipment are non-negotiable regardless of budget: an auto-darkening helmet with a range that covers shade 13, genuine leather welding gauntlets (not general-purpose work gloves), a non-synthetic flame-resistant jacket or apron, and a Class C fire extinguisher. Skipping any one of these is how home welders end up with arc-flash burns, burned-through clothing, or garage fires.
The non-negotiable safety items and why each matters:
- Auto-darkening helmet (60-180 dollars): A passive helmet works but you will set the shade wrong half the time and skip it on tack welds. Auto-darkening pays for itself in tacks alone.
- Leather welding gloves (25-50 dollars): Cotton gloves catch fire from spatter. Leather rated for welding takes the hits without melting.
- Non-synthetic clothing (60-100 dollars for jacket): Polyester melts onto skin. Leather, denim, or treated cotton resists ignition.
- Class C fire extinguisher (50-90 dollars): Welding ignites surrounding flammables far more often than beginners expect. Hose pulling next to the work is the ideal placement.
- Respirator for galvanized or painted metal (30-150 dollars): Welding zinc-coated steel without a respirator or adequate ventilation (OSHA 1910.252(c) covers zinc-bearing metals specifically) causes “metal fume fever” — flu-like symptoms that set in 4-10 hours after exposure.
This category is where Harbor Freight savings disappear. The cheapest acceptable PPE bundle is roughly 200 dollars new in 2026. People who try to spend less here usually end up replacing burned cotton sweatshirts and treating spatter burns. See our companion guide on welding burns first aid for what happens when PPE fails.
What You Can Skip in Year One
Several “nice to have” items can wait until year two without affecting the welds you can produce: a dedicated welding table, a power grinder beyond a basic angle grinder, MIG pliers, anti-spatter spray, and a TIG torch foot pedal. Each is genuinely useful but none of them stops a beginner from completing their first 10 projects.
Items that can wait until year two:
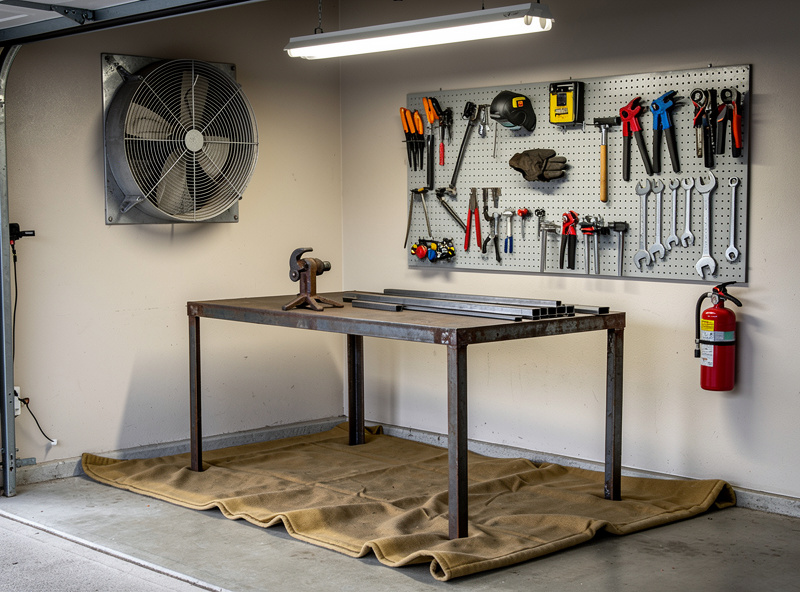
- Welding table (100-500 dollars): A piece of 1/4-inch steel plate clamped to a stable workbench works for the first year of small projects.
- Power grinder beyond a basic 4.5-inch angle grinder: One angle grinder with cutoff wheels and flap discs covers all common grinding for the first year.
- Anti-spatter spray (15 dollars): Useful but a wire brush and the right gas mix do almost as well.
- MIG pliers (25 dollars): Replace contact tip cleaning with regular pliers and a wire brush.
- Bench grinder for tungsten sharpening (80-200 dollars): Only needed once you start TIG welding. A flap disc on your angle grinder works in the meantime.
- Tig water cooler unit (350+ dollars): Only matters past the 200-amp continuous-use range that hobbyists rarely hit.
The pattern is consistent — buy the welder, helmet, gloves, jacket, fire extinguisher, and consumables for your first project. Add tools as specific projects demand them. Almost everyone who starts with a complete shop ends up with 30-40% of their tools rarely-used clutter.
Hidden Costs That Catch Beginners Off Guard
Three recurring costs blindside first-year welders: gas cylinder rental and refills, electrical service upgrades for 240V welders, and consumables — wire, tips, gas diffusers, grinder discs. These add 200-400 dollars annually beyond the upfront investment. Plan for them or end up shopping mid-project.
The hidden costs that matter:
- Gas cylinder rental and refills (180-300 dollars first year): Most home welders rent rather than buy a cylinder because purchase is 250-450 dollars but rental is 50-100 dollars per year plus refills.
- Wire and consumables (60-150 dollars per year): A 10-pound spool of solid MIG wire is 35-50 dollars and lasts 12-30 hours of weld time.
- Grinder discs (40-80 dollars per year): Cutoff wheels burn through at one per 20 minutes of cutting; flap discs last 5-10 hours of grinding.
- Replacement contact tips and nozzles (30-60 dollars per year): Spatter wear means replacing tips weekly during active projects.
- Electrical service upgrade (300-1,500 dollars one-time, optional): 240V welders need a 30-50 amp dedicated circuit. If your garage does not have one, an electrician’s visit is needed.
- Ventilation upgrades (50-300 dollars): A through-wall fan or shop-vac with capture nozzle prevents indoor fume buildup.
The two biggest surprises are gas costs and electrical service upgrades. Both are best researched before buying the welder, not after. A 240V welder you cannot plug in is an expensive paperweight until the electrical work happens. Read about ventilation specifically in our guide on welding burns first aid for the safety angle.
Starter Welder Buying Decisions That Save Money Long-Term
Three buying decisions pay back across years: choose 120V/240V dual-voltage from day one, prefer brand-name spare parts availability over the cheapest unit, and buy the auto-darkening helmet right rather than upgrading later. Each choice adds 20-50% to upfront cost but saves 200-500 dollars in unnecessary upgrades.
Long-term-smart choices:
- Dual-voltage welder: 120V works at any standard outlet, 240V handles thicker steel as your skills grow. Buying single-voltage means re-buying when projects exceed your unit.
- Brand with spare parts (Lincoln, Miller, Hobart, ESAB, Forney): Off-brand units are 30-40% cheaper but parts are unobtainable in 3-5 years. You replace the welder instead of repairing it.
- Pro auto-darkening helmet (150 dollars range) vs cheap (40-60 dollars range): Cheap helmets fail or auto-darken inconsistently. Pro helmets last a decade.
- Cylinder you own vs rent: If you weld 50+ hours per year, owning a cylinder pays back in 3-4 years. If you weld 10-20 hours per year, rental is cheaper for life.
- 240V circuit installed before buying: Most beginners regret 120V flux-core welders within a year. Wire the circuit, then buy the welder.
The pattern is consistent across hobbyist welding: cheap upfront purchases get replaced. The 600-dollar starter kit that becomes a 1,200-dollar kit after a year cost 1,800 dollars total. Buying the 1,200-dollar capable kit upfront saves the 600-dollar replacement step. Read our deeper analysis in best budget welder under 300 dollars.
Frequently Asked Questions
Can I start welding at home for under 300 dollars?
Technically yes with a Harbor Freight flux-core welder and minimum PPE, but expect frustrating welds, weak machine duty cycle, and replacement within 6-12 months. The realistic minimum that gets you usable welds and 5-plus years of life is around 600 dollars total including PPE.
Do I need 240-volt power to weld at home?
Not for thin metal up to 1/4 inch on most 120V flux-core or MIG welders. For consistent welds on thicker steel and aluminum, 240V is essentially required. Many beginners regret choosing 120V-only within their first year because projects naturally grow.
What is the cheapest welder that actually works for hobbyists?
Forney Easy Weld 140 (flux-core, no gas needed) and Lincoln K2278-1 Handy Core are real current entry-level machines that produce reliable welds on thin steel hobby projects, generally 350-550 dollars depending on retailer and bundle. Below 300 dollars almost every welder has duty-cycle or wire-feed issues that frustrate beginners.
How much does welding gas cost per year for a hobbyist?
A 75-25 argon-CO2 cylinder rental and refills total roughly 180-250 dollars per year for someone welding 30-50 hours annually. Buying a cylinder outright costs 250-450 dollars and refills are 30-60 dollars each.
Is welding training worth the cost?
For pure hobbyists, no. YouTube and free community resources teach the same MIG techniques. For people considering certification or fabrication careers, even a 200-dollar community college class pays back through accelerated skill development. Self-taught is the dominant path for home welders.
What is the most expensive part of starting a home welding setup?
The welder itself for low-budget setups, then PPE for the 200-dollar bracket, then the gas cylinder for ongoing operation. For higher-budget setups (1,500-plus dollars) the welding table and a quality auto-darkening helmet often equal or exceed the welder cost.
The One Cost Most Beginners Underestimate
The line item that surprised me most in year one was consumable replacement, not equipment. Contact tips, flap discs, gas refills, replacement gloves — the $186 I spent on consumables was 14% of total year-one cost, and the budget articles I read going in barely mentioned it. If you weld 4-8 hours a week, plan $30-$60/month for consumables for the first six months while you find your wear rate. After that the rate drops as your technique stops chewing through tips at three times normal.
Related Articles
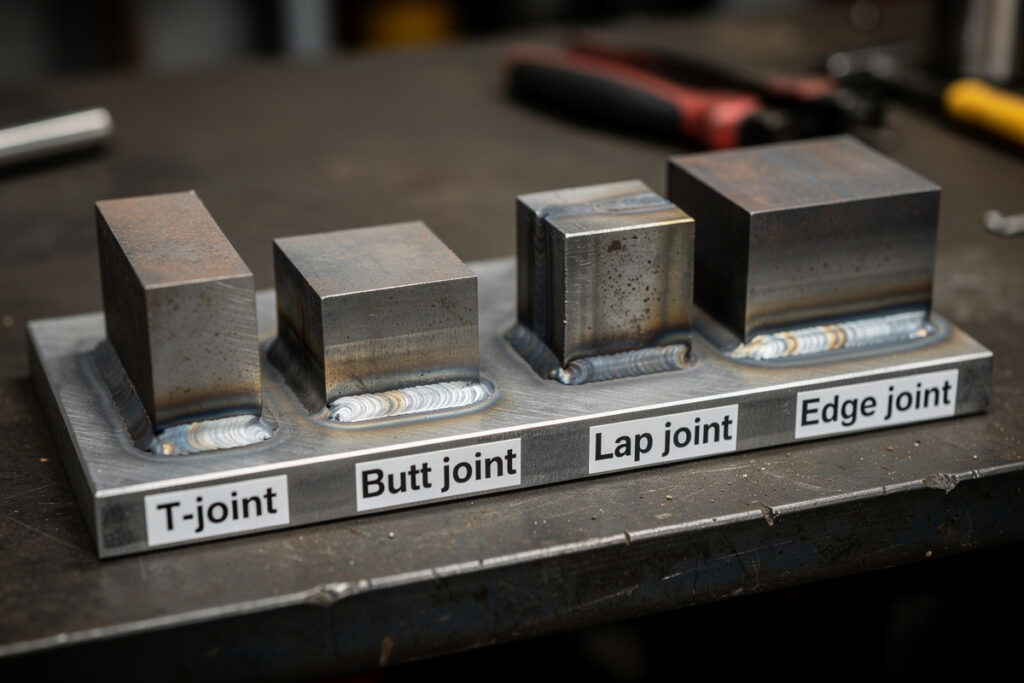
- Welding Joint Types Guide — Butt, lap, T, corner, and edge explained
- Gas vs Gasless MIG Explained — Which setup for your first welder
- Common Beginner Welding Mistakes and How to Avoid Them — The 11 mistakes every beginner makes and their fixes
- 10 First Welding Projects That Teach Core Skills — Skill-building projects in the right order
- How Long Does It Take to Learn Welding? — Realistic hour-by-hour timeline for home welders
- Welding Terms Glossary — 50+ essential terms for home welders
- How to Set Up a Home Welding Workshop — Power, space, ventilation, and layout checklist
- Welding for Beginners Complete Guide
- Best Budget Welder Under $300
- MIG vs TIG vs Stick Welding
- Welding Burns First Aid
- DIY Welding Fire Pit Build Guide
- How to Identify Mystery Steel
- Essential Welding Equipment Guide
- Welding Consumables Guide
- Best Welding Helmet for Home Use
- First Year Welding Equipment Checklist
- Welding Safety Guide
Discussion (0)