A motivated beginner welding 4-6 hours per week reaches basic MIG competency — clean flat-plate beads, functional tack welds, simple projects like a welding cart — in roughly 20 hours of arc time, or 4-6 weeks. Intermediate skill (out-of-position joints, self-diagnosed defects) takes 60-100 hours, or 3-6 months.
I hit the 20-hour mark around week five and could lay a straight bead on flat plate with my YesWelder MIG-PRO205DS running 0.030 Lincoln SuperArc L-56 — not a pretty bead, but one that penetrated and held. The transition from “this thing makes sparks” to “I can build something that will not collapse” happened somewhere in the 15-20 hour window, and having a DIY welding project goal was what kept me at the bench when the beads looked terrible. Most beginners quit between hour 3 and hour 8 because the gap between “I understand the theory” and “my hands produce the result” is wide and humbling. If you push through hours 8-15, welding becomes a skill you own rather than one you are borrowing from YouTube. For context on whether the learning curve itself is difficult, read is welding hard to learn. For the broader beginner journey, the welding for beginners guide covers everything.
Hours 0-10: Learning to Run a Bead on Flat Plate
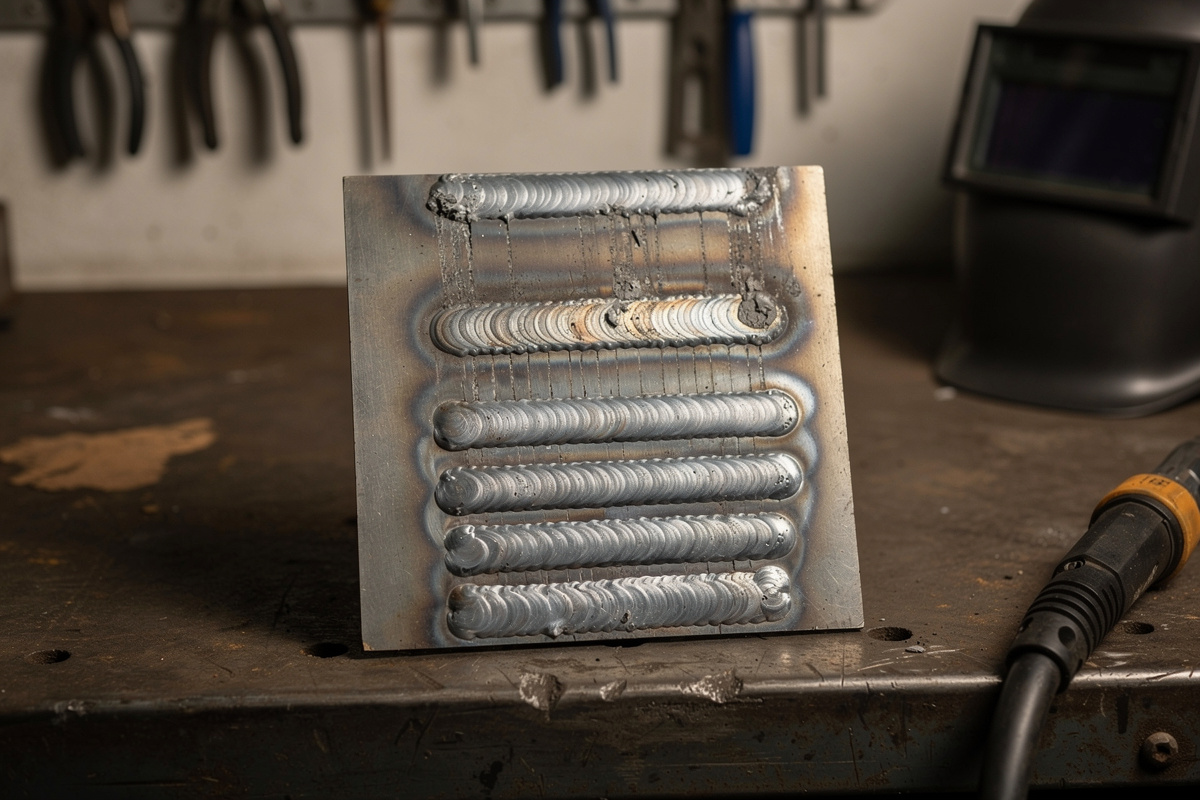
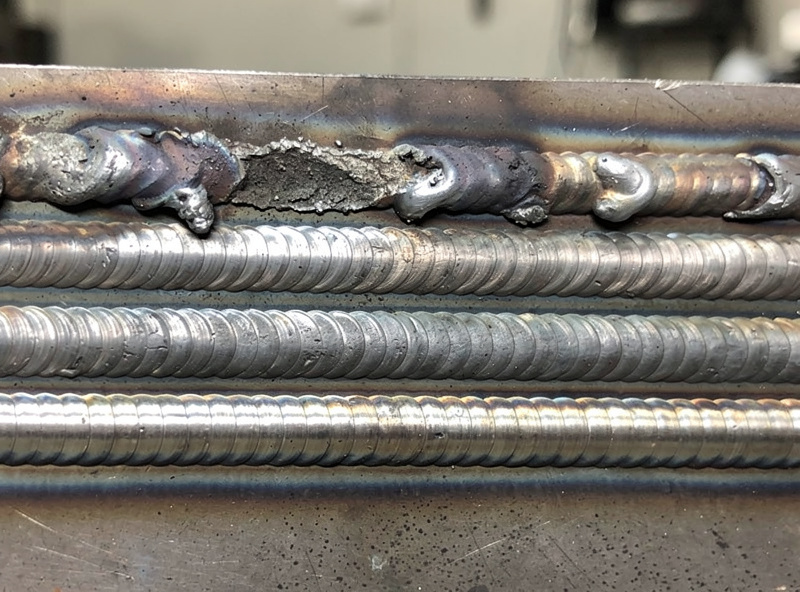
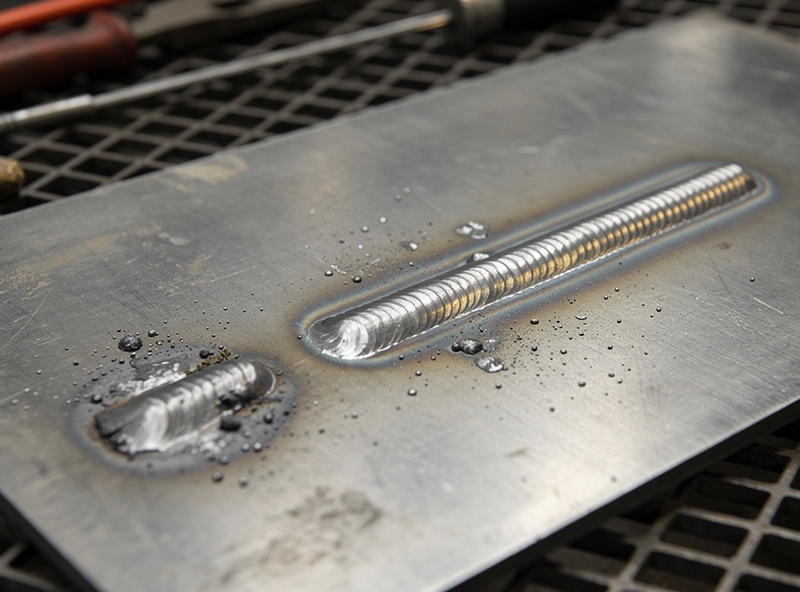
The first 10 hours are entirely about running straight beads on flat scrap steel — no joints, no projects, just bead after bead on 1/8-inch flat bar. This is the phase where arc start, travel speed, gun angle, and stickout become muscle memory that happens without conscious thought. By hour 10, a dedicated beginner produces beads that travel in a straight line and have consistent width, though ripple spacing and tie-in at the edges will still be uneven.
What the first 10 hours actually look like:
- Hour 0-2: The arc start is terrifying. You flinch the first 30 times the arc lights. The helmet auto-darkens a half-second late the first few times because you are not striking the arc confidently enough to trigger the sensor — even on a four-sensor helmet like the Lincoln Viking 3350 or Optrel Crystal 2.0, the trigger needs a real arc, not a hesitant scratch. Beads wander, stickout varies from 1/8 inch to 1 inch, and every third bead gets a wire stub or burnback because the wire-speed-to-voltage balance is wrong. This is normal and everyone goes through it.
- Hour 3-5: The flinch disappears. You start seeing the puddle instead of just the bright light. Beads still wander and are inconsistently wide, but the concept of “watch the puddle, not the arc” starts clicking. Wire speed and voltage become things you adjust deliberately rather than twisting randomly.
- Hour 6-8: This is the most dangerous phase for quitting. The beads are straighter but still ugly, and the gap between what a YouTube video weld looks like and what your weld looks like is discouraging. Push through this — the next breakthrough is at hour 10-12 when gun angle becomes automatic.
- Hour 9-10: You can run a 6-inch bead that is straight, consistent width, and has recognizable ripple pattern. Penetration is still inconsistent — some sections of the bead dug in, others sat on top — but the bead looks like welding, not like a seagull walked through wet concrete.
The reference for what “good” looks like at this stage is a MIG welding settings chart paired with the right voltage and wire speed. For troubleshooting when the beads are not improving, see the welding troubleshooting guide.
Hours 10-30: Joints, Fit-Up, and Your First Real Project
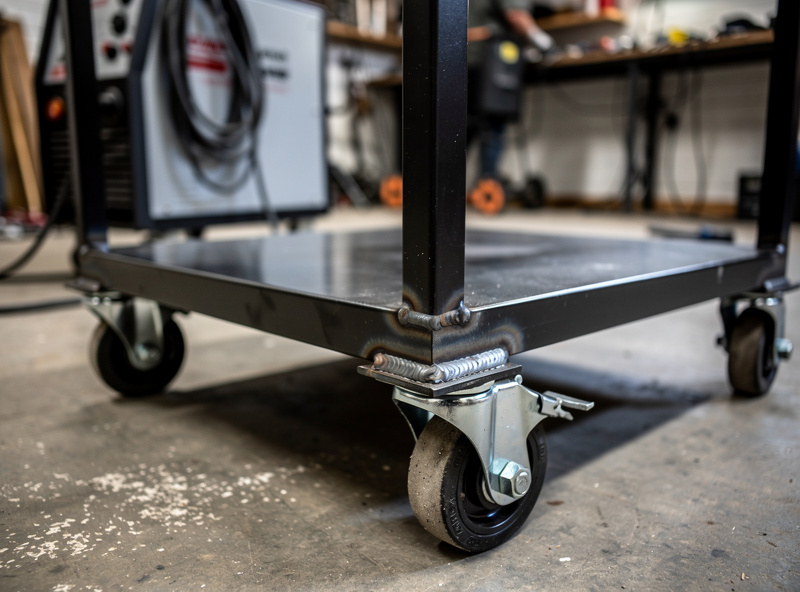
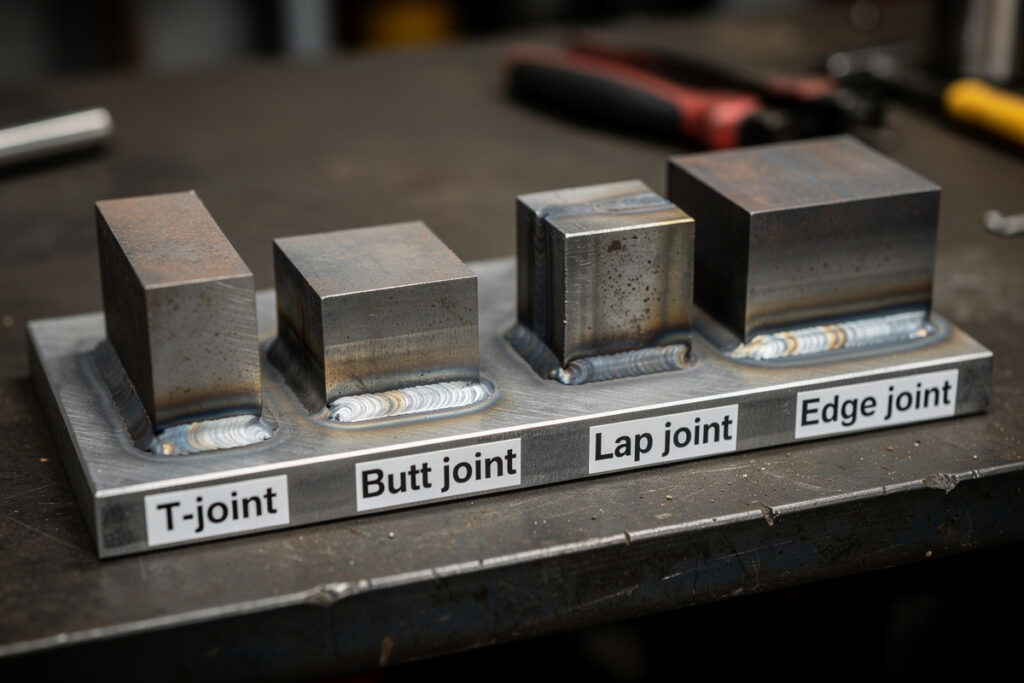
Between hour 10 and hour 30, you transition from running beads on flat plate to welding actual joints — T-joints first (the easiest), then lap joints, then butt joints (harder than they look), then outside corner joints. This is also the window where most beginners complete their first real project — a welding cart, a fire pit ring, a set of sawhorse brackets — something with multiple joints that has to fit together and hold weight.
What hours 10-30 look like:
- Hour 10-15: T-joints on 1/8-inch flat bar become consistent. You learn that the puddle behaves differently when gravity pulls it downward on a vertical leg. The key breakthrough here is reading the puddle’s wetting action — seeing whether the filler metal is flowing into both sides of the joint or just piling up on one side. Proper work angle for T-joints (45 degrees) becomes automatic.
- Hour 15-20: Butt joints on 1/8-inch plate with a 1/16-inch root gap are the first real test. Burn-through happens. Learning to leave the right root gap — too tight and no penetration, too wide and the puddle falls through — takes 5-10 hours of trial. By hour 18-20, butt joints are functional even if the back side of the weld is not pretty.
- Hour 20-25: First real project. A welding cart is the canonical first project because it is all T-joints on 1/8-inch angle iron — forgiving, functional, and teaches you that fit-up matters more than welding skill. A project with tight, square fit-up welds beautifully even with mediocre technique. A project with 1/8-inch gaps fights you the entire time. After one project, “fit-up is everything” becomes something you believe instead of something you read.
- Hour 25-30: You can complete a small project from cut list to finished welds in a weekend. Beads are not Instagram-worthy but they penetrate and the project does not wobble or collapse. The DIY welding fire pit build is a good reference for a second-project scope.
A critical note: hours 15-25 are when the difference between gas-MIG and flux-core becomes most visible. Flux-core throws more spatter and leaves slag that needs chipping and wire-brushing between passes, which noticeably stretches the cleanup time on every project compared to gas-shielded MIG’s cleaner bead. This is the point where many flux-core beginners start researching gas conversion. For the gas-vs-flux decision, see MIG vs TIG vs Stick and the essential welding equipment guide.
Hours 30-100: Out-of-Position Welding, Diagnostics, and Process Switching
The jump from “I can weld flat things” to “I can weld anything in any position” is the 30-100 hour window. This is where vertical welding, overhead welding, and multi-pass techniques enter the practice rotation. It is also the point where most welders start considering a second process — usually stick welding for outdoor work or TIG for clean sheet-metal and aluminum. My friend who has been welding for decades says this is the phase where welders self-sort into “fabricators” (building furniture, gates, frames) and “technicians” (chasing perfect beads on exotic metals). Both are valid; the difference is which projects actually get finished.
What hours 30-100 look like:
- Vertical-up MIG (hour 30-50): Vertical welding requires a completely different technique than flat — slower travel speed, triangular weave pattern, and a body position that lets you track the puddle’s upward progress. The first 10 vertical beads will sag and drip molten metal onto the floor. The breakthrough is learning to freeze the puddle momentarily at each weave pause, using the previous freeze as a shelf for the next puddle. By hour 50, vertical-up welds on 1/8-inch plate are functional.
- Reading defects (hour 40-60): You stop googling “why does my weld look bad” and start diagnosing specific defects — “that undercut was from too fast travel speed on the vertical leg, not from voltage.” The switch from symptom-based troubleshooting to cause-based troubleshooting is the signal that intermediate skill has arrived. The welding troubleshooting guide and MIG spatter guide cover the common defect patterns.
- Second process (hour 50-80): Most welders who started on MIG add stick welding around hour 50-60 for outdoor projects. Stick’s learning curve is steeper for arc starts but flatter for technique — once you can strike and maintain the arc, the bead goes where you point it. TIG is the opposite: arc start is easy (foot pedal), but feeding filler rod with your off-hand while controlling heat and travel speed is like learning to rub your stomach and pat your head simultaneously.
- Multi-pass welds (hour 60-100): Welding material thicker than 1/4 inch requires multiple passes — root pass for penetration, fill passes for volume, cap pass for appearance. Multi-pass technique adds inter-pass cleaning (wire brush between every pass) and heat management (letting the workpiece cool between passes to avoid warping).
For the TIG learning curve specifically, see the TIG welding guide. For the equipment required at this stage, the essential welding equipment guide covers what changes.
What “Learned” Actually Means: Milestones Instead of a Destination
There is no single moment where you know how to weld. Welding skill is a set of milestones, not a finish line. A welder who can build a garden gate may not be able to weld aluminum. A welder who can TIG stainless steel sanitary tube may not be able to stick-weld a structural repair outdoors in the wind. Each process and material is a separate sub-skill that takes its own 20-60 hours to reach basic competency.
The milestones that matter for home welders:
- Functional flat-plate MIG (10-20 hours): You can join two pieces of 1/8-inch mild steel in a T-joint and the result holds weight without breaking.
- Project-ready (20-40 hours): You can plan a small project, cut the steel, fit it up, weld all joints, and the finished piece is square and functional.
- Out-of-position (40-80 hours): You can weld vertical and overhead joints on mild steel — necessary for any project taller than bench height.
- Multi-process (60-120 hours): You can switch between MIG, stick, and TIG and produce functional welds with each. The first process took 20 hours to learn; the second takes 10; the third takes 5.
- Self-diagnosing (80-150 hours): You hear the arc change and know the stickout drifted. You see the puddle shape and adjust travel speed without thinking. You look at a completed bead and name the defect and its cause in 5 seconds.
What Accelerates the Timeline (and What Slows It)
The single biggest accelerant is project-based practice — having a specific, real project that demands completion. Practice beads on scrap are better than nothing, but a project forces you to weld joints in sequence, manage fit-up, handle thermal distortion, and finish the piece. My first fire pit taught me more in 4 hours than the previous 15 hours of practice beads. The project forced me to weld joints in order, handle fit-up gaps I had not practiced, and live with my welds — because the fire pit was going in the backyard either way.
Factors that accelerate learning:
- Project-based practice: One project teaches more than 5 hours of practice beads because it forces out-of-position joints and fit-up problem-solving.
- Steel thickness variety: Practicing only on 1/8-inch plate teaches you to weld 1/8-inch plate. Welding 16-gauge sheet and 1/4-inch plate back-to-back teaches heat management.
- In-person feedback: One hour with someone who welds, watching your technique and correcting gun angle and stickout in real time, is worth 10 hours of solo practice. If there is a welder in your network, buy them lunch. If there is a community college welding class for 200 dollars, take it — the hands-on feedback pays for itself in saved hours of frustration. Just don’t confuse the two tracks: a full accredited program like the NCCER Welding curriculum runs roughly 1,150 hours across all four levels toward a certified, employable credential — more than ten times the 60-100 hour hobby-competency arc this timeline covers. A single evening or weekend class borrows a slice of that structured instruction without the certification, and that slice is what actually saves hours of frustration.
- Recording yourself welding: Your phone on a tripod recording your hands during a bead reveals stickout variation and gun angle drift that you cannot feel in the moment.
Factors that slow learning:
- Wrong machine for the goal: Learning TIG on a lift-TIG machine without a foot pedal teaches bad habits. Learning MIG on a flux-core-only welder when your projects need gas-MIG appearance means re-learning arc characteristics and cleanup habits again once you switch to gas — practice time that does not carry over cleanly.
- No project pressure: Practice without a deliverable drifts. A project with a deadline — “the fire pit needs to be done by Saturday for the barbecue” — forces focus and completion.
- Dirty practice metal: Welding on rusty, painted, or oily scrap teaches you to weld on contaminated metal — a useful skill but not the one you should learn first. Clean, mill-scale-removed mild steel produces the most predictable puddle and the fastest skill development.
- Skipping the basics for advanced techniques: Learning to weave before you can run a straight stringer bead. Learning to TIG aluminum before you can MIG weld a T-joint. The order matters — each skill builds on the previous one.
Frequently Asked Questions
How many hours does it take to learn MIG welding?
A beginner reaches functional MIG welding skill — straight beads on flat plate and simple T-joints — in roughly 20 hours of arc time with 4-6 practice hours per week, or about 4-6 weeks. The jump to out-of-position welding and consistent quality across all joint types takes an additional 40-80 hours, typically over 3-6 months.
Can I learn to weld in a weekend?
You can learn to strike an arc and run a wobbly bead on flat plate in a weekend. You cannot learn to weld joints reliably, read the puddle, or complete a functional project in one weekend. Expect roughly 10-15 hours of practice before the first bead you would show someone else, and 20-30 hours before your first real project.
Is TIG welding harder to learn than MIG welding?
Yes — TIG requires independent hand-feeding of filler rod while controlling heat with a foot pedal and travel speed with the torch hand, making it roughly 2-3 times slower to learn than MIG. Expect 40-60 hours to reach basic TIG competency versus 15-20 hours for MIG. However, MIG-to-TIG transition is much faster than learning TIG from scratch.
How long until my welds look professional?
Appearance-quality welds with consistent ripple pattern and even tie-in at the toes take roughly 60-100 hours of dedicated MIG practice, typically 4-8 months of hobbyist-level welding. The difference between hour-20 welds (functional, messy) and hour-100 welds (clean, sellable) is entirely practice volume, not talent.
What is the fastest way to learn welding at home?
Project-based practice with in-person feedback is fastest: pick a real project (welding cart, fire pit, workbench frame), practice the specific joints it requires on scrap first, then build the project. One hour of correction from an experienced welder watching your technique is worth 10 hours of solo practice. Record yourself welding to see stickout and angle drift.
How long does it take to switch from MIG to stick welding?
A competent MIG welder reaches functional stick welding in roughly 10-15 hours of practice. The arc-start technique is the main new skill — maintaining arc length as the electrode burns down takes about 5 hours to feel natural. The puddle-reading skill transfers directly from MIG, which is why the second process is always faster to learn than the first.
Discussion (0)