MIG welding uses a continuously fed wire electrode and shielding gas to produce clean, fast welds on steel, stainless, and aluminum. A 110V MIG handles metal up to 1/4-inch thick; 220V machines weld up to 1/2-inch steel.
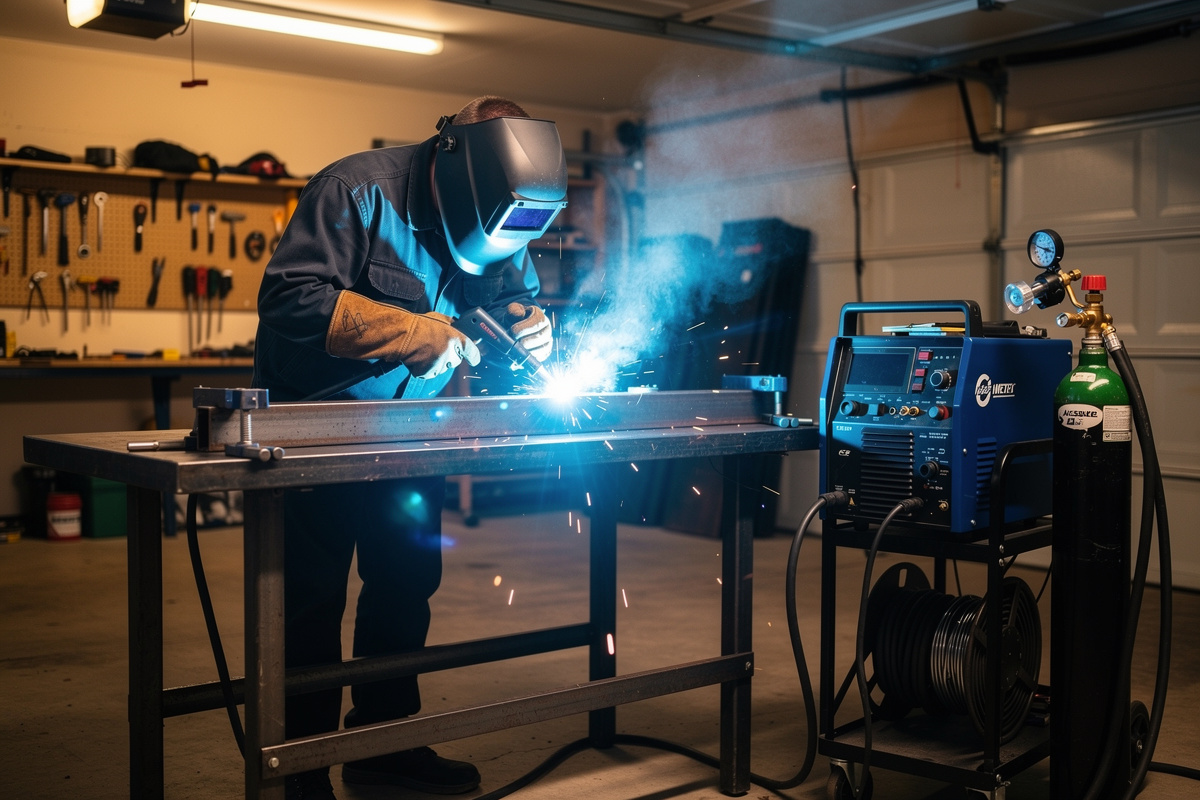
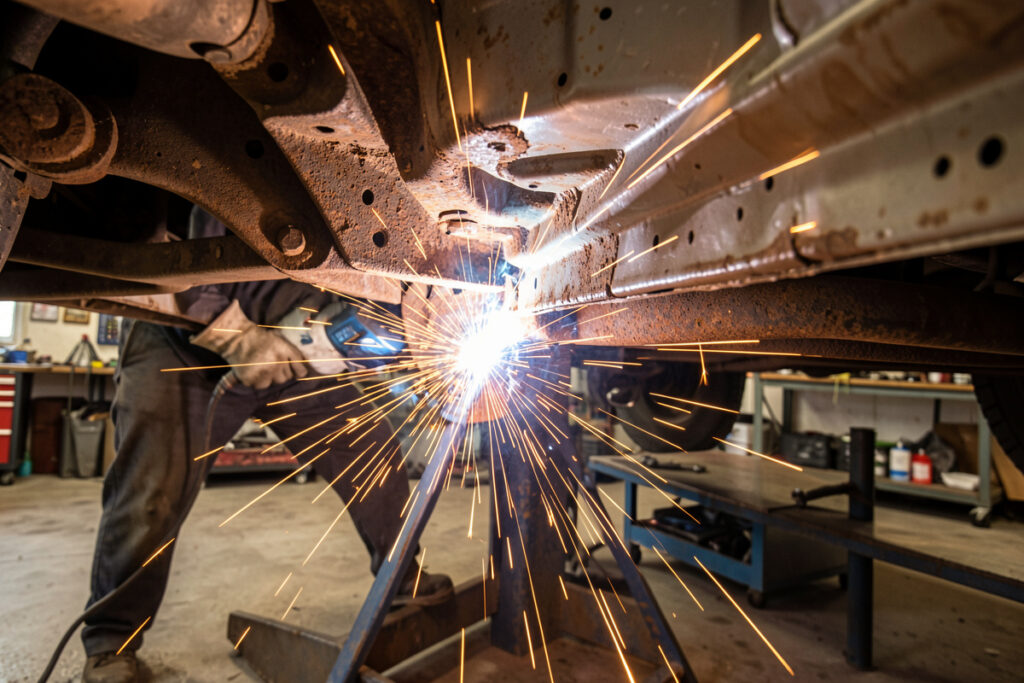
I run a YesWelder MIG-PRO205DS double-pulse MIG across roughly 80 home projects — sim rigs, garden bed frames, trailer fender repairs, fire pits, the welding cart that holds the welder itself. The reason MIG keeps earning its place over TIG and stick on most home jobs is not weld quality (TIG wins there) — it is that you can put a structurally sound bead on 1/8″ steel within an hour of unboxing the machine. This guide covers settings, wire selection, gas choices, techniques, and common problems. For first-time-welder context, see welding for beginners; for buyer’s logic before you purchase a machine, see best MIG welder for home garage and cost to start welding at home.
How MIG Welding Works
MIG welding feeds a spool of solid or flux-cored wire through a contact tip at 150 to 700 inches per minute. The wire becomes the filler metal and one electrode. An electrical arc between the wire and workpiece melts both, creating a molten pool that solidifies into the weld bead. Shielding gas flows from the gun nozzle to protect the pool from atmospheric contamination.
The power source is a constant-voltage (CV) transformer or inverter. You set voltage directly and wire speed indirectly controls amperage. Higher wire speed means more current because more wire must be melted per second. This inverse relationship between the two knobs is what confuses beginners, but a MIG welding settings chart eliminates the guesswork by matching your metal thickness to recommended voltage and wire speed ranges.
Modern MIG machines use either transformer or inverter technology. Transformer-based welders are heavier and less expensive. Inverter welders weigh 30 to 50 percent less, offer smoother arc characteristics, and often include synergic control where you set wire speed and the machine automatically adjusts voltage. For home garage use, a 140-amp inverter MIG on a 20-amp 120V circuit handles most projects under 1/4-inch steel.
MIG Welding Settings Explained
Getting the settings right is the single biggest factor in producing quality MIG welds. Three variables control the arc: voltage, wire feed speed (WFS), and gas flow rate. Voltage controls arc length and penetration profile. Wire feed speed controls deposition rate and amperage. Gas flow measured in cubic feet per hour (CFH) protects the puddle.
For 16-gauge mild steel, start at 17 volts with wire speed around 250 inches per minute using 0.030-inch ER70S-6 wire (per AWS A5.18). For 1/4-inch plate, increase to 20-22 volts and 350-400 IPM. Use 20-25 CFH of 75/25 argon/CO2 shielding gas for most indoor work. If your bead sits on top of the metal without wetting in, raise voltage one click. If you burn through, lower voltage or increase travel speed. Listen for the steady frying-bacon hiss; popping or sputtering means voltage is too low or stick-out is wrong.
A full settings chart organized by metal thickness eliminates trial and error. The MIG welding settings chart on this site covers 24-gauge through 1/2-inch steel for common wire diameters. Print it and tape it to your welder cart so you never have to guess the starting point for a new project.
Wire Types and Selection
Two wire families dominate home MIG welding: ER70S-6 solid wire and E71T-GS flux-cored wire. Solid wire requires external shielding gas and produces the cleanest welds with minimal spatter. Flux-cored wire contains its own shielding compounds and works without a gas bottle, making it ideal for outdoor welding where wind would blow away shielding gas.
ER70S-6 is the standard for welding mild steel indoors. The “S-6” designation means higher silicon and manganese deoxidizers that handle mill scale and light rust without pre-cleaning. Common diameters are 0.024-inch for thin sheet metal, 0.030-inch as the all-purpose size, and 0.035-inch for 1/4-inch and thicker plate. Use 0.030 ER70S-6 if you buy only one spool. The full MIG wire size guide of 0.023 vs 0.030 vs 0.035 matches each diameter to amperage and thickness.
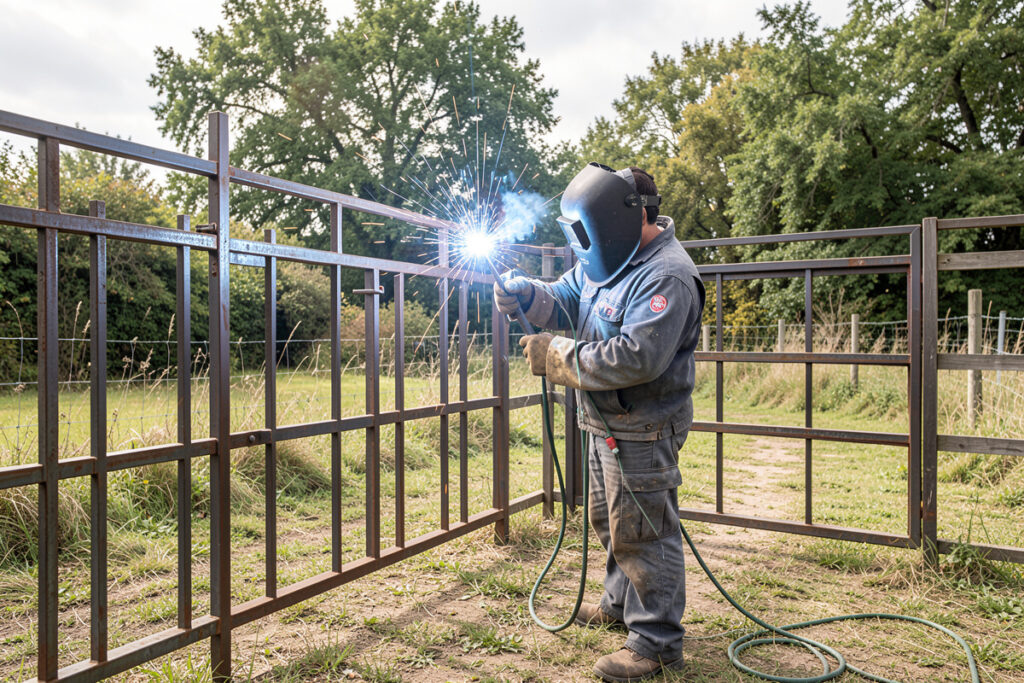
E71T-GS self-shielded flux-cored wire (per AWS A5.20) works on a MIG machine without a gas regulator. It produces more spatter and a slag layer you must chip off, but it welds through light rust and paint. The first time I tried flux-core indoors with the garage door closed, the smoke set off the kitchen fire alarm 30 feet away — flux-core throws noticeably more visible smoke than gas-shielded MIG because the flux itself is burning off along with the metal, and OSHA 29 CFR 1910.252(c) local exhaust applies even more strictly. This wire type is what makes a 110V MIG welder practical for fence repair, trailer fixes, and outdoor fabrication where dragging a gas bottle is impractical. For clean indoor work, always prefer solid wire with gas. Full consumables breakdown is in the welding consumables guide.
Shielding Gas Choices
Gas selection affects penetration depth, bead profile, and spatter level. The three common mixes for home MIG are 100% CO2, 75/25 argon/CO2, and 100% argon. Each has specific strengths depending on the metal and thickness you are welding.
75/25 argon/CO2 (C25) is the default for mild steel. It produces a stable arc, flat bead profile, and low spatter. A 40-cubic-foot bottle costs $80 to $120 to refill and lasts 8 to 15 hours of welding. For most home welders, this is the only gas they ever need. Buy a 40 or 80 CF bottle and a dual-gauge regulator set to 20-25 CFH flow rate. My full MIG gas mix chart comparing C25, C100, and C10 breaks down when each mix wins.
100% CO2 costs less per cubic foot and produces deeper penetration on thick steel. However, it creates more spatter and a rougher bead profile. Many budget welders ship with CO2-only setups. If you plan to weld steel thicker than 3/16-inch regularly, CO2 is a reasonable choice. For thinner material and cleaner results, upgrade to C25 when your CO2 bottle runs empty.
100% argon is required for aluminum MIG welding and stainless steel with matching wire. Never use C25 on aluminum — the CO2 will oxidize the aluminum puddle. If you want to MIG weld aluminum, you need a spool gun, 100% argon, and 4043 or 5356 aluminum wire, as my guide to MIG welding aluminum with a spool gun details. Most home welders skip MIG aluminum and use TIG instead for better control on thin aluminum sections.
Gas vs Flux-Cored Welding
Choosing between gas-shielded and flux-cored MIG depends on where you weld, what you weld, and how much cleanup you will accept. Both processes use the same MIG machine with a wire change and a gas toggle.
Gas MIG with solid wire and C25 shielding gas is the superior process for indoor garage work. It produces near-zero spatter, requires no slag chipping, and creates X-ray quality welds on mild steel. The weld bead is smooth and often needs only light brushing before painting. The downside is you need a gas bottle, which means a regulator, hoses, and periodic refills. On windy days above 10 mph, shielding gas blows away and weld quality degrades.
Flux-cored MIG (FCAW) works without gas and handles wind, rust, and paint. It is the go-to for outdoor repairs, farm equipment, and construction sites. The wire costs 20 to 40 percent more per pound than solid wire, and you will spend time chipping slag after every pass. Spatter is heavier, so keep anti-spatter spray on hand. For a home welder who occasionally fixes a gate post in the driveway, a roll of E71T-GS flux-cored wire is worth keeping in the shop alongside your solid wire spool. For the deeper metallurgy and opposite polarity, see flux core vs solid wire MIG.
MIG Welding Techniques
Proper technique produces strong, attractive welds consistently. The four variables under your control are travel angle, work angle, travel speed, and stick-out distance. Mastering these four elements eliminates 90 percent of common MIG welding problems.
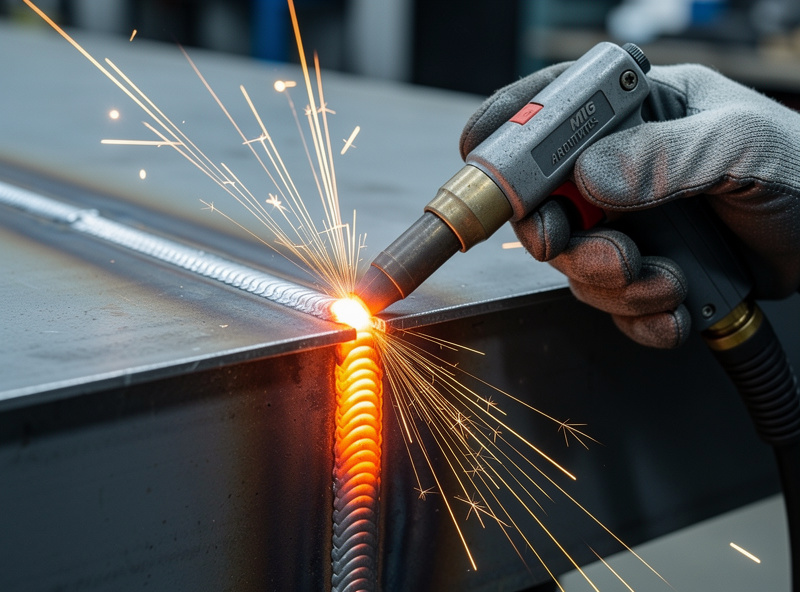
Hold the MIG gun at a 10-15 degree drag angle pointing backward into the puddle. This is called a trailing or drag technique and it gives you the best visibility and penetration on steel. Push technique (leading angle) gives a wider, flatter, lower-penetration bead, useful on aluminum and on thin steel where you want less burn-through; my guide to push vs pull MIG technique covers when each direction wins. For vertical-up welding, use a slight push angle and pause on each side of a weaving pattern to build the puddle upward against gravity. See MIG welding vertical and overhead for full out-of-position heat control.
Travel speed controls bead width and penetration. Too slow and you pile up metal with excessive heat input, risking burn-through on thin material; my guide to MIG welding thin sheet metal without burning through covers the low-heat technique. Too fast and the bead sits on top without fusing. A good starting speed produces a bead about twice the wire diameter wide. On 16-gauge with 0.030 wire, aim for a 1/8-inch wide bead. On 1/4-inch plate with 0.035 wire, target 3/8-inch to 1/2-inch bead width.
Maintain a 1/2 to 3/4-inch stick-out (contact tip to workpiece distance). Shorter stick-out gives more penetration; longer stick-out reduces heat input for thin metal. Keep your hand steady and slide the gun along the joint using your non-welding hand as a brace against the table. Do not freehand long beads until you can consistently lay short ones with good tie-in at the toes.
Common MIG Welding Problems
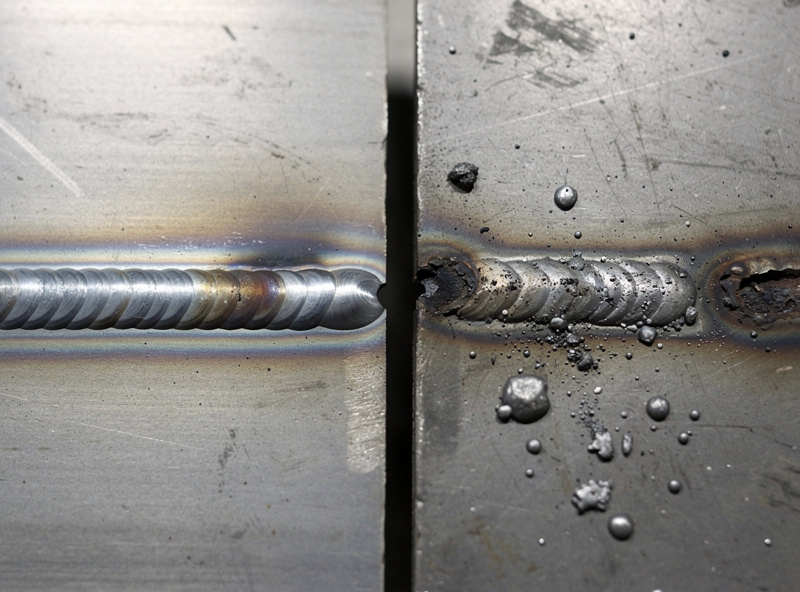
Every MIG welder encounters spatter, burn-through, porosity, and incomplete fusion at some point. Recognizing the cause quickly saves wire, gas, and frustration. Most problems trace back to three root causes: incorrect settings, poor technique, or contaminated base metal.
Spatter — those tiny metal balls stuck to your workpiece — usually means voltage is too low for your wire speed, your stick-out is too long, or your base metal is dirty. The MIG weld spatter guide covers all 10 common causes and their exact fixes. In most cases, bumping voltage one click, shortening stick-out to 1/2 inch, and wiping the joint with acetone solves the problem.
Burn-through happens when heat input exceeds what the base metal can absorb. On 16-gauge and thinner, burn-through is the most common failure. Reduce voltage, increase travel speed, or use a stitch welding pattern instead of a continuous bead. If your MIG welder keeps burning through wire, check that your drive roll tension is not too tight, which deforms the wire and causes erratic feeding that mimics a settings problem.
Porosity appears as visible bubbles or pinholes in the weld bead. It means gas is trapped in the solidifying metal, usually from insufficient shielding gas coverage. Check your gas flow rate (20-25 CFH), verify the bottle is not empty, and clean the nozzle of spatter buildup. Wind, oil on the base metal, and rust under the joint also cause porosity. See the welding porosity troubleshooting guide for detailed prevention methods.
MIG vs TIG vs Stick Welding Comparison
Understanding when to use MIG versus TIG or Stick welding helps you choose the right process for each project. Each process has clear advantages depending on material type, thickness, position, and required weld quality.
| Feature | MIG (GMAW) | TIG (GTAW) | Stick (SMAW) |
|---|---|---|---|
| Learning Curve | Easiest — beginner-friendly | Hardest — requires coordination | Moderate — electrode control |
| Weld Speed | Fastest — continuous wire feed | Slowest — manual filler rod | Moderate — electrode changes |
| Weld Quality | Good — clean with gas | Best — precise, no spatter | Good — but slag removal needed |
| Material Thickness | 24-gauge to 1/2-inch | 24-gauge to 1/4-inch (typical) | 16-gauge to unlimited |
| Outdoor Use | Poor with gas / OK with FCAW | Poor — gas coverage needed | Excellent — no gas bottle |
| Equipment Cost | $200-$800 | $400-$2,000+ | $100-$500 |
| Aluminum Capability | Possible with spool gun | Excellent — primary use | Difficult — special rods |
| Position Welding | All positions possible | All positions — best control | All positions — with skill |
| Consumables Cost | Low — wire + gas | Medium — tungsten, gas, filler | Lowest — electrodes only |
| Portability | Needs gas bottle (or FCAW) | Needs gas bottle | Most portable — no gas |
For home garage beginners working on mild steel projects, MIG is the recommended starting process. It produces acceptable welds faster than TIG or Stick with less skill required. Once you are comfortable with MIG, adding TIG capability lets you weld aluminum and produce cosmetic welds on visible joints — the TIG welding guide covers setup and metal selection for that step. Stick welding complements both for outdoor repairs and heavy structural work where portability matters. The full process comparison is in MIG vs TIG vs stick welding.
Setting Up Your MIG Welder for the First Time
A proper initial setup prevents common mistakes and gets you welding within 30 minutes of unboxing. Follow this sequence every time you change wire type or diameter.
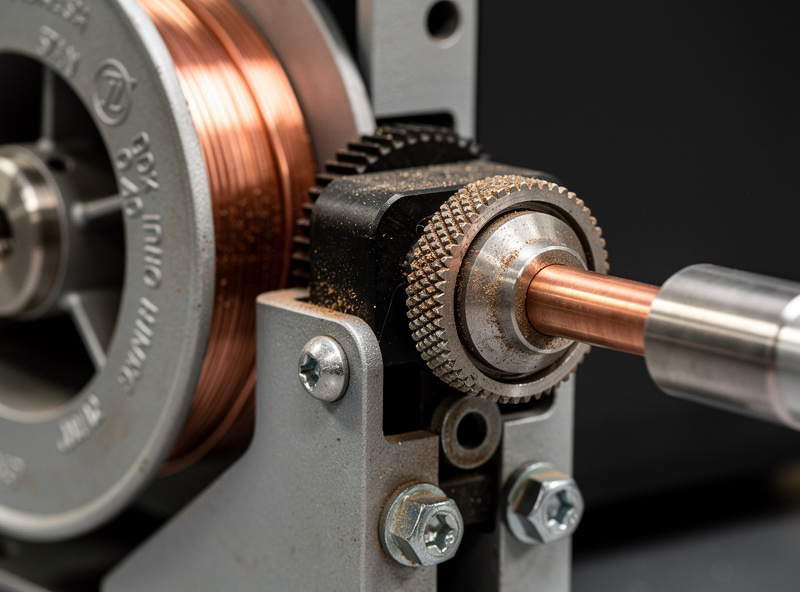
Install the correct drive roll for your wire. Solid wire uses a V-groove roll; flux-cored wire uses a knurled roll. Set the drive roll tension just tight enough to feed wire without slipping — you should be able to stop the wire with your gloved hand and the drive roll slips rather than birdnests the wire. Thread the wire through the gun liner, install the correct contact tip for your wire diameter, and attach the nozzle.
Connect the gas bottle with the regulator set to 20-25 CFH. Open the cylinder valve fully, then crack it back a quarter turn. Set your machine polarity to DCEP (electrode positive) for solid wire or DCEN (electrode negative) for flux-cored wire. This polarity setting is critical — wrong polarity produces ugly, porous welds. Clamp your ground to clean bare metal on the workpiece or welding table.
Test your setup on scrap metal of the same thickness as your project. Lay a 2-inch bead, examine the bead profile, listen to the arc sound (should be a steady sizzling bacon sound), and adjust voltage or wire speed until the bead is flat with slight crown and good toe fusion on both sides. This 5-minute test run prevents wasting material on your actual project. Per OSHA 29 CFR 1910.252(a), clear combustibles 35 feet from the work area before you spark up — including the cardboard packaging the welder shipped in.
Starting Your First MIG Welding Projects
The best first MIG projects use 16-gauge or 14-gauge mild steel flat bar and angle iron. These thicknesses are forgiving on settings and allow you to practice beads, butt joints, lap joints, and T-joints without fighting burn-through. Avoid starting with sheet metal thinner than 18-gauge or plate thicker than 3/16-inch until you have burned through 5 pounds of wire on practice coupons.
Good beginner projects include a welding cart to organize your equipment, simple steel shelving brackets, or a small fire pit ring. Each of these uses basic straight cuts and square joints that let you focus on technique rather than complex fit-up. The DIY welding fire pit project includes a full cut list and step-by-step weld instructions rated for beginner skill level.
As your skills develop, progress to projects that incorporate curved cuts, multiple joint types, and thinner material. A welding cart build teaches fit-up and dimensioning. A sim rig frame build introduces tube welding and structural considerations. The complete project ladder is in the DIY welding projects guide. Equipment selection across machines and PPE lives in the essential welding equipment guide; safety and ventilation in the welding safety guide; defect diagnosis in the welding troubleshooting guide.
The Single Setting That Fixes Most Problems
If your MIG welds are inconsistent, before you change voltage, wire speed, gas flow, or technique — measure your stick-out. Lay the gun against the workpiece in your normal posture and check that wire extends 1/2 to 5/8 inch beyond the contact tip. Beginners drift to longer stick-out (3/4 inch or more) because it feels easier to see the puddle, but added extension raises circuit resistance and measurably drops your effective amperage — Elga’s own stick-out testing shows amperage dropping from roughly 282A to 213A as contact-tip-to-work distance goes from 16mm to 25mm on the same settings — and starves the weld of penetration. The single highest-yield habit I built in my first year was pulling the gun closer to the work — half my “settings problems” disappeared the day I stopped welding from a longer-than-spec distance. Tape a 5/8-inch reference mark on your gun nozzle if you cannot reliably hold the distance by feel.
Frequently Asked Questions
What is the best wire size for MIG welding at home?
0.030-inch ER70S-6 is the best all-purpose wire size for home MIG welding. It handles 24-gauge through 1/4-inch mild steel on both 110V and 220V machines without changing spools. Keep one spool of 0.030 as your default and add 0.035 only if you regularly weld 3/8-inch or thicker plate.
Do I need gas for MIG welding?
Solid wire MIG requires shielding gas — either 75/25 argon/CO2 for mild steel or 100% argon for aluminum. Flux-cored wire (E71T-GS) does not need external gas because the flux inside the wire creates its own shielding. You can weld outdoors with flux-cored wire where wind would blow shielding gas away.
What voltage should I use for 1/8-inch steel MIG welding?
For 1/8-inch mild steel, use 18-19 volts with 0.030 wire at 280-300 IPM wire feed speed and 20-25 CFH C25 gas. If your machine only has numbered dials instead of voltage readout, start at the midpoint setting and adjust one click at a time based on bead appearance and arc sound.
Can MIG welders weld aluminum?
Yes, MIG welding aluminum requires 100% argon shielding gas, 4043 or 5356 aluminum wire, and a spool gun to prevent wire feeding problems. Set voltage 2-3 volts higher than equivalent steel settings and use a push technique for gas coverage. Most hobbyists find TIG easier for thin aluminum projects.
Why does my MIG weld look so spattery?
Excessive MIG spatter usually comes from voltage set too low for your wire speed, stick-out longer than 3/4 inch, dirty base metal, or wrong polarity. Check that your machine is set to DCEP for solid wire, shorten stick-out to 1/2 inch, and clean the joint to bright metal. Increasing voltage one click often eliminates spatter immediately.
What is the difference between MIG and flux-cored welding?
MIG uses solid wire with external shielding gas for the cleanest welds. Flux-cored welding uses wire with flux inside that creates its own shielding without a gas bottle. Flux-cored produces more spatter and requires slag chipping, but works outdoors in wind and on rusty metal. Both run on the same MIG machine — you just change wire and toggle gas on or off.
How thick of metal can a 110V MIG welder handle?
A 110V MIG welder rated at 140 amps can weld mild steel up to 1/4-inch thick in a single pass using 0.030 wire. For 3/8-inch steel, you need multiple passes or step up to a 220V machine rated at 200+ amps. On 24-gauge through 16-gauge sheet metal, a 110V MIG welder performs as well as a 220V unit.
Related Articles
- MIG Welding Settings Chart: Voltage and Wire Speed by Metal Thickness
- Why Is My MIG Weld So Spattery? 10 Causes and Exact Fixes
- Why Does My MIG Welder Keep Burning Through Wire? 8 Causes
- MIG Welding for Beginners: Sim Rig Frame Project
- Welding Porosity: Causes, Prevention, and How to Fix Bad Welds
- Best MIG Welder for Home Garage
- Welding for Beginners
- Essential Welding Equipment Guide
- Welding Safety Guide
- Welding Troubleshooting Guide
- Welding Consumables Guide
- Welding vs CNC Routing
- Best Welding Helmet for Home Use
- DIY Welding Projects Guide

Discussion (0)