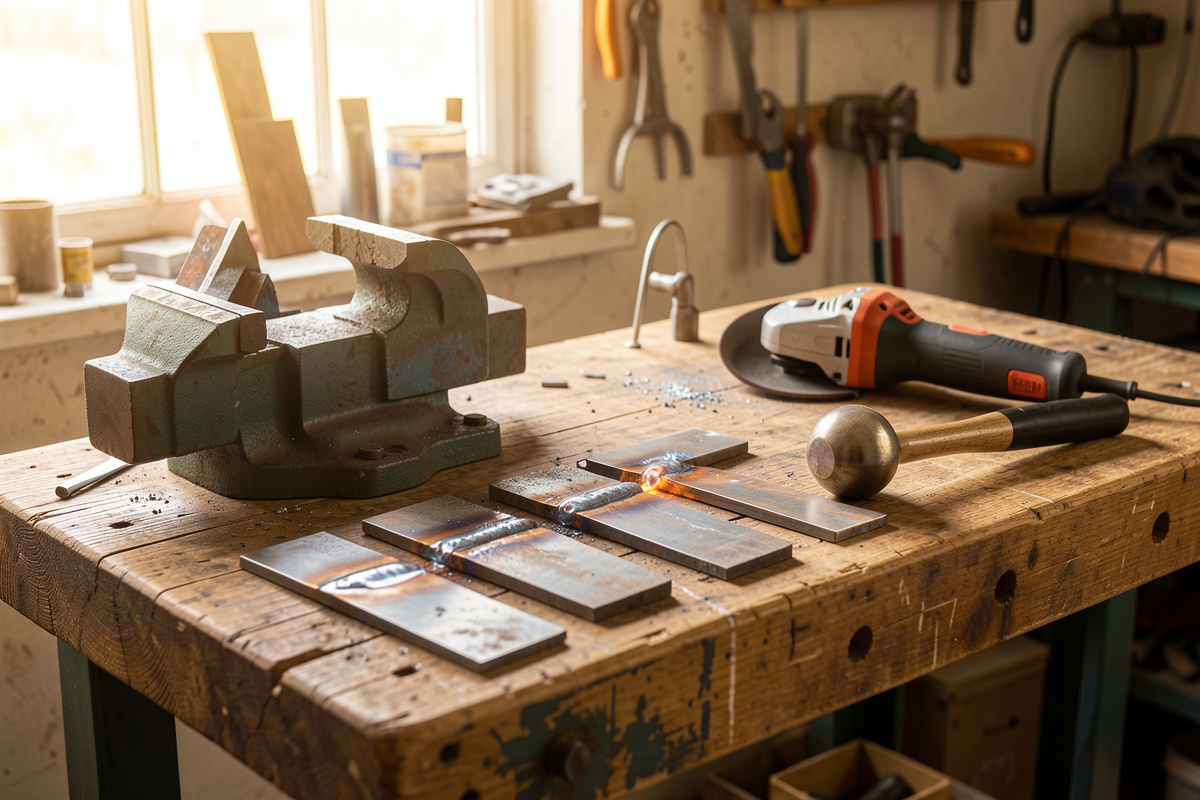
DIY weld testing means breaking a sample of your own welds to see what is really inside them, and on a home bench you can do it with a vise, a hammer, an angle grinder, and a hacksaw. The three methods that matter — the fillet break test, the nick-break test, and the guided bend — cost nothing but a scrap coupon and ten minutes, and they expose the fusion failures that no surface inspection can catch.
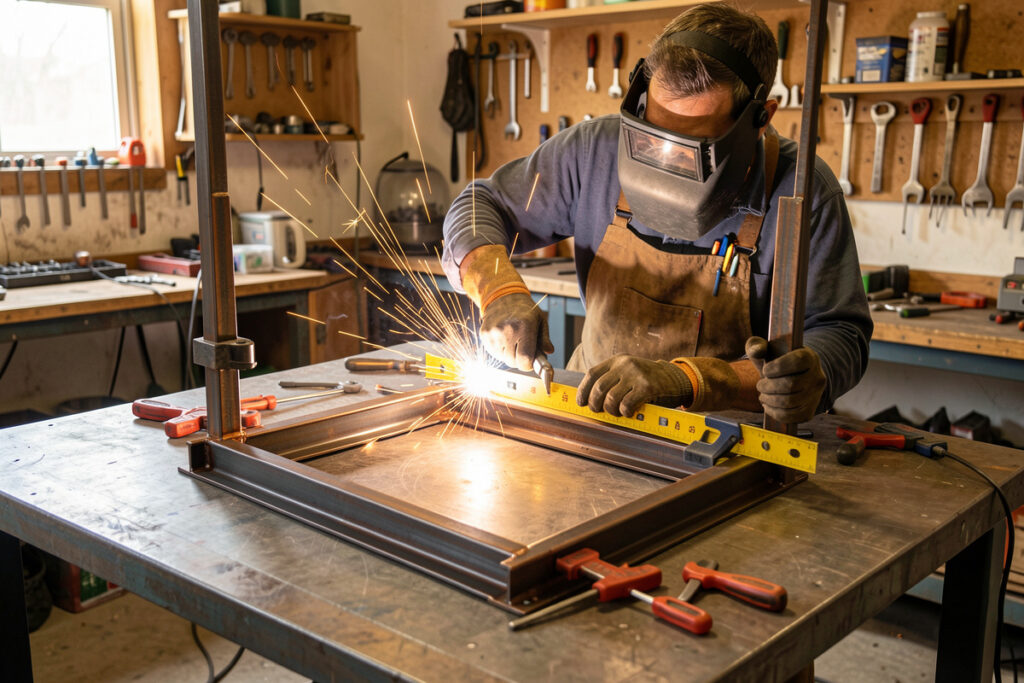
I run these constantly on my own bench. Every time I change a setting on my YesWelder MIG-PRO205DS, switch fillers, or try a new joint, a matching coupon gets welded and broken before the real part is trusted. This is the single highest-value habit in my whole shop, and my welder friend Mike drilled it into me early: a weld you have not tested is a guess. Here is exactly how I run each test, what the broken faces tell you, and how to read a result back to a fix at the machine.
Why Destructive Testing Beats Looking Pretty
Destructive testing exposes the two failures that hide under a perfect-looking bead: lack of fusion and internal porosity. A weld can sit on top of unmelted base metal — cold lap — and look flawless from above while having almost no real strength. The only way to prove fusion on a budget is to break a sample and read the fracture face. Surface appearance and weld strength are not the same thing, and destructive testing is how you stop confusing them. The professional versions of these same break and bend tests are standardized in AWS B4.0 (Standard Methods for Mechanical Testing of Welds), so the home bench is running a simplified form of a real lab procedure.
The payoff is a fast, honest feedback loop. You change one variable, weld a coupon, break it, and read the result — minutes from question to answer. Compare that to discovering a fusion problem when a finished frame fails under load. I keep a scrap bin of offcuts specifically for coupons, because the cost of a test is trivial against the cost of trusting a bad weld. Once you have broken a few welds and seen cold lap in the flesh, you stop trusting your eyes alone forever.
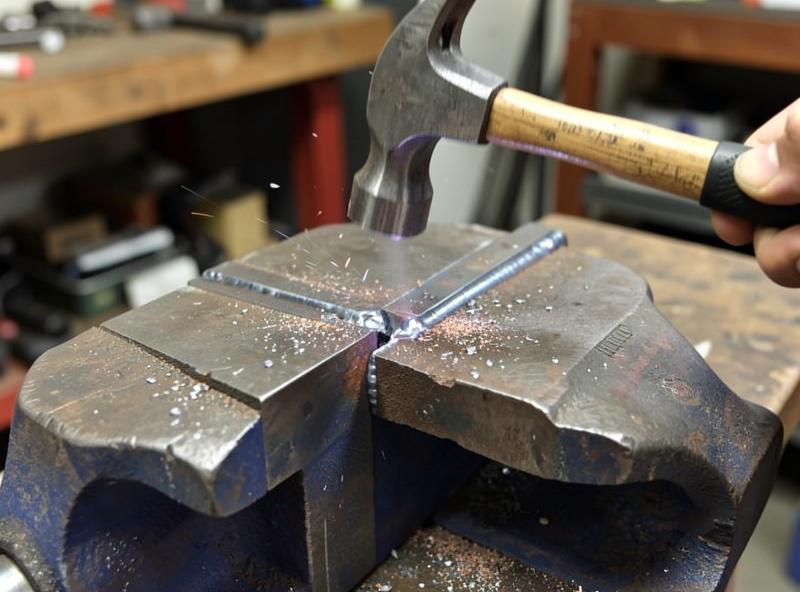
Test 1: The Fillet Break Test
The fillet break test is the easiest destructive test there is and the one I run most. You weld a single fillet on one side of a steel T-joint, clamp the base plate in a vise, and hammer the upright over toward the unwelded side until the joint breaks. Then you read the fracture: good fusion tears chunks of base metal out with the weld, while a bad weld peels cleanly off the unmelted surface, leaving a smooth, shiny face.
What makes it so useful is that it directly attacks the weld root, where fusion problems live. A fillet that looks textbook on the surface but breaks off clean told you nothing was actually fusing at the root — usually a sign of too little heat, too fast a travel speed, or a bad torch angle. The first time you run this, weld one coupon hot and correct and a second one deliberately cold, then break both. Seeing the difference between a torn, fused break and a clean peel is the moment lack of fusion stops being a concept and becomes something you can recognize.
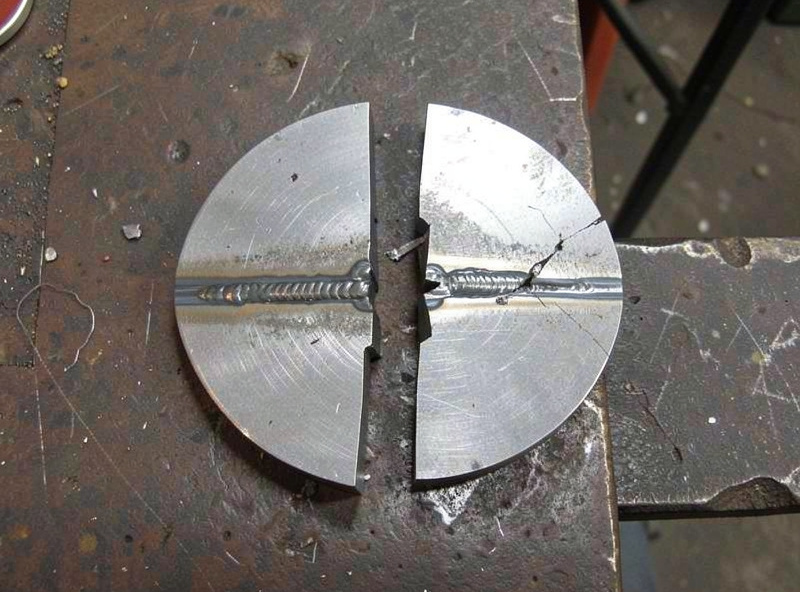
Test 2: The Nick-Break Test
The nick-break test reads the inside of a butt weld, and it is the best home method for finding internal porosity and slag. You weld a butt joint, then saw or grind a shallow notch into the weld at each end (and sometimes drill a hole at the center), clamp it in the vise, and snap it across the notches with a hammer. The notches force the break to run through the weld so you can read its full cross-section.
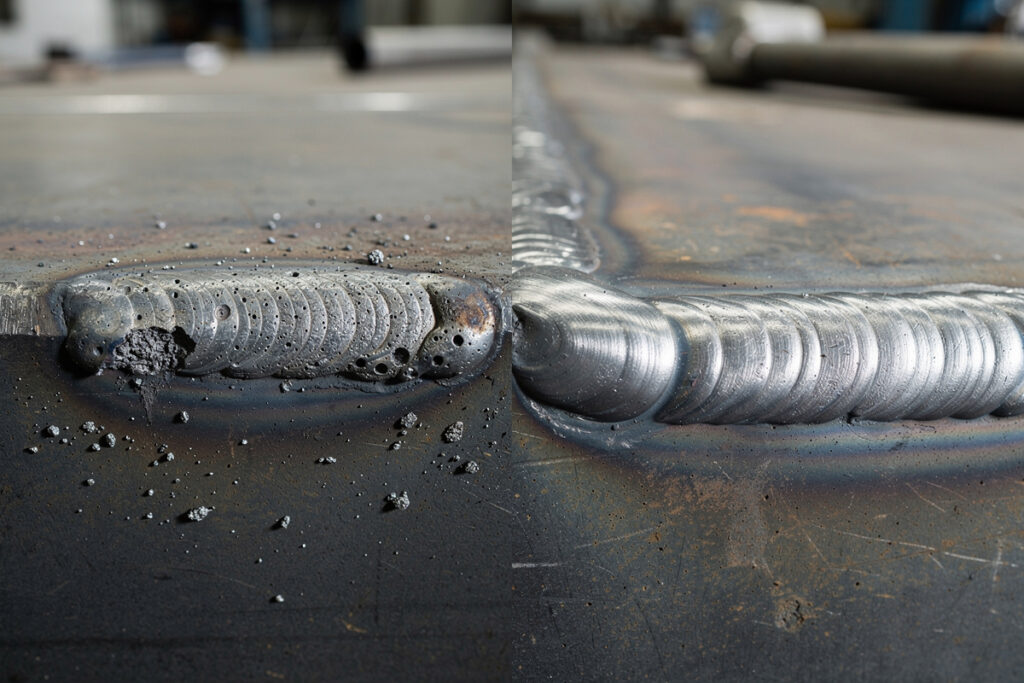
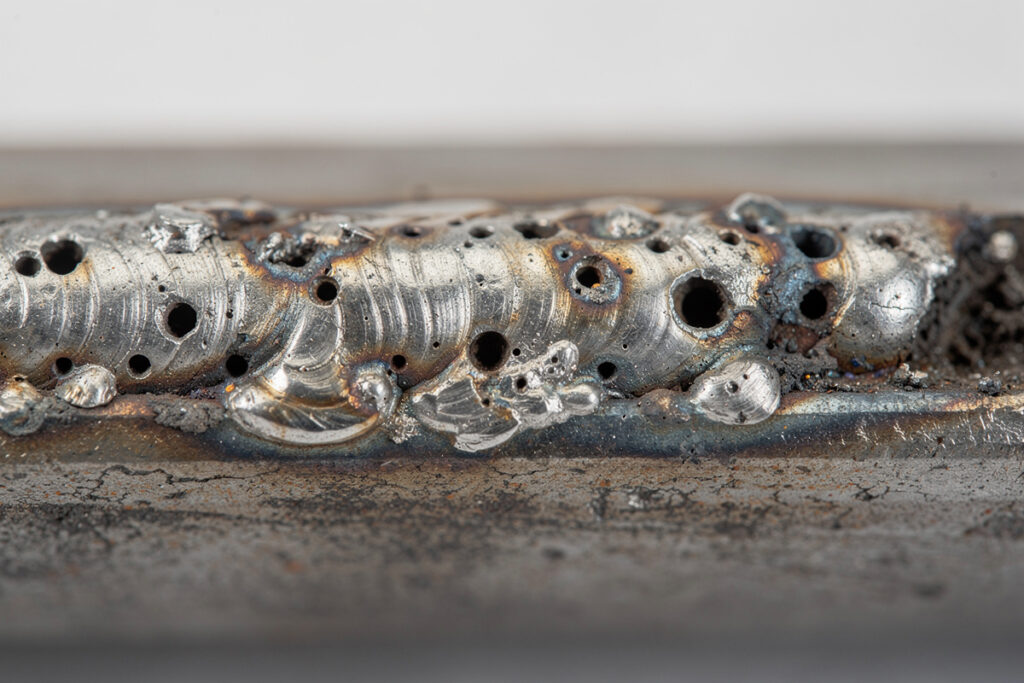
The fracture face is a report card. Rounded voids are gas porosity, usually from contamination, a wet consumable, or wind stealing your shielding gas. Dark, glassy patches are trapped slag or oxide. A smooth unmelted line along an edge is lack of fusion. Bright, fibrous, torn metal across the whole face is what you want — that is a sound, fused, ductile weld. I run a nick-break whenever I am dialing in a new butt-joint procedure, because it shows porosity I would never catch by eye. My weld defects inspection guide has the full fracture-face catalog if you want to match what you are seeing.

Test 3: The Guided Bend Test
The bend test is the home welder’s gold standard because it proves fusion, ductility, and root penetration in a single test, and it is exactly what the trades use to qualify a welder. You cut a strap across a butt weld, then bend it 180 degrees and inspect the stretched outer face for cracks. The standard pass criterion is no single discontinuity over 1/8 inch (3 mm) on the convex surface — the same limit AWS D1.1 sets for a guided-bend welder qualification.
You can run it as a guided bend in a shop press using a simple die you weld up yourself, or as a rougher free bend over a length of pipe in the vise. A face bend (weld face on the outside of the curve) stresses the cap; a root bend (root on the outside) stresses the penetration. When my coupon folds flat with an unbroken face, I know the joint is genuinely sound. When it cracks open at the root, I have a penetration problem to chase. Because this test is identical to a formal qualification test, practicing it is the best certification prep there is — I cover the full fixture build in my dedicated bend test guide.
Cutting and Etching: Reading the Weld Profile
If you want to see penetration depth and the heat-affected zone directly, cut a weld in cross-section, polish the face, and etch it with a mild acid. A macro-etch turns an invisible internal profile into a visible map: you can measure how deep the weld fused into the base, see the boundary of the heat-affected zone, and spot internal lack of fusion or undercut at the toes. For steel, a diluted acid swabbed on a sanded face darkens the structure enough to read with the naked eye.
This is the most informative home test for understanding what your settings actually do to penetration, and it pairs perfectly with the bend test — bend tells you pass or fail, the etch tells you why. Handle acids with proper gloves, eye protection, and ventilation, and neutralize and dispose of them responsibly; this is a chemistry step, not just a metal one. I use a macro-etch when I am comparing two voltage settings on the same thickness, because the difference in penetration depth shows up clear as day on the polished face.
Building a Coupon Habit That Actually Improves Your Welds
The point of all this is not the tests themselves — it is using them to close the loop between a setting and a result. The habit that transforms your welding is welding a witness coupon alongside any real part whenever you change a variable: same material, same thickness, same settings, run right after the real joint, then broken. If the coupon is sound, you have strong evidence the real weld is too.
Read every broken coupon back to a cause. A clean peel means more heat or slower travel. Porosity means cleaner metal, dry wire, or better gas coverage — check your gas mix and shielding. Cracks at the root mean a penetration or fitup problem. None of these are mysteries once you have broken enough coupons; they are a vocabulary you build one fracture at a time. This is also how you turn destructive testing into prevention — most defects get solved upstream with clean prep, dry consumables, and correct settings, and the coupon just confirms you got it right. For the bigger picture of where these tests fit, start at the weld testing and inspection hub.
Frequently Asked Questions
What is the easiest way to test a weld at home?
The fillet break test. Weld a fillet on one side of a steel T-joint, clamp the base in a vise, and hammer the upright over until it breaks. Read the fracture: torn base metal means good fusion, a clean smooth peel means lack of fusion. It needs only a vise and a hammer.
How do I test a weld without special equipment?
Use destructive tests that need only shop tools. A bench vise, a hammer, an angle grinder, and a hacksaw let you run fillet break tests, nick-break tests, and free bend tests. These break a sample coupon to reveal fusion, porosity, and penetration that surface inspection cannot show.
What does a broken weld fracture face tell you?
Rounded voids are gas porosity from contamination or poor shielding. Dark glassy patches are trapped slag. A smooth unmelted line is lack of fusion. Bright, fibrous, torn metal across the whole face is what you want, indicating a sound, fused, ductile weld.
Can I test a weld without destroying it?
Some defects, yes. Visual inspection, a dye penetrant kit, and a soapy-water leak test on pressurized vessels are nondestructive and home-friendly. But confirming internal fusion and penetration reliably requires a destructive test on a matching sample coupon, since buried flaws stay invisible from outside.
What is a nick-break test?
A nick-break test reveals the inside of a butt weld. You notch the weld at each end, then snap the coupon across the notches in a vise. The forced break runs through the weld so you can read its full cross-section for porosity, slag inclusions, and lack of fusion.
Discussion (0)