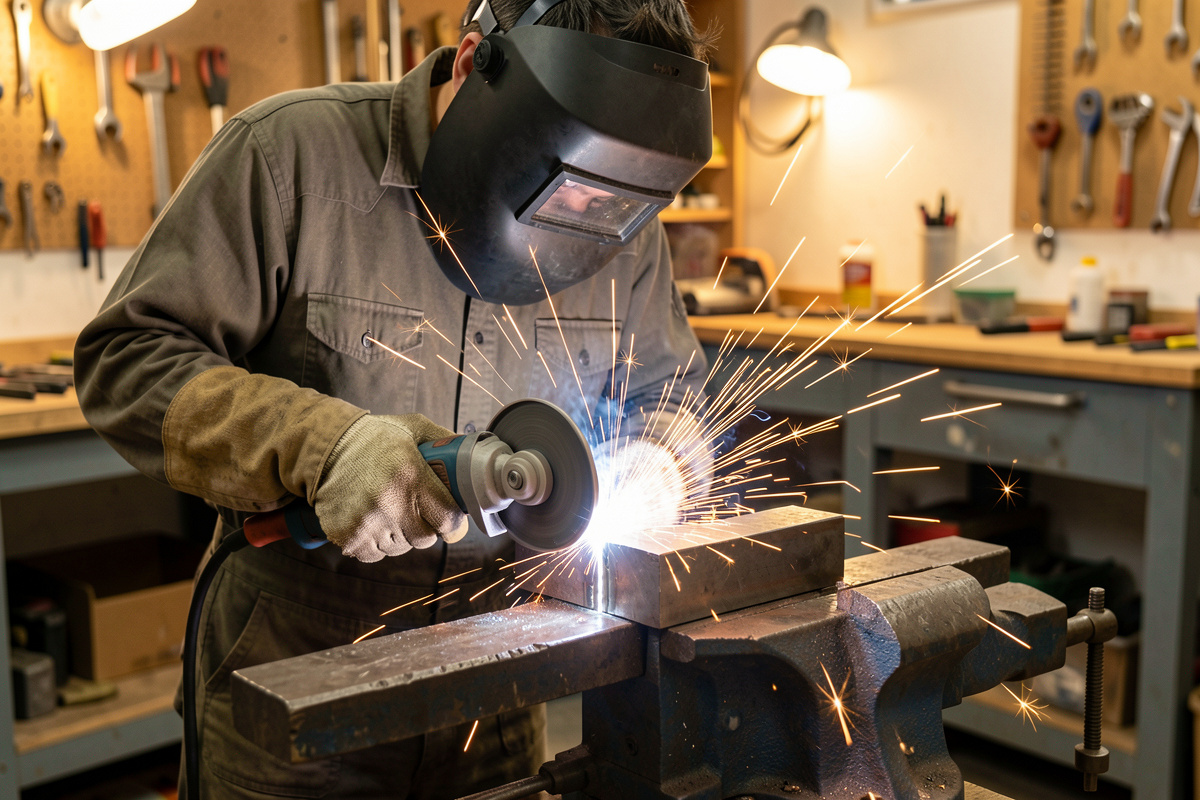
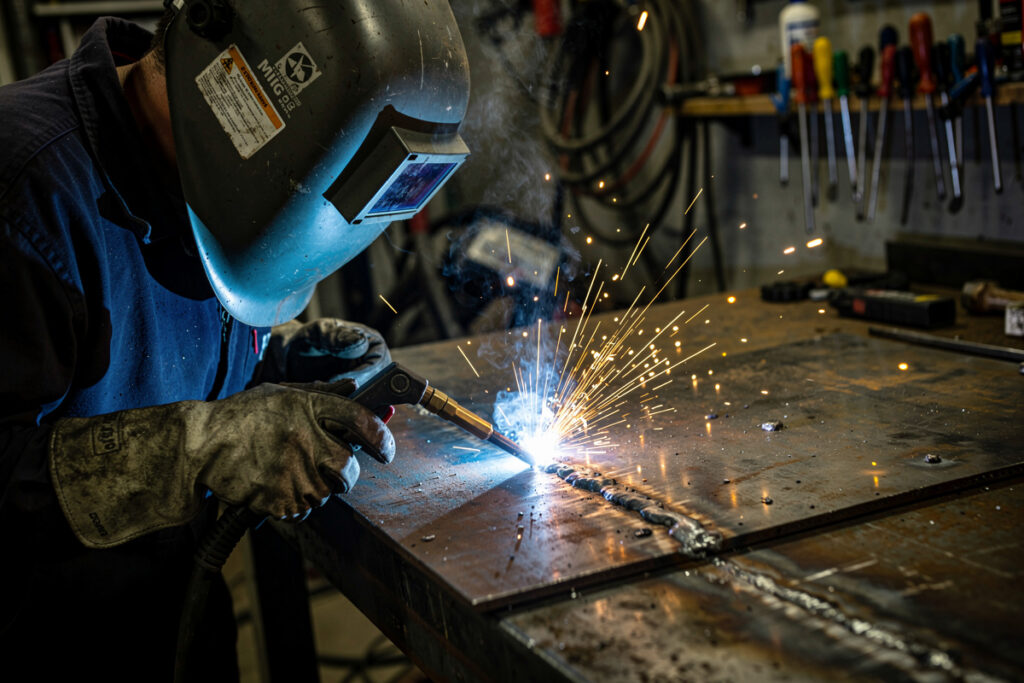
Lack of fusion is the defect that scares me more than any other, because it is the one you usually can’t see. A weld with bad undercut announces itself; a weld with lack of fusion can look textbook on the surface and be barely holding on underneath. The metal piled up, it looked like a bead, but it never actually melted into the parent steel — it’s sitting on top like solder that didn’t take. That’s a joint that passes the eyeball test and fails the first real load.
It shows up in two related forms that get lumped together: lack of fusion (the weld didn’t bond to the side wall or the previous pass) and incomplete penetration (the weld didn’t reach down into the root of the joint). Cold lap is the cosmetic cousin — weld metal rolled over onto cold base metal without fusing. All three come from the same villain: not enough heat in the right place at the right time. Here is how I find it on my own bench and how I make sure it isn’t lurking in a joint I care about.
Why Lack of Fusion Is the Dangerous One
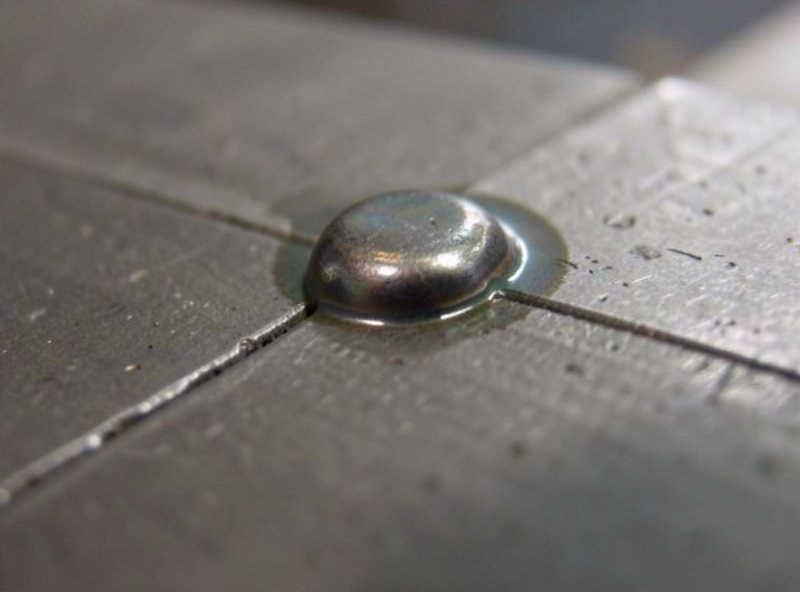
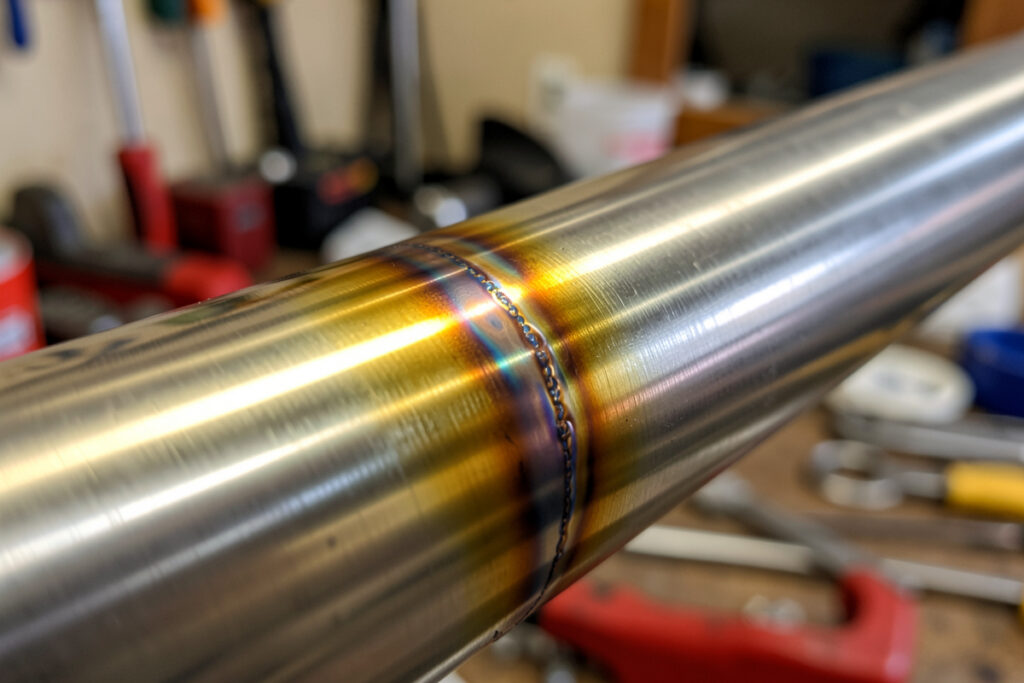
With most defects, you can see the problem and grade it. Lack of fusion hides inside the joint. I have ground into welds that looked beautiful on the cap and found a clean, mirror-bright line where the weld metal and the side wall never melted together — that bright line is two pieces of steel touching, not joined. Under load, that interface is a pre-made crack with zero resistance. It’s exactly why structural and pressure work leans on destructive bend tests and NDT instead of trusting the surface; my friend Mike, decades in the trade, treats a pretty cap as meaningless until he’s seen the joint behave.
For a home welder the stakes are real on anything that matters: a trailer hitch, an engine stand, a lifting point, eventually the hull seams on the aluminum boat I’m building toward. A cosmetic shelf bracket can survive a lazy tie-in. A part that catches load when something goes wrong cannot.
The Causes, From Most to Least Common
1. Not Enough Heat (The Big One)
Fusion needs the base metal to actually melt, not just the filler. If your voltage/amperage is too low for the thickness, the puddle never gets the side wall and the previous pass hot enough to melt and tie in. The filler arrives molten, hits cold steel, and freezes on top. On thick plate this is the classic mistake — running settings that suit 3 mm sheet on 8 mm plate gives you a bead that looks fine and bonds to almost nothing. When in doubt on thickness, I turn the heat up, not down, and let the puddle prove it’s wetting in.
2. Travel Speed Too Fast
Move too quickly and you outrun the heat. The arc doesn’t dwell long enough to melt the joint walls before the puddle solidifies. Fast travel plus low heat is the recipe for a cold, ropey bead with no penetration. Slowing down lets the heat soak into the base metal so it melts and the puddle fuses to it.
3. Wrong Arc Placement / Technique
This is the one that traps people who think more heat is always the answer. If you let the arc ride up on the puddle — pushing the molten metal ahead of the arc instead of keeping the arc digging into the leading edge — the puddle insulates the base metal from the arc and fusion suffers. I keep the arc on the leading edge of the puddle, into fresh metal, so the heat is hitting steel, not pre-melted filler. On a multi-pass weld I point the arc into the side wall and the toe of the previous bead so each pass ties into the last.
4. Poor Joint Prep and Fit-Up
Mill scale, paint, rust, and oil all insulate. The arc burns through some of it, but a tight gap full of scale gives the puddle something to float on instead of fuse to. On a groove joint, too tight a root gap or no bevel means the arc physically can’t reach the root to melt it — that’s incomplete penetration baked in before you strike an arc. I grind back to bright metal and open the joint up enough that the arc can get to the root.
5. Dirty or Cold Previous Passes
On multi-pass welds, slag left between stick or flux-core passes is a fusion killer — you weld over it and trap a layer that never bonds. Chip and wire-brush every pass. And on heavy sections, a cold base metal sucks heat out of the puddle so fast that fusion fails; preheating thick or cold steel keeps enough heat in the joint for the weld to tie in.
Causes vs. Fixes
| Cause | Result | Fix |
|---|---|---|
| Heat too low for thickness | Weld sits on top, no side-wall fusion | Raise voltage/amperage; on doubt, go up not down |
| Travel too fast | Cold ropey bead, no penetration | Slow down; let heat soak into the joint |
| Arc riding on the puddle | Puddle insulates the base metal | Keep the arc on the leading edge, into fresh metal |
| Tight gap / no bevel | Incomplete root penetration | Bevel and open the root so the arc reaches it |
| Scale / rust / slag in the joint | Weld floats on contamination | Grind to bright metal; clean every pass |
How I Confirm a Joint Actually Fused
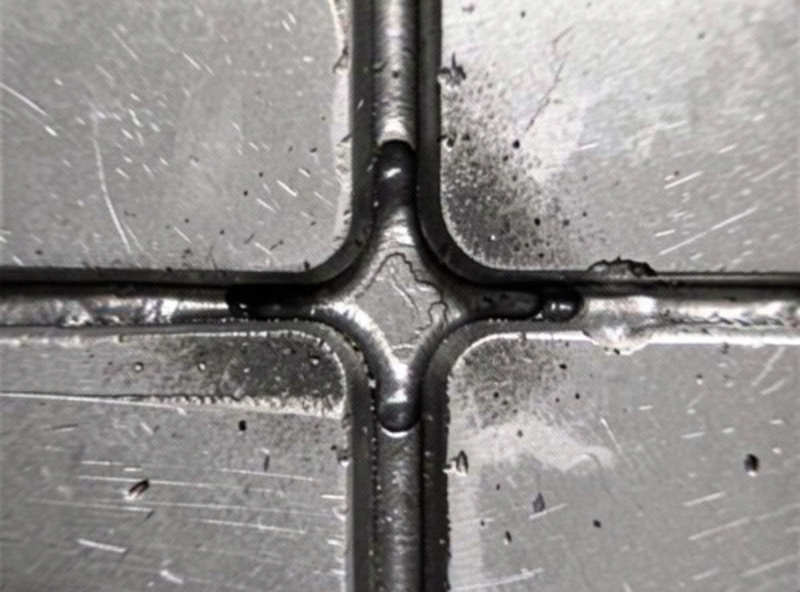
You cannot dial out lack of fusion by eyeballing the cap, so I prove my settings before I trust them. On a new joint type or thickness, I weld a test coupon on scrap of the same material, then I either bend it in the vise until it folds or cut it and look at the cross-section. A sound weld bends and the joint deforms with the metal; a weld with lack of fusion cracks open along that bright unfused line. Two minutes with a hacksaw or a destructive bend tells you more than an hour of staring at the bead. I keep a scrap rack specifically so I never test settings on the actual part.
If you’ve already laid down a weld you suspect has lack of fusion on something that matters, the honest fix is to grind it out and re-weld with corrected heat, speed, and arc placement — there is no surface repair for a bond that was never made. A wash pass over the top just adds more metal to a joint that still isn’t tied in underneath.
Dialing It Out
My order when a joint isn’t fusing: heat up first, slow down second, fix arc placement third, and check prep and fit-up underneath all of it. The single mindset shift that fixes most of it is to stop chasing a pretty bead and start chasing a wetting puddle — watch the toes of the puddle flow into the base metal, not just the filler stacking up. That’s covered alongside the rest of the defect family in the welding troubleshooting guide. If your problem is a groove cut into the edge of the bead instead, that’s welding undercut, a different fix. And good fusion starts with the right joint — the joint types guide covers bevels and fit-up for penetration.
Why is lack of fusion so dangerous?
Because it hides. A weld with lack of fusion can look textbook on the surface while the weld metal never bonded to the base metal underneath. That unfused interface acts like a pre-made crack under load, which is why structural and pressure work relies on bend tests and NDT instead of trusting the cap.
What is the difference between lack of fusion and incomplete penetration?
Lack of fusion means the weld didn’t bond to the side wall or a previous pass. Incomplete penetration means the weld didn’t reach down into the root of the joint. Both come from not enough heat in the right place, and both leave an unbonded interface inside the joint.
What is the main cause of lack of fusion?
Not enough heat for the metal thickness. If the voltage or amperage is too low, the base metal and previous passes never get hot enough to melt and tie in, so the filler freezes on top. When in doubt about thickness, turn the heat up and watch the puddle wet into the joint.
Can you fix lack of fusion without grinding it out?
No. There is no surface repair for a bond that was never made. A wash pass over the top just adds metal to a joint that still isn’t tied in underneath. On anything that carries load, grind it out and re-weld with corrected heat, travel speed, and arc placement.
How do I check if my weld actually fused?
Weld a test coupon on scrap of the same thickness, then bend it in a vise until it folds or cut it and look at the cross-section. A sound weld deforms with the metal; a weld with lack of fusion cracks open along a bright, unfused line. This is the only honest way to confirm your settings.
Discussion (0)