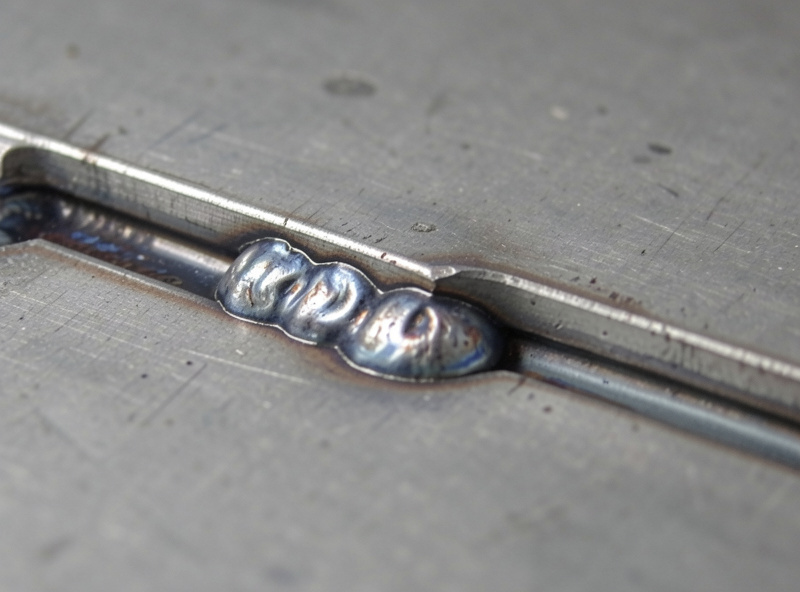
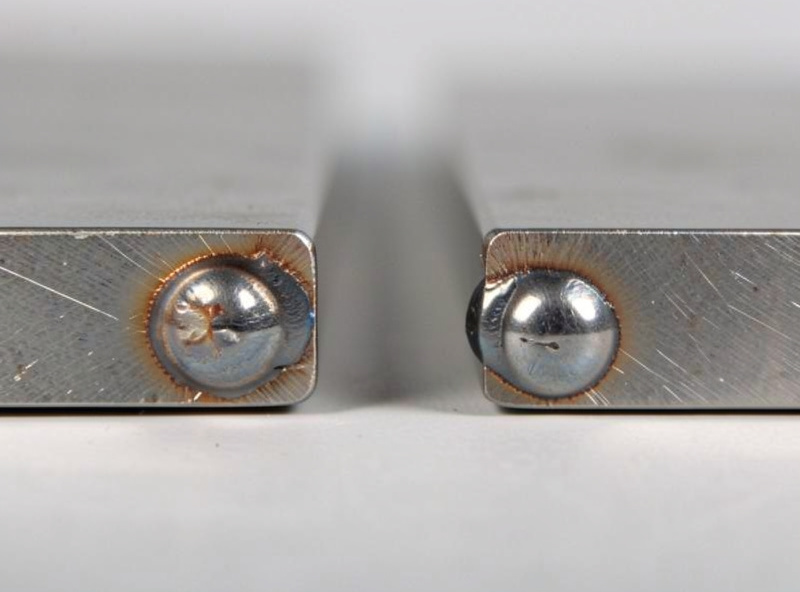
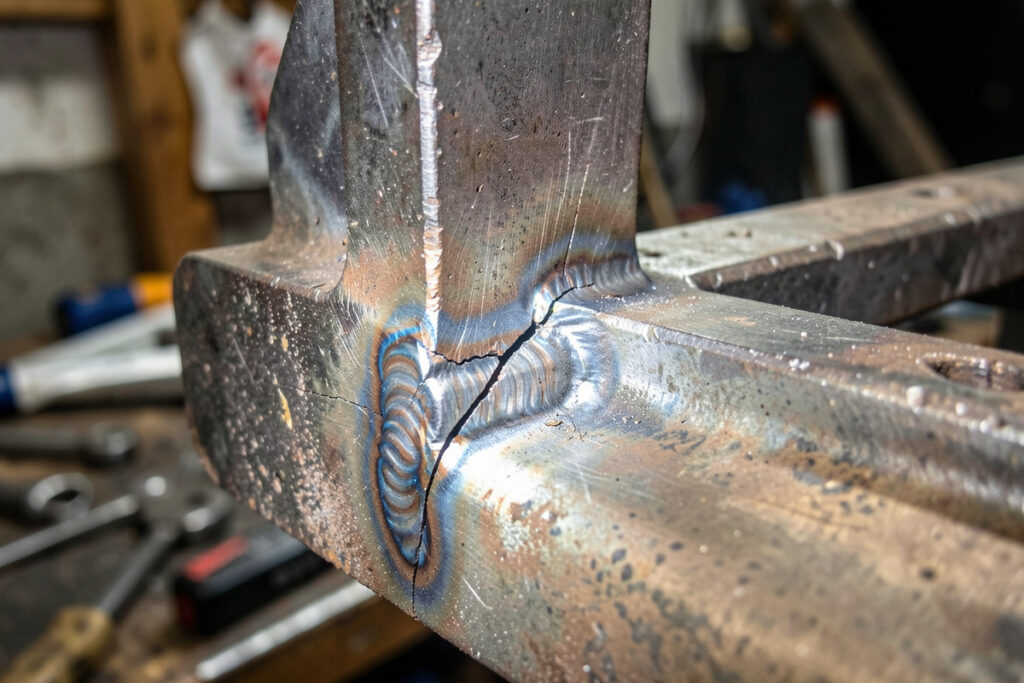
Undercut is the defect I see most often on a beginner’s first “real” weld, and it is one of the few that a cut test can’t hide and a coat of paint won’t fix. It is the little groove melted into the base metal right along the toe of the bead, where the parent steel got eaten away and the weld never filled it back in. On a bracket it looks cosmetic. On anything that carries load it is a stress riser, a built-in crack starter sitting exactly where the joint is already working hardest.
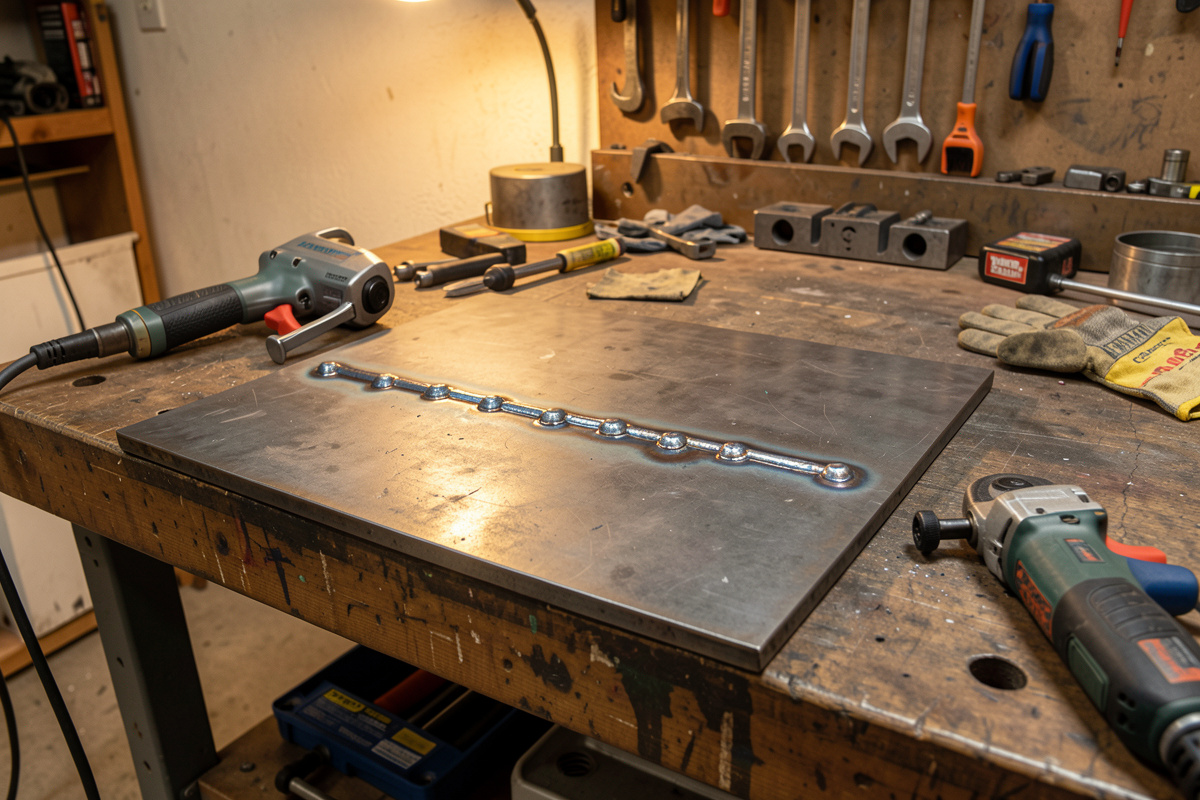
I have chased undercut across every process on my own bench — the MIG-PRO205DS I run daily, stick on dirty outdoor jobs, and the TIG rig I am still climbing the curve on. The causes are almost always the same handful of things, and once you can read the puddle they are easy to dial out. This guide is how I diagnose it, fix it on the spot, and stop it coming back.
What Undercut Actually Is (And Why It Matters)
Picture the toe of your weld — the line where the bead blends into the flat plate. In a sound weld that transition is smooth, the bead tying into the metal with no step. Undercut is when the arc melts the edge of the joint, the molten parent metal flows into the puddle, and then there isn’t enough filler arriving to back-fill the gap it left. You’re left with a continuous (or intermittent) trench running along one or both toes.
The reason it matters comes down to two things: section loss and stress concentration. The groove physically removes metal from the joint, so the cross-section carrying load is thinner than you designed for. Worse, that sharp-bottomed groove concentrates stress the way a notch in a piece of glass does — load finds the bottom of the trench and starts a crack there. On the aluminum boat I am building toward, undercut on a hull seam is exactly the kind of thing that turns into a fatigue crack a few seasons in. Code work has hard limits on it for the same reason; my friend Mike, who has decades in the trade, will reject a joint for undercut before he even looks at the profile.
There are two flavors. Toe undercut runs along the edge of the bead on the flat plate and is the common one. Root undercut shows up at the root of a groove or fillet, usually on a vertical or root pass, and is harder to spot until you grind. Both come from the same root cause: heat and arc placement that melted the edge faster than filler filled it.
The Real Causes, In Order of How Often I See Them
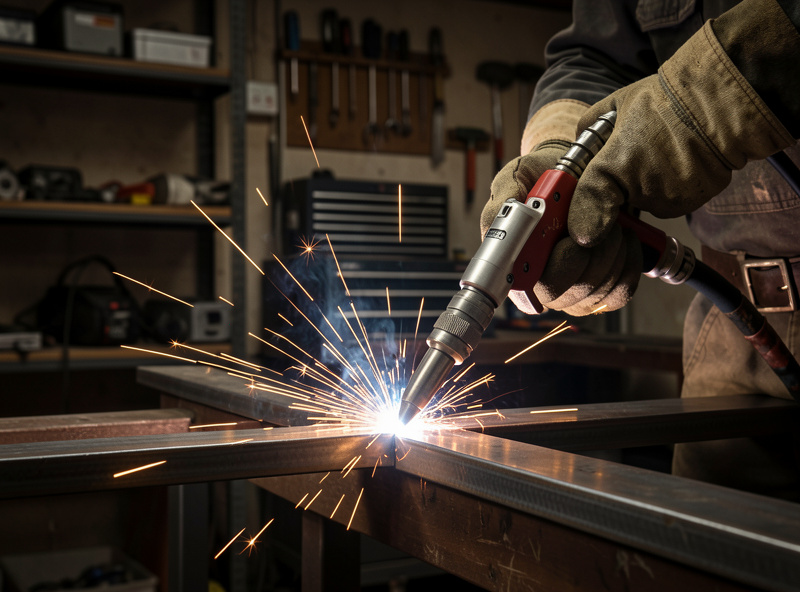
People love to blame the machine. In my experience undercut is almost never the machine — it is heat, angle, and travel speed, in that order. Here is how I work through it.
1. Too Much Heat (Voltage / Amperage Too High)
This is the number-one cause and the first thing I check. Crank the voltage or amperage past what the joint wants and the arc digs into the base metal at the toes faster than the puddle can wet back over it. The bead can look fine in the middle and be undercut on both edges. On the MIG-PRO I’ll drop voltage a half-step at a time and watch the toes flatten out. On stick, it’s pulling the amperage back into the rod’s window — a 7018 run 20 amps hot will undercut a vertical fillet every time.
2. Travel Speed Too Fast
Move too quickly and you melt the edges of the joint but leave the puddle behind — there’s simply no filler arriving to fill the melted-out groove. Fast travel is the sneaky one because the weld looks productive. Slow down so the puddle has time to wet into both toes before you move on. The fix is usually counted in fractions of an inch per second, not a wholesale change.
3. Wrong Work and Travel Angle
Angle is where undercut on a horizontal fillet lives. If you point the arc too much at the vertical member (or hold too steep a work angle), you melt that top edge and gravity pulls the puddle down and away from it, leaving the upper toe undercut. On a horizontal tee I aim the arc into the corner, biased slightly toward the bottom plate, work angle around 45 degrees split between the two members. A consistent 5–15 degree drag (or push) angle keeps the arc force where it belongs.
4. Too Much Weave or Pausing Wrong
When you weave, the arc spends time out at the edges of the joint. If you whip across the middle and pause at the toes — great, you’re filling them. If you do the opposite, pausing in the center and snapping across the edges, you melt the toes and never fill them. I pause briefly at each toe on a weave and move quickly through the middle. Get that backwards and you’ll undercut both sides of a wide weave.
5. Stickout, Wire Speed, and Gas (MIG-specific)
Excessive stickout (contact-tip-to-work distance) drops your real amperage and changes how the arc digs — too long and the arc gets erratic and undercut-prone at the toes. I keep stickout around 3/8 inch on the MIG-PRO and the bead behaves. Wire speed too low for the voltage gives you a hot, fluid arc with not enough metal to fill what it melts — classic undercut. And the wrong gas plays in: straight CO2 digs harder and is more prone to edge undercut than 75/25, which is one reason I run tri-mix-style 75/25 for clean steel work.
Causes vs. Fixes At a Glance
| Cause | What You See | The Fix |
|---|---|---|
| Voltage / amperage too high | Undercut on both toes, flat-to-dished bead | Drop heat a half-step at a time until toes fill |
| Travel speed too fast | Thin, ropey bead, groove along edges | Slow down; let the puddle wet both toes |
| Wrong work angle (fillet) | Undercut on the upper (vertical) plate | Split angle into the corner, bias toward bottom plate |
| Bad weave timing | Undercut at the outer edges of a weave | Pause at the toes, move fast through the center |
| Excess stickout / low wire (MIG) | Erratic arc, edge undercut | Stickout ~3/8 in; raise wire speed to match voltage |
| Wrong gas (MIG) | Aggressive dig, spatter, edge undercut | Run 75/25 for clean steel instead of straight CO2 |
How I Fix Undercut on a Finished Weld
If the weld is already down and undercut, you have two honest options depending on depth. For shallow, cosmetic undercut on non-critical work, a careful capping pass over the groove — lower heat, slower, pausing at the toe — will fill it without piling on a huge bead. For anything structural or deeper than a hair, I grind the bead back to clean sound metal, check there are no cracks at the bottom of the groove, and re-weld with corrected settings. You cannot reliably “paint over” undercut with a thin wash pass and trust it; you have to put metal back where metal was lost.
What you should not do is fill undercut with body filler and a coat of paint on anything that carries load. That hides a defect rather than fixing it, and it is precisely the kind of shortcut that fails a cut test or, worse, fails in service.
Dialing It Out Before It Happens
The whole game is balance: enough heat to fuse, enough filler and slow-enough travel to fill what you melt, and the arc pointed where the metal needs to go. My order of operations when a new joint is undercutting:
- Heat first. Drop voltage/amperage a notch and re-run a test bead on scrap. Most undercut disappears here.
- Travel speed. Slow down until the toes wet in cleanly. Watch the puddle, not the wire.
- Angle. On fillets, split the work angle into the corner; on flat, keep a steady 5–15 degree drag.
- Technique. If weaving, pause at the toes. If the joint doesn’t need a weave, run a tighter stringer instead.
Run those on a piece of scrap the same thickness as the job — I keep a scrap rack exactly for this — before you touch the real part. Two minutes of test beads saves an hour of grinding. Reading the puddle is the skill underneath all of it, and that is covered in the broader welding troubleshooting guide. If your bead is also full of pinholes, that’s a different problem — see welding porosity causes and fixes. And if you’re new to dialing a MIG in at all, start with the complete MIG welding guide.
When Undercut Is Telling You Something Bigger
Persistent undercut you can’t dial out sometimes points past technique. Severely warped or dirty plate that won’t sit flat changes your arc-to-work distance mid-bead and undercuts wherever the gap opens up — that’s a fit-up problem, not a welding problem. Wildly inconsistent material thickness in the same joint will undercut the thin side at settings that suit the thick side. And on out-of-position work, gravity is fighting you the whole time, so the heat and travel-speed window is narrower — vertical-up especially rewards pausing at the toes. None of those are the machine. The machine just does what you tell it.
Is welding undercut a serious defect?
On non-critical, decorative work, shallow undercut is mostly cosmetic. On anything that carries load it is serious: it removes metal from the joint and creates a sharp notch that concentrates stress and starts cracks. Structural and code work has strict limits on it for that reason.
What is the number-one cause of undercut?
Too much heat. Voltage or amperage set higher than the joint needs makes the arc dig into the base metal at the toes faster than filler can wet back over it. Drop the heat a half-step at a time and most undercut disappears.
Can you fix undercut without grinding it out?
Only if it is shallow and on non-critical work. A careful low-heat capping pass that pauses at the toe can fill a hair of undercut. Anything deeper or structural should be ground back to sound metal and re-welded with corrected settings. Never hide undercut with filler and paint on load-bearing parts.
Why do I get undercut on the top of a horizontal fillet?
That is a work-angle problem. Pointing the arc too much at the vertical plate melts its edge, and gravity pulls the puddle down and away, leaving the upper toe unfilled. Split your work angle into the corner, bias slightly toward the bottom plate, and slow down so the puddle wets the top toe.
Does travel speed cause undercut?
Yes. Moving too fast melts the edges of the joint but leaves the puddle behind, so there is no filler arriving to fill the melted-out groove. Slow your travel until the puddle has time to wet into both toes before you move on.
How do I stop undercut on MIG?
Check heat first, then travel speed, then angle. Keep stickout around 3/8 inch, raise wire speed if the arc is hot and fluid with too little metal, run 75/25 gas instead of straight CO2 for clean steel, and keep a steady drag angle. Test on scrap of the same thickness before the real joint.
Discussion (0)