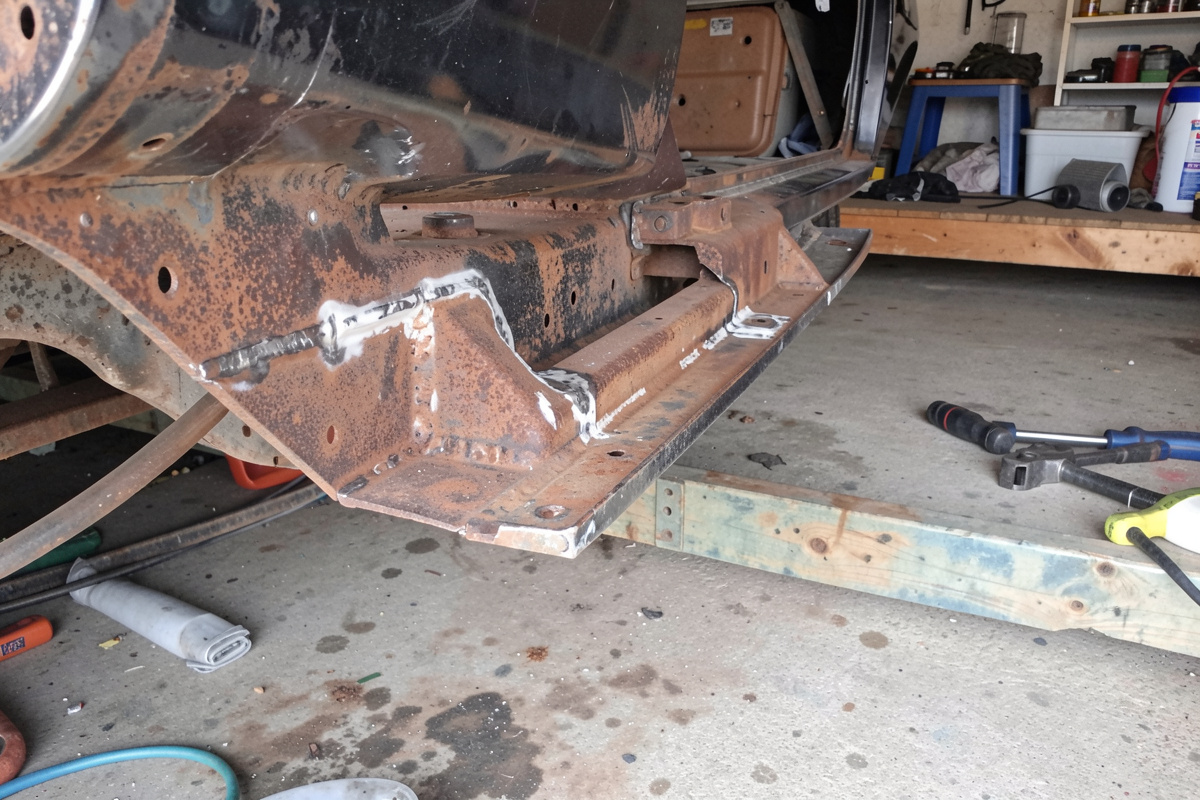

To weld in a patch panel, you cut the rust or damage back to solid steel, trim the patch for a tight fit, clamp it dead flush, and join it with plug welds on a lap or stitch welds on a butt joint—keeping the heat low so the panel doesn’t warp. Floor pans, rockers, and quarter panels each ask for a slightly different joint, but the workflow is the same.
This is the bread-and-butter of home auto bodywork, and I’ve fitted enough patches on my own bench to know the welding is the quick part. The fit-up is where the job is won or lost. Get a tight, well-clamped joint and the welds almost lay themselves; rush the fit and you’ll fight blow-through and warp the whole way. Here’s how I approach each panel type.
Patch Panel Basics: Lap vs Butt
Every patch is either a lap joint or a butt joint, and choosing right is the first decision. A lap joint overlaps the patch behind or over the panel and is joined with plug welds; it’s stronger, more forgiving, and lower-distortion, but it traps moisture and shows a step, so it belongs on hidden structure. A butt joint sets the patch flush in the opening and is stitch-welded; it’s invisible after filler but demands a tight, even gap and careful heat control.
| Factor | Lap Joint (plug welds) | Butt Joint (stitch welds) |
|---|---|---|
| Strength | Higher, overlap adds margin | Good if fully welded |
| Distortion risk | Lower | Higher |
| Appearance | Visible step, needs hiding | Flush, invisible after filler |
| Moisture trap | Yes, must seal | No |
| Best for | Floor pans, rockers, inner structure | Quarter panels, outer skins |
As a rule, hidden and structural areas get lap joints with plug welds; visible outer skins get butt joints. The plug-weld technique that makes lap joints work is worth learning on its own—I cover it in plug welds and rosette welds.
Floor Pans: Strength Over Looks
Floor pans are structural and hidden, which makes them the most forgiving patch to weld—nobody sees the welds and a lap joint is ideal. I cut out the rotten pan back to solid floor and seat flanges, clean both faces, then fit a replacement pan or a flat patch with an overlap onto the surrounding metal. Drill 8 mm holes along the overlap, clamp it tight, and plug-weld each hole to mimic the factory spot welds.
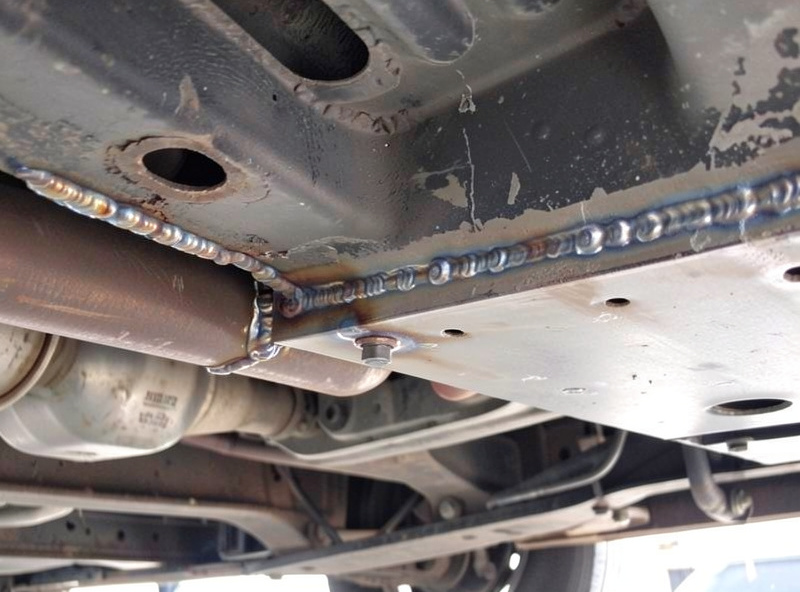
Because the pan is bigger and slightly heavier gauge than outer skin, it tolerates a touch more heat, but I still skip around the plug welds rather than working down a line, so the big panel doesn’t oil-can or warp. Once it’s welded, seam-seal the overlap top and bottom and coat the bare metal—floor pans live in road spray and will rust again fast if you leave them raw. The same cut-to-clean-steel logic from welding rust holes applies in full here.
Rockers: Structure That Shows
Rockers (the sills below the doors) are the tricky middle case: they’re structural like a floor pan but partly visible like a skin, and they’re often a multi-layer assembly of an outer skin over inner reinforcement. The outer rocker skin is usually a butt-welded repair so it finishes flush, while any inner structure underneath is lap-welded with plugs for strength.
The key with rockers is to rebuild any inner reinforcement first, then fit the outer skin over it. Replacement rocker panels are sold stamped to shape, which saves a lot of hammer work. Clamp the new skin with the body line aligned, tack it in stages checking the gap and the curve, then stitch-weld the seam with plenty of cooling between tacks. Get the inner structure solid and the outer skin will have something true to sit against—mismatched rockers throw off door gaps, so check the door closes before you commit to filling. A rocker is also crash structure, so on a modern unibody check the maker’s repair procedure or I-CAR guidance for where sectioning is actually permitted before you cut — structural calls like that I follow documented procedure on rather than eyeball.
Quarter Panels: All About the Finish
Quarter panels are large visible outer skins, so they’re butt-welded for an invisible repair and they’re the least forgiving for warp. A long butt seam on thin, curved 0.8 mm steel will turn into a wave if you let the heat build, so this is where stitch-and-skip discipline matters most—tiny tacks, wide spacing, constant jumping around, and full cooling between passes.
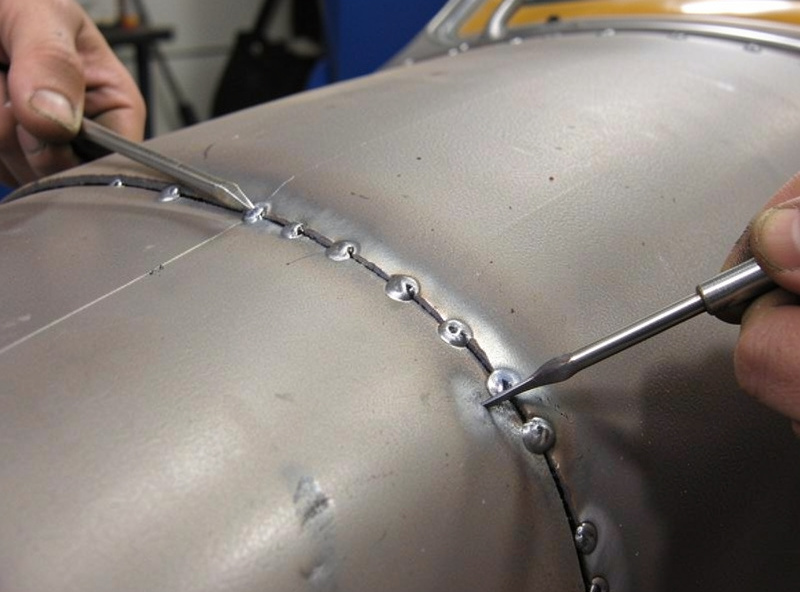
Fit is everything on a quarter: the gap should be tight and even, ideally a hair under the wire diameter, so each tack bridges cleanly without a hole to fill. I tack every 25 mm first to lock the whole seam, then fill the spaces a tack at a time over several passes, often spending more time waiting for cooling than welding. Any warp that creeps in gets shrunk back, which I cover in stopping warp on auto panels. The reward is a seam that disappears under a skim of filler and paint.
Settings, Clamping, and Heat Control
For all of this I run 0.6 mm wire and 75/25 gas on the lowest stable setting, with a copper backing block behind butt joints wherever I can reach. Copper won’t fuse to steel and pulls heat away, so it stops blow-through and supports the gap—it’s the single most useful thing on a body bench after the welder itself.
Clamping makes the low-heat welding possible. Intergrip sheet-metal clamps hold a butt joint flush and gapped while you tack; sliding clamps and magnets hold lap joints tight. A panel that shifts or springs while you weld will warp no matter how careful your technique, so I over-clamp rather than under-clamp. My fitting and tacking guide goes deeper on holding panels square, and the same thin-steel approach runs through MIG welding thin sheet metal. It all ties back to the wider car repair welding method: clean steel, tight fit, low heat, lots of patience.
Make Your Own Patch or Buy a Stamped Panel?
For a flat or gently curved area, I make my own patch from sheet steel matching the panel gauge—it’s quick, cheap, and lets me get a perfect fit. A body hammer over a sandbag rolls in a gentle crown, which is enough for most floor and lower-panel repairs. The home-made route also means I can shape the patch to the exact opening rather than working around a generic part.
For complex shapes—a wheel arch curve, a swage line, a rocker with a stamped profile—a pre-stamped replacement panel saves hours and gives a far better result than trying to hand-form a compound curve. Plenty of common cars have full or partial panels available stamped to the original shape. My rule: hand-make flat and simple, buy stamped for anything with a body line or a compound curve. Trying to hammer-form a quarter-panel arch by hand is a deep skill, and for a one-off repair it’s rarely worth the fight.
Common Patch Panel Mistakes
The mistakes are predictable. Leaving a sloppy gap and trying to “fill” it with a hot bead, which warps the panel and leaves a mess to grind. Lap-welding a visible skin so a step telegraphs through the paint. Butt-welding a structural area that really needed the strength of an overlap. Forgetting to check that the door or trunk still closes before welding a rocker or quarter solid—a panel tacked even slightly off will throw the gaps out.
The other classic is heat impatience: working steadily down a seam instead of skipping around it. Thin steel needs cooling time, and the welder who waits ends up with a flat panel while the one who rushes ends up shrinking a wave back out afterward. Fit tight, clamp hard, skip-weld, and let it cool, and a patch panel goes in clean the first time.
Frequently Asked Questions
Should I butt weld or lap weld a patch panel?
Lap-weld with plug welds on hidden structural areas like floor pans and rocker reinforcement for strength and lower distortion. Butt-weld visible outer skins like quarter panels so the repair finishes flush and invisible under filler.
How do you weld in a floor pan?
Cut the rot back to solid floor, overlap a replacement pan onto the surrounding metal, drill 8mm holes along the overlap, clamp tight, and plug-weld each hole to copy the factory spot welds. Skip around the welds to control heat, then seam-seal and coat both faces.
Why do quarter panels warp when welding?
They are large, thin, curved outer skins that hold little heat, so a continuous bead pulls them into a wave. Use tiny stitch welds spaced 25mm apart, jump around the seam, and let the panel fully cool between tacks to keep the heat-affected zone small.
What welder settings for patch panels?
Run 0.6mm solid wire under 75/25 argon/CO2 gas on the lowest stable heat setting for 0.8-1.0mm body steel. Use a copper backing block behind butt joints to stop blow-through and back up the gap.
Do you need to seal a patch panel after welding?
Yes. Bare welds and the back of the panel are unprotected steel that will rust quickly, especially on floor pans and rockers exposed to road spray. Dress the welds, prime both faces, and seam-seal any lap joint that can trap moisture.

Discussion (0)