
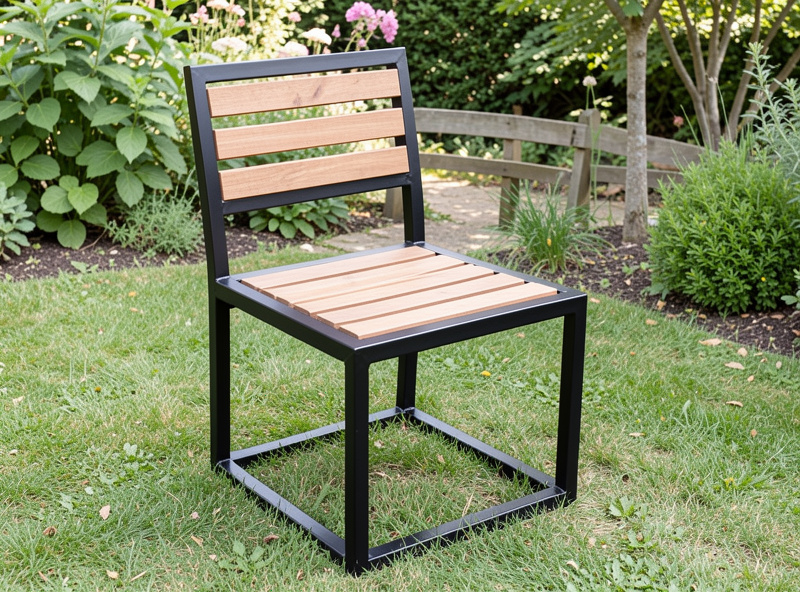
Welded outdoor furniture, a steel-frame chair and a matching bench, is the project where welding stops being shop utility and starts being something you put in the garden and sit on. I build the frames from 1-inch square tube, slat the seats and backs with wood or steel strap, and finish for the weather. A chair frame takes an afternoon and a bench an evening, and the comfort lives entirely in two numbers: a 16 to 18-inch seat height and a slight backward seat and back angle.
The welding here is easy; the ergonomics are what separate furniture you actually use from a steel sculpture nobody sits in. I learned that the hard way on a first chair that looked great and sat like a park bench from 1890. This guide gives you the frame plans for both a chair and a bench, the angles that make them comfortable, and the finish that keeps steel furniture alive outdoors in a real climate.
The Two Frames: Chair and Bench
The chair is a four-leg frame with a seat rail box at roughly 17 inches, a back frame raked back about 10 to 15 degrees, and a seat that tilts back a couple of degrees so you do not slide forward. The bench is the same geometry stretched to a 48 or 60-inch seat with a center leg pair added under the seat so it does not sag. Build the chair first; it is the prototype that proves your angles before you commit the steel for the longer bench. Get the chair comfortable and the bench is just the same recipe at length.
I use 1-inch square tube for both. It is plenty strong for seating loads, light enough to move, and easy to weld clean corners on. The seat and back slats are where you choose the look: hardwood slats bolted to welded tabs give a warmer chair, while steel strap or expanded metal keeps it all-metal and industrial. Wood is more comfortable bare; steel needs a cushion but lasts forever. I have built both and the wood-slat version is the one that gets sat in.
The Angles That Make It Comfortable
Seat height of 16 to 18 inches suits most people; 17 is my default. The seat itself should tilt back about 3 to 5 degrees so weight settles into the chair rather than sliding off the front edge. The back frame rakes back 10 to 15 degrees from vertical for lounging, less for a dining chair you sit upright in. The front seat rail wants a small radius or a rolled edge so it does not cut into the back of your knees. These four numbers are the whole game.
I mock the chair up in scrap and clamps and actually sit in it before welding anything solid. A cardboard-and-tape seat taped to a tacked frame tells you in thirty seconds whether the angle is right, and adjusting a tack is free where re-cutting a welded frame is not. Every body is different, so tune the angle to whoever will use it most. This is the step beginners skip and then wonder why their beautiful welds produced an uncomfortable chair.
Scaling the Chair Up to the Bench
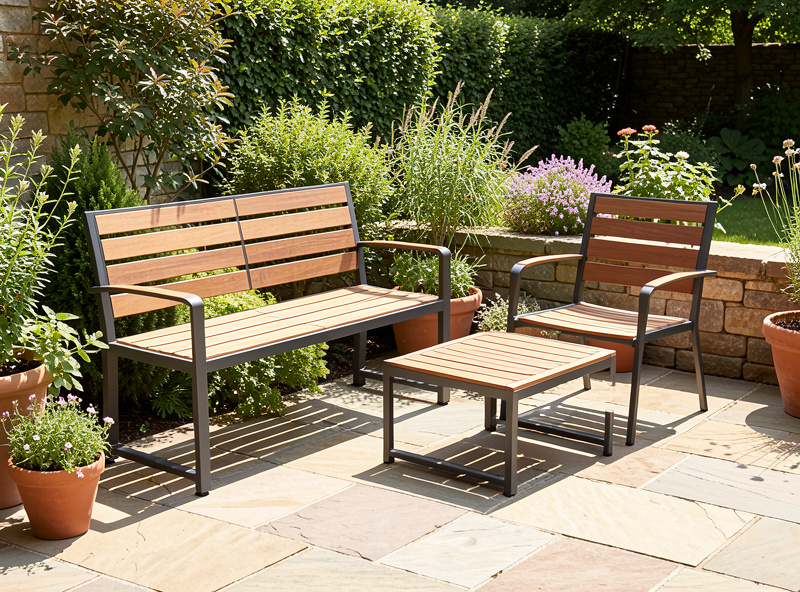
The bench is the chair geometry stretched, but a 60-inch seat span is where a frame that worked at chair width starts to flex and sag. I add a center leg pair under the seat at the midpoint and a longitudinal rail tying the front and rear seat rails together, because an unsupported seat box at that length bows in the middle the first time two adults sit on it. The back frame also wants a center upright tied into the seat box so it does not flex backward as a single long span.
I keep the same 17-inch seat height and the same seat and back angles on the bench so a chair and bench set match visually and sit the same way. The one change I make is stepping the rear legs slightly wider at the floor than at the seat, giving the longer, heavier bench a wider footprint so it does not tip when someone sits on one end. A bench is heavy enough that it stays put, but the wider rear stance is cheap insurance and reads as intentional design rather than an afterthought.
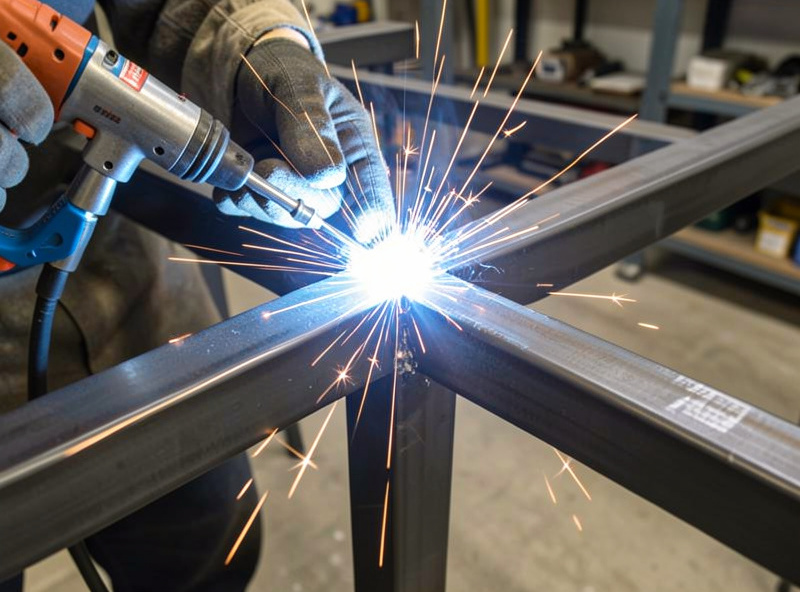
Welding the Frames Clean
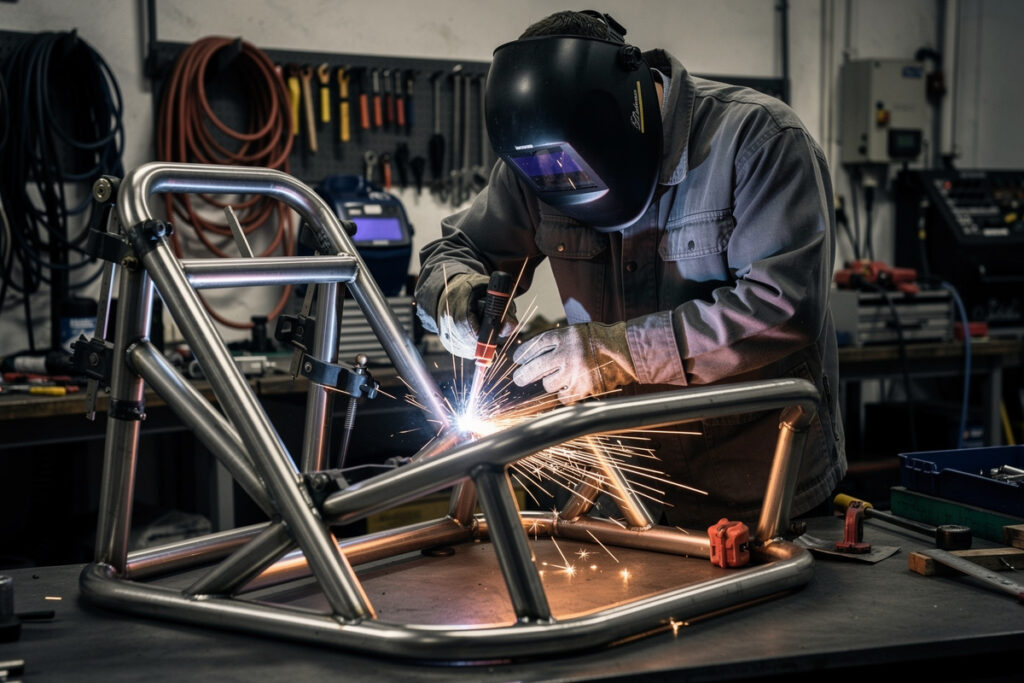
Furniture is seen up close, so the welds show and the frame must sit flat with no rock. I build on the welding table, clamp every joint to the Bessey GSCC clamps, and tack the whole frame before welding it out so I can correct any twist. My MIG-PRO205DS runs 0.030 ER70S-6 under 75/25 at sheet-to-light-structural settings, around 18 volts, because 1-inch tube does not want a lot of heat and burn-through at a thin-wall corner is ugly on furniture. I grind every external weld smooth so the corners feel finished, not raw.
The legs must all touch the ground or the chair rocks, which on furniture is unforgivable. I weld the frame on a flat surface, then check it on a known-flat floor; if one leg is proud, I do not shim it, I find the twist and correct it. Add a small foot pad or glide to each leg so the chair does not scratch a patio and does not sink into soft ground. A rocking chair frame is a fitup failure, not a welding failure, so it gets fixed before final welds.
Slats, Seats, and Bolting It Together
I weld small drilled tabs to the seat and back rails and bolt the wood slats on rather than fixing them permanently, so a weathered slat swaps out without a grinder. Stainless hardware only outdoors; plain steel bolts rust-stain the wood and seize. Space slats with a small gap so rain drains and the seat does not pool water. For an all-steel seat, expanded metal welded into a frame drains itself and is the lowest-maintenance option, though it wants a cushion to be comfortable for any length of time.
On the wood I use a stable outdoor species, white oak, cedar, or accoya, that handles wet and dry cycles without cupping, and I round every edge and corner so there is nothing sharp against a leg or arm. Cheap softwood slats cup and split within a season or two outdoors, and the bolt-on detail that should make replacement easy becomes a chore when the wood has swelled tight against rusty hardware. Spend on the slats and the stainless hardware; the steel frame is already the cheap part of the build by hours and by material.
For the bolt-on parts and finish supplies, here is what I use. As an Amazon Associate I earn from qualifying purchases.
- Stainless exterior bolts and screws so nothing rust-stains the slats.
- Rust-converting metal primer for the frame before topcoat.
- Exterior enamel rated for outdoor metal.
Armrests, Stacking, and the Details
Armrests turn a basic seat into a chair people choose to sit in, and they are simple: a horizontal tube running from the back frame to a front support leg, capped with a wood top so steel does not bake in the sun or freeze in winter. I set arm height around 7 to 9 inches above the seat, which lands a relaxed forearm without hunching the shoulders. The front arm support can double as a slightly extended front leg, which stiffens the whole chair and gives a clean line. Skip arms on the dining version where you want to tuck the chair under a table.
If you are building several chairs, decide early whether they need to stack or nest for winter storage, because stacking geometry has to be designed in, not added later. A slight inward taper on the legs and a consistent seat box let chairs nest a few inches into each other. I did not plan this on my first set and ended up storing four chairs that each took a full footprint in the shed. On the second set I tapered the legs and they stack four high against the wall, which is worth the small extra fitup effort at build time.
What a Set Actually Costs to Build
The honest accounting on a chair-and-bench set is that the steel is cheap and the rest adds up. A chair frame is a few dollars of 1-inch tube; the bench maybe double that. Where the money goes is good outdoor wood for the slats, stainless hardware, and a real finish, plus the gas and consumables to weld and grind it clean. Even so, a welded set costs a fraction of comparable bought steel furniture and outlasts it by decades, because you built every joint instead of relying on a spot weld and a bolt. That cost math is exactly why this project is worth the afternoon: you are trading a few hours of shop time for furniture that becomes a permanent fixture of the garden.
Finishing for Years Outdoors
Outdoor steel furniture lives or dies on the finish. I wire-wheel every weld to bright metal, prime with a rust-inhibiting primer, and topcoat with an exterior enamel or powder coat. Powder coating is the gold standard if you can get a piece to a coater; it outlasts spray enamel by years. Whatever I use, I pay attention to the inside of tube ends, where water gets in and rusts from inside out, so I either cap them welded shut or drill a weep hole so water drains rather than pools.
If a chair lives somewhere brutal, the same rust rules from my outdoor builds apply: seal the joints, drain the tubes, and recoat before bare metal shows. Steel furniture that gets a recoat every few years lasts decades; neglected, it streaks rust onto your patio in one wet winter. The frame is the part that outlives everyone; the finish is the part you maintain.
Further Reading
If this is your first seat-height structural project, build up to it with the simpler frames in the cluster. My steel workbench frame plans teach the same square-tube fitup and anti-warp discipline on a more forgiving piece, and the welded garden trellis is the gentlest introduction to outdoor steel and finishing. For another fire-and-patio centerpiece, the DIY welded fire pit pairs naturally with a bench set, and the DIY welding projects guide maps where furniture sits in the overall progression.
Discussion (0)