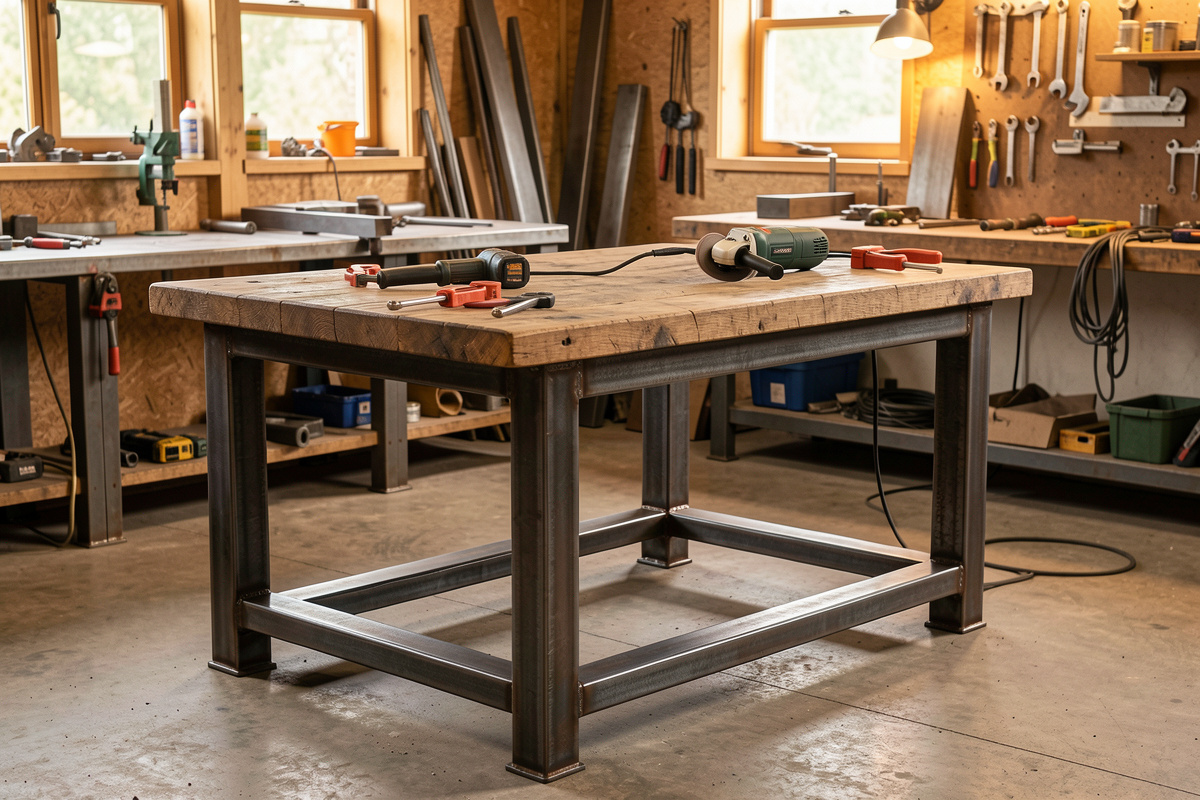
A welded steel workbench frame for a home shop should be built from 2×2-inch, 11-gauge (0.120-inch wall) box tubing, sized to a 60-inch-long by 30-inch-deep top at a 36-inch working height. That single weldment, tacked square and burned in with my MIG-PRO205DS, will carry a 200-pound engine block without a shiver. This is a general-purpose shop bench frame, not a weld table and not a rolling machine cart, and the design choices change because of it.
I have built three of these frames over the years, and the version I keep coming back to is the one I am describing here. It is the bench I clamp to, hammer on, and lean my full weight into when I am persuading a stubborn bracket into alignment. If you want a dedicated steel-topped welding surface instead, that is a different build with different priorities, and if you want the machine to roll around the shop on casters, that is different again. I link to both of those at the end. This article is about the bench that lives in one spot and takes a beating.
Steel Workbench vs Weld Table vs Rolling Cart
A general shop workbench frame is built for stiffness and a forgiving top you can drill, gouge, and replace. A welding table is built for a flat, conductive, slag-proof steel surface you ground to and never cover. A welding cart is built light and mobile to haul the machine and bottle. Confusing the three is the most common planning mistake I see beginners make, and it leads to a bench that does none of the jobs well.
For this frame I am optimizing for rigidity under side load and a top I can abuse. I run a 1.5-inch-thick laminated MDF or solid-wood top bolted to the frame, because I want a surface that absorbs hammer blows and that I can replace for the cost of a sheet of board when it gets chewed up. The steel-topped weld table is its own tool that lives beside this bench, and I cover the differences in the welding table buying guide. If mobility is your priority, the lighter welding cart build uses thinner stock and casters instead.

The Cut List and Steel I Use
For a 60 by 30-inch bench at 36 inches high, the frame needs four 33-inch legs (the top frame and top thickness make up the rest of the height), two 56-inch and two 26-inch top rails, the same four lengths for a lower shelf rail, and four short stretchers. All of it is 2×2-inch 11-gauge mild steel box tube. That wall thickness matters: I have built a frame from thin 16-gauge tube to save money and it flexed every time I leaned on it. Eleven gauge is the floor for a bench that takes hammering.
I cut every length on the cold-cut metal chop saw, deburr the ends with the DeWalt DWE402 and a flap disc, and check each cut against a framing square before it goes anywhere near the welder. Crooked cuts make crooked welds and a racked frame, and you cannot weld your way out of a fitup problem. A soapstone, a tape, and a sharp center punch are the only layout tools this build needs.
Tacking the Frame Square
I build the two long side ladders first, flat on the table, each one being two legs joined by a top rail and a lower shelf rail. I clamp them to the Bessey GSCC sliding-arm clamps, check square in both directions with a machinist square, and put a single tack at each joint. One tack per joint lets me tweak the geometry before anything is locked in. Only when both side ladders measure identical and the diagonals match do I add the second tack.
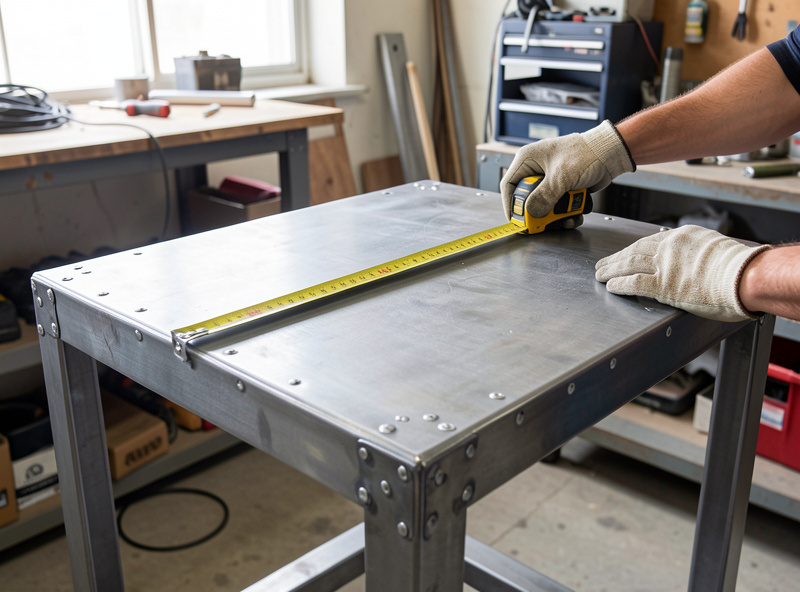
Then I stand the two ladders up, join them with the four cross rails, and tack the whole box. Now I measure corner to corner across the top in both diagonals. If the two diagonals are equal, the top is square. Mine usually need a gentle persuasion with a dead-blow before the numbers match, and that is exactly why you tack before you fill. A frame welded solid out of square is scrap.
Welding It Out Without Warping It
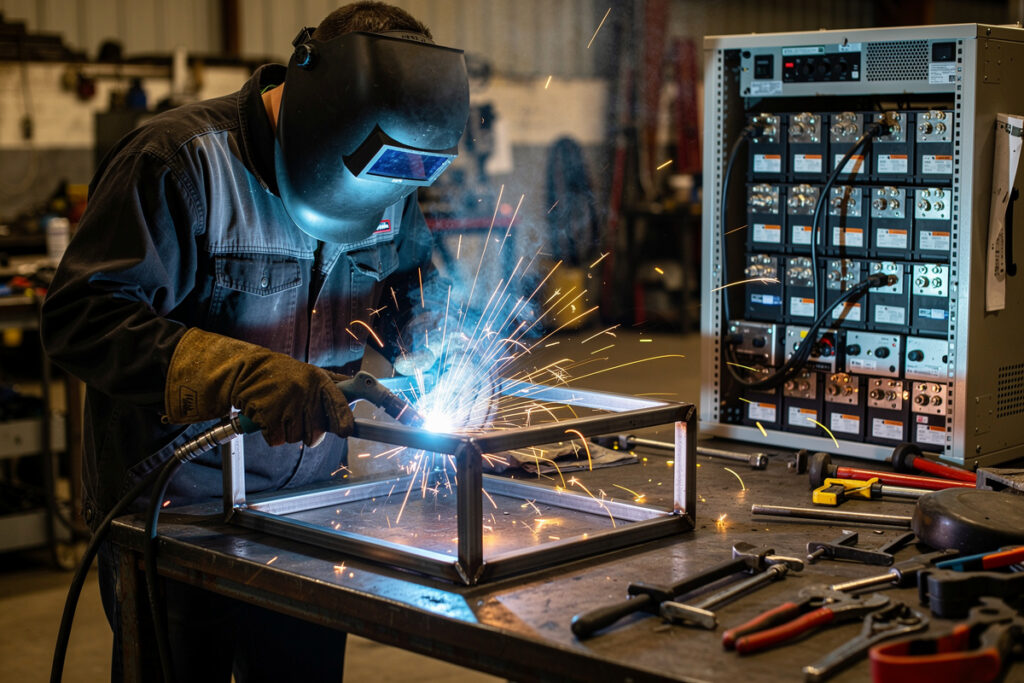
Box tubing warps if you dump all the heat into one joint and chase a bead the whole way around. I weld these frames in a skip-and-balance sequence: a 1-inch stitch on one side of a joint, then the same stitch on the opposite corner of the frame, working diagonally across the weldment so the heat stays balanced. I let the steel come back to roughly hand-warm between passes. The frame stays straight that way, and on 2×2 box you do not need a continuous bead for strength anyway.
My MIG-PRO205DS runs 0.030 ER70S-6 under 75/25 gas for this, around 19 volts and a wire speed I have dialed to a clean sizzle rather than a crackle. These are simple T-joints and corner joints in clean steel, so it is straightforward short-circuit MIG work. If your fitup left a gap, slow your travel and let the puddle bridge it rather than piling wire into a cold lump. Grind every joint clean first; mill scale and cutting oil are where porosity starts.
Legs, Leveling, and the Top
I cap every leg with a weld-on leveling foot or, on a dead-flat floor, a simple welded foot plate. Threaded leveling feet are worth the few dollars because no shop floor is truly flat, and a bench that rocks is a bench that walks when you hammer on it. I tack the feet on last, after the frame is standing on the floor, so they all touch.
The top is a 1.5-inch laminated wood or MDF panel sitting on the top frame, fixed down through tabs I weld inside the top rails and drill for a bolt. I do not weld the top on; I want to swap it. A strip of angle iron welded along the front edge gives me a hard lip to clamp work against and protects the wood from clamp jaws. That front rail is the detail that turns a table into a real workbench.
| Bench type | Top surface | Steel weight | Best for |
|---|---|---|---|
| General shop workbench (this build) | Replaceable wood/MDF | 2×2 11-gauge, heavy | Clamping, hammering, assembly |
| Welding table | Solid steel plate | Steel top, heaviest | Welding, grounding, flat reference |
| Welding cart | Steel shelves + casters | Lighter tube, mobile | Hauling machine and bottle |
What I Would Change for a Bigger Bench
If you scale past 72 inches long, add a center leg pair or a mid-span rail under the top, because an unsupported wood top will sag in the middle under a vise or a press. I also step up to 2×2 0.188-inch wall or 2×3 tube on the longest benches. For a bench that lives under a bench vise or a hand press, I weld a steel sub-plate into the top frame directly under the vise location so the load goes into steel, not into the wood. The frame is the easy part; planning where the loads land is what separates a bench you trust from one you baby.
Frequently Asked Questions
What size steel tube for a welding workbench frame?
Use 2×2-inch 11-gauge (0.120-inch wall) mild steel box tube for a general shop bench up to 60 inches long. Thinner 16-gauge tube flexes under hammering. Step up to 0.188-inch wall or add a center leg pair past 72 inches.
How tall should a welded workbench be?
A 36-inch working height suits most standing shop work for an average-height person. Cut legs at 33 inches once you account for the top frame and a 1.5-inch top, then add leveling feet so the bench does not rock on an uneven floor.
Should a workbench top be steel or wood?
For a general shop bench, a replaceable 1.5-inch wood or MDF top absorbs hammer blows and costs little to swap when chewed up. A solid steel top belongs on a dedicated welding table, which is a separate tool with different priorities.
How do you keep a welded frame from warping?
Weld in 1-inch stitches and skip diagonally across the frame instead of chasing a continuous bead around one joint. Let the steel cool to hand-warm between passes. Balanced heat keeps 2×2 box tubing straight, and stitches are plenty strong here.
Do I need a center support on a workbench?
For benches up to about 60 inches, four legs and a top frame are enough. Past 72 inches, add a center leg pair or a mid-span rail so a wood top does not sag under a vise or press. Put steel under any vise location.

Discussion (0)