Welding a steel enclosure for a home battery bank costs $80-$180 in materials and produces a fire-resistant enclosure that prefab racks at $400-$900 do not exceed. Frame is 13-15 lengths of 1.5″ x 1.5″ x 1/8″ steel angle, MIG-welded into a 19″ rack-compatible cabinet for 1-4 LiFePO4 modules.
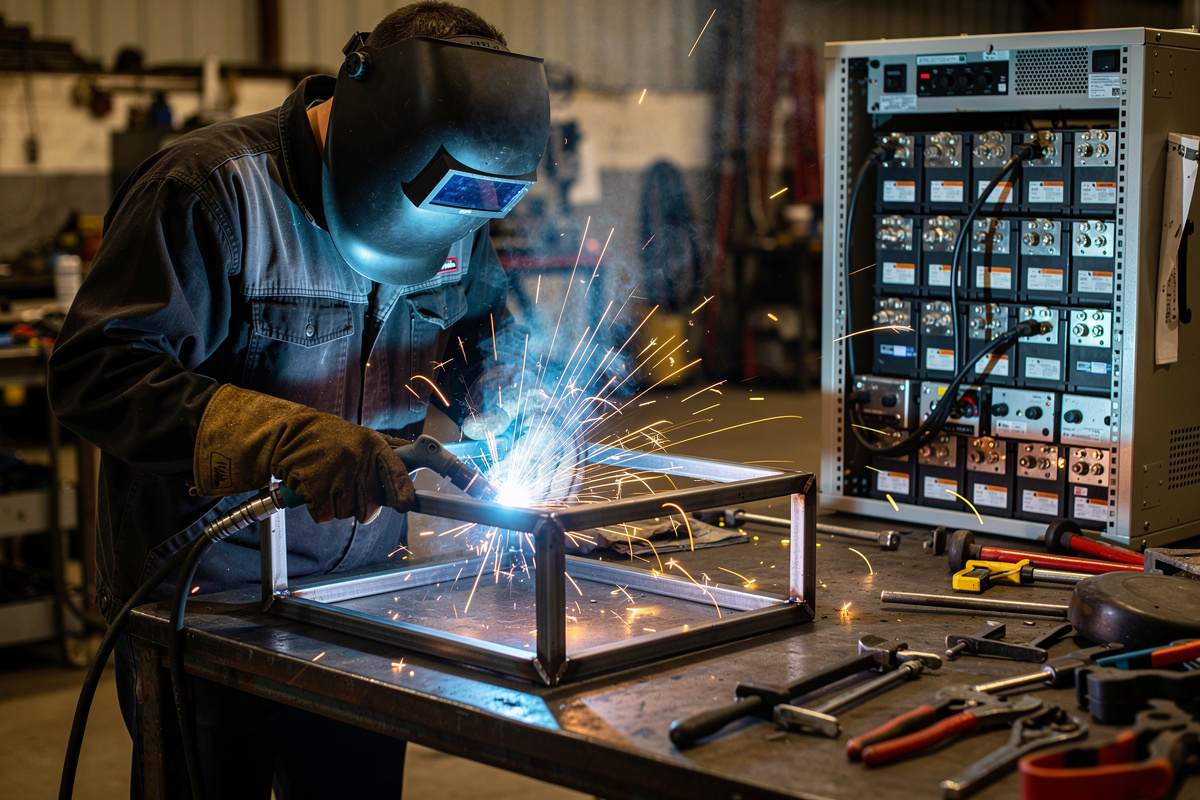
I welded a 4-module enclosure for my off-grid storage in 2024 — 14 lengths of 1.5″ angle, $96 in steel, 11 hours over a weekend including paint. The cabinet has held 12 kWh of LiFePO4 capacity for 18 months without a single bracket failure or coating breakdown. NFPA 855 covers stationary energy storage system installation requirements; its 3-foot (36″) minimum separation between ESS units and from doors and windows (source) applies whether you build the cabinet or buy it. The full project context is in the DIY welding projects guide.
This guide walks through the steel selection that matters for fire-rated enclosures, the dimensional layout for standard 19″ server-rack LiFePO4 batteries, the MIG welding settings for clean structural joints in 1/8″ angle stock, and the safety details specific to enclosing 5-15 kWh of energy storage.
Why Welded Steel and Not Wood or Aluminum
LiFePO4 chemistry is dramatically safer than NMC or older lithium chemistries — no thermal runaway under normal failure modes, no fire risk from cell rupture. But “dramatically safer” is not “zero risk.” A short-circuit fault in a 100 Ah / 48 V cell delivers 200-500 amps of current that can ignite nearby flammable materials before the BMS or fuse trips.
Three reasons steel beats the alternatives:
- Fire containment. Steel resists ignition at any temperature LiFePO4 can produce. Wood enclosures around battery banks are a code violation in many jurisdictions because the wood itself is fuel.
- Mechanical strength. A 100 Ah server-rack battery weighs 95-115 lbs. A bank of 4 modules is 400+ lbs. Steel angle handles this easily; aluminum at the same gauge would flex.
- Magnetic shielding. Steel offers some EMI shielding that protects nearby electronics from BMS switching transients. Not a primary concern but a nice side-effect.
Aluminum is acceptable for outdoor enclosures where weight matters and the battery is far from any combustible material. For most indoor garage installations, welded steel is the right answer.
Steel Selection: Stock and Grade
Three steel components for a typical 4-bay server-rack LiFePO4 enclosure:
- Frame: 1.5″ x 1.5″ x 1/8″ hot-rolled angle iron, A36 grade. The standard structural steel for residential builds. Available at any steel yard or Home Depot at roughly $3-4 per linear foot. A 4-bay enclosure uses about 35 linear feet — $110-140 in steel.
- Door panel: 16-gauge cold-rolled steel sheet. Sized for the door opening (typically 19″ x 28″ for a 4-bay). Cold-rolled is smoother and paints better than hot-rolled. About $30-50 for the sheet.
- Hinges and latch: heavy-duty steel cabinet hinges (continuous piano hinge or 3-4 standard hinges) plus a key-lock latch. $25-50 for the hardware.
For a deeper guide to where and how to source steel for projects like this, see our where to buy steel for welding projects and the scrap yard steel identification guide. Both cover the practical sourcing decisions that determine whether you spend $110 or $250 on the same project.
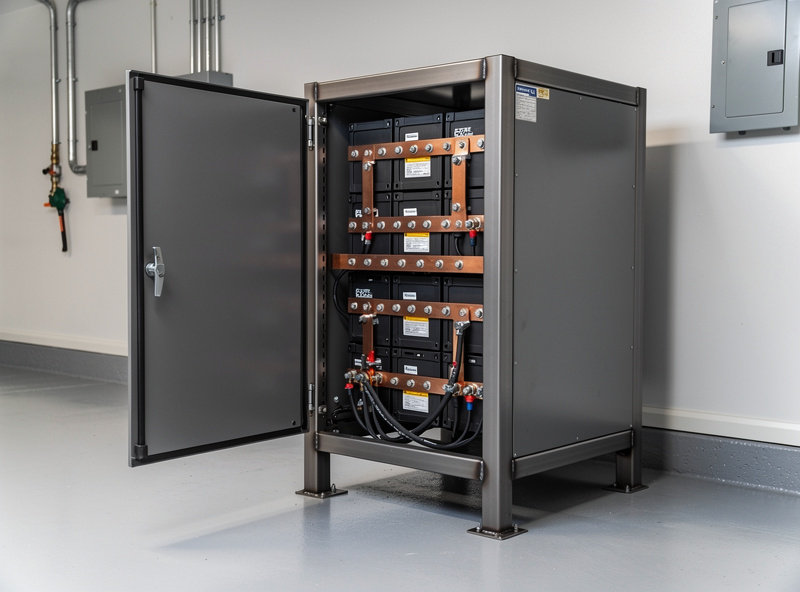
Dimensional Layout for 19″ Server-Rack LiFePO4
Standard server-rack LiFePO4 batteries (EG4 LL-S, SOK 48V 100Ah, BigBattery EG4, Pytes V5) all conform to the EIA-310 19″ rack form factor. Critical dimensions:
- External width: 19″ rack standard (482.6 mm). Internal opening 17.75″ minimum to clear the battery flanges.
- Battery height: 3U (5.25″) for most 5 kWh modules. 4U for some 14 kWh units.
- Battery depth: 19-23″ depending on brand. Build the enclosure 24″ deep for compatibility.
- Cooling clearance: 1-2″ above each battery for heat dissipation. Plan total stack height accordingly.
For a 4-bay enclosure: external 22″ wide x 30″ deep x 30″ tall, internal 19″ wide x 24″ deep x 28″ tall (4 x 5.25″ battery + 4 x 1.5″ cooling clearance + 1.75″ base). Rack-mounted battery flanges hang from horizontal angle iron rails at 1U intervals.
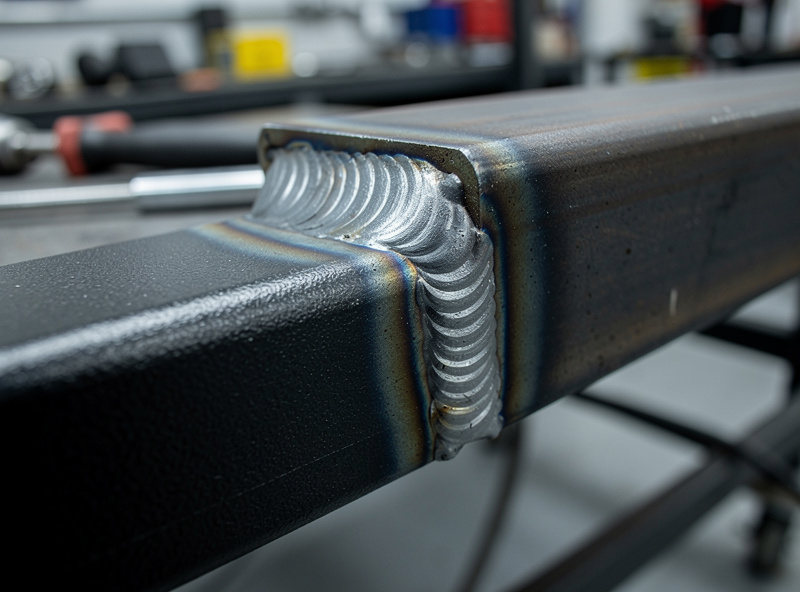
MIG Welding Settings for 1/8″ Steel Angle
MIG settings for 1/8″ hot-rolled angle, .035″ wire (ER70S-6), 75/25 argon-CO2 shielding gas:
- Voltage: 18-19 V for short-circuit transfer mode at this material thickness.
- Wire feed speed: 280-320 inches per minute.
- Travel speed: 8-12 inches per minute. Steady, slightly drag-the-puddle technique on horizontal joints.
- Stickout: 3/8″ – 1/2″ wire stickout. Longer stickout reduces penetration; shorter increases spatter.
- Joint prep: Grind mill scale off the weld zone. Mill scale on hot-rolled steel causes inclusions and weak welds. Two minutes of grinding per joint pays back in weld quality.
- Tack weld first. 6-8 small tacks at corners and midpoints before any full weld pass. Allows you to re-square the frame before committing to full welds.
The complete settings reference for various steel thicknesses lives in our MIG welding settings chart. Common defects and their fixes (porosity, undercut, cold-lap) are in the welding porosity guide and the spatter causes and fixes.
Battery Selection: What’s Going Inside the Box
The enclosure is sized around the battery, so battery choice matters first. The chemistry-and-controller tradeoffs that determine which LiFePO4 module to use are covered comprehensively on our partner site in the complete battery chemistry guide for home storage. The short version for enclosure builders: pick a server-rack form factor module (EG4 LL-S, SOK, BigBattery, Pytes), plan for 4-6 modules of capacity over the system lifetime even if you start with 1, and verify the battery’s communication protocol matches your inverter’s CAN bus or RS485 interface.
Comparison: Welded Enclosure vs Prefab Options
| Option | Cost (4-bay) | Build time | Fire rating | Pro | Con |
|---|---|---|---|---|---|
| DIY welded steel angle (this guide) | $140-220 | 1 weekend | Equivalent to UL fire-rated | Custom fit, low cost | Requires welding skill |
| Bolt-together steel kit (40/80 series) | $300-450 | 4-6 hours assembly | Equivalent | No welding required | Higher cost, less rigidity |
| Prefab server-rack enclosure (Tripp Lite, APC, EG4) | $450-900 | 2 hours | UL listed | Plug and play | Generic sizing, expensive |
| Wooden cabinet with steel liner | $200-300 | 2 days | Code violation in many jurisdictions | Wood look | Code/insurance risk |
| Open rack (no enclosure) | $80-150 | 4 hours | None | Cheapest, easiest | No fire containment, no theft protection |
| Aluminum welded enclosure | $180-280 | 1 weekend | Lower than steel | Lighter weight | Less fire protection, harder to weld |
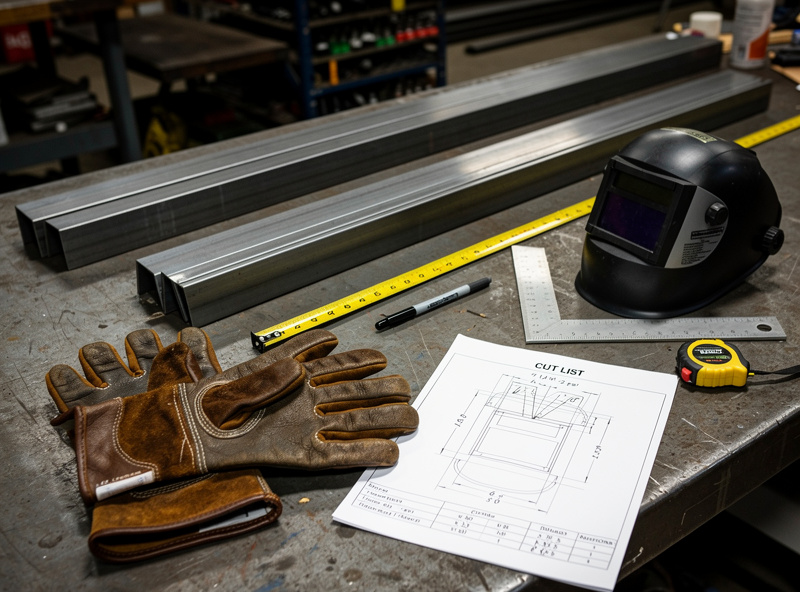
Build Sequence for a Single-Weekend Project
- Saturday morning: Cut all 13-15 angle pieces to length. Mark for grinding, grind mill scale off all weld zones. Lay out on a flat work surface.
- Saturday midday: Tack-weld the bottom frame square. Verify diagonal measurements match — adjust if needed before committing to full welds.
- Saturday afternoon: Tack-weld vertical members and top frame. Re-verify squareness.
- Saturday evening: Full-weld all joints. Allow to cool before moving to the door panel work.
- Sunday morning: Cut and weld the door frame. Attach the cold-rolled steel sheet to the door frame with rivets or self-tapping screws.
- Sunday midday: Mount hinges and latch. Test door swing and latch engagement.
- Sunday afternoon: Grind weld beads smooth on visible surfaces. Apply primer (Rust-Oleum Clean Metal Primer or similar). Let dry overnight.
- Monday evening (optional): Apply finish coat (high-gloss black is the practical choice). Allow 48-72 hours full cure before installing batteries.
Safety Features Worth Adding
Three details that elevate a basic enclosure to a properly safe one:
- Fixed Class T fuse holder mount inside the enclosure. Welded-in flat steel tab to mount a Class T fuse holder. Code language (NEC Article 706) doesn’t give a fixed inch number here — it requires the overcurrent device “as close as practicable” to the battery terminals (source), so mount the tab as near the battery compartment as the layout allows without crowding the terminals themselves.
- Ventilation openings with mesh screens. 1-2 small (2″-3″) ventilation openings on the back panel, covered with metal mesh screen. LiFePO4 doesn’t off-gas under normal conditions, but venting any enclosure prevents heat buildup and accommodates rare failure modes.
- Cable pass-through gland. A 1.5″ hole in the back or side panel with a rubber strain-relief gland for the battery output cables. Prevents abrasion and seals the enclosure against pests.
For broader project guidance on welding similar steel-angle structures, see our how to build a welding cart (similar joint patterns), the welded steel tube sim rig frame (similar dimensional precision requirements), and the welding vs CNC routing decision guide. The welding ventilation guide covers garage setup that matters before any indoor welding project.
For background on the electrical code requirements for residential battery storage, the NFPA 855 Standard for Energy Storage Systems is the canonical reference. The OSHA welding and cutting safety portal covers PPE and ventilation requirements applicable to home welding work.
Frequently Asked Questions
Do I really need a steel enclosure for a LiFePO4 battery?
Code-required in many jurisdictions (NFPA 855), insurance-required by most home insurers, and good engineering practice in all cases. LiFePO4 is dramatically safer than older chemistries but not zero-risk; a short-circuit fault delivers 200-500 amps. Steel containment costs $140-220 in DIY materials and produces a UL-equivalent enclosure.
What size steel angle works for a server-rack enclosure?
1.5 by 1.5 by 1/8 inch hot-rolled steel angle (A36 grade) handles a 4-module bank weighing 400+ pounds with substantial safety margin. Heavier 2x2x3/16 angle works for larger 6-8 module banks. Lighter 1x1x1/16 angle is too thin to MIG-weld cleanly and not strong enough.
What are the right MIG settings for 1/8 inch steel?
18-19 V, 280-320 IPM wire feed, .035 ER70S-6 wire, 75/25 argon-CO2 gas, 8-12 IPM travel speed. Grind mill scale off the weld zone before welding. Tack weld first to verify squareness, then full-weld in a sequence that pulls the frame in rather than letting heat distortion pull it out.
Can I bolt the frame together instead of welding?
Yes — 80/20 aluminum extrusion or steel angle with bolt-together connectors works for builders without welding skills. Pros: no welding required, easier to disassemble. Cons: 50-100 percent higher material cost, less rigid under heavy load, more vulnerable to vibration loosening over years. For a one-time build, welding is more economical.
How much does this cost compared to a prefab enclosure?
DIY welded steel angle: $140-220 in materials for a 4-bay enclosure. Bolt-together kits: $300-450. Prefab UL-listed cabinets: $450-900. The DIY version saves $300-700 if you have welding equipment and skills, with no compromise in fire rating or structural strength.
What ventilation does a battery enclosure need?
For LiFePO4, minimal — these batteries do not off-gas under normal operation. 1-2 small (2-3 inch) ventilation openings on the back panel covered with metal mesh prevent heat buildup and accommodate rare failure modes. NMC chemistry would require dramatically more aggressive ventilation; LiFePO4’s safety advantage is exactly why this minimal venting is sufficient.
Do I need to ground the steel enclosure?
Yes — connect the steel enclosure to your home electrical grounding system via a dedicated ground wire from one of the frame members. The ground connection ensures any fault current has a low-impedance path to earth, preventing the enclosure from becoming live during a fault. A simple #6 AWG bare copper wire to a ground rod or grounded electrical panel does the job.
Discussion (0)