
The 3D printer in my welding shop has saved more hours than the chop saw — and I run a 14-inch DeWalt D28715 that does plenty of cutting. The reason is that every tube-notching guide, magnet clamp, and 45-degree tack jig I used to layout-mark with a soapstone now comes off a print bed in PETG. Print cost: 40–80 cents. Commercial equivalent: $30–50. The notcher I lean on the most holds 1.5-inch square tube against a drill-press sanding drum and lands 0.5 mm gaps instead of the 2–3 mm gaps I used to fight through with the MIG gun.
I print my welding jigs on a Prusa Mini I keep in the shop corner. The YesWelder MIG-PRO205DS that I run 0.030″ wire through sits four feet away from the printer bed, which means the jig that just came off the print goes straight onto the work clamp — Bessey GSCC2.524 24-inch clutch-style, my daily — and into a tack pass. That four-foot distance also matters for fire safety, which I’ll come back to. The printer-to-welder workflow is what makes printed jigs worth the bother; if I had to walk down a hallway between print and tack, I’d just buy the magnet square. There’s also one trick that turns a printed magnet clamp from melted PLA goo into a jig that survives 4–6 tacks per cycle, and I’m holding that one until the heat-set insert section below.
The Three Jigs I Print Most: Magnet Clamp, V-Block, 45° Tack Jig
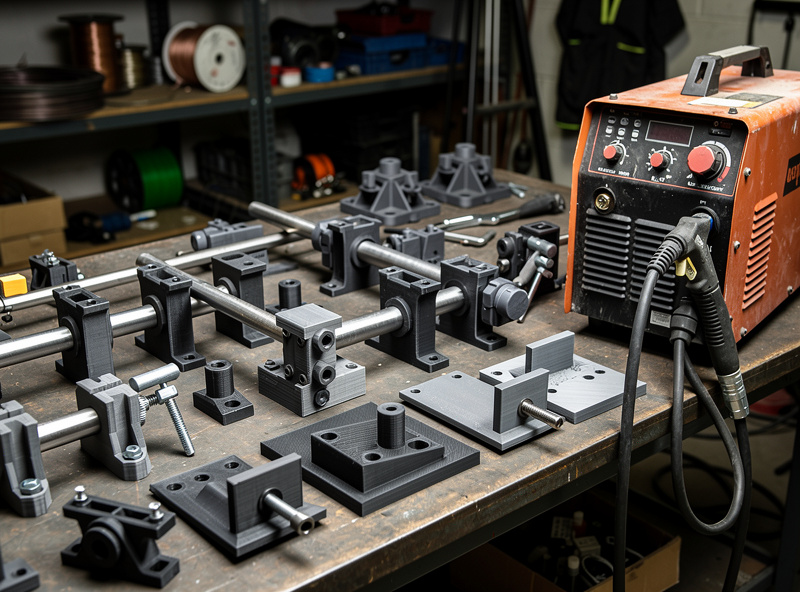
I have a small library of printed jigs in a milk crate next to the workbench, but three earn their place by getting pulled out three or four times a week. Everything else is either a one-off for a specific project or a v1 I never reprinted.
| Jig | Material | Infill | Print Time | Replaces |
|---|---|---|---|---|
| 90° magnet clamp block | PETG (Polymaker PolyMax) | 100% at magnet pocket, 40% body | 1.5 hours | $25 Strong Hand magnet square |
| Tube V-block (1.5″ square) | PETG | 50% gyroid | 2 hours | $40 machined V-block |
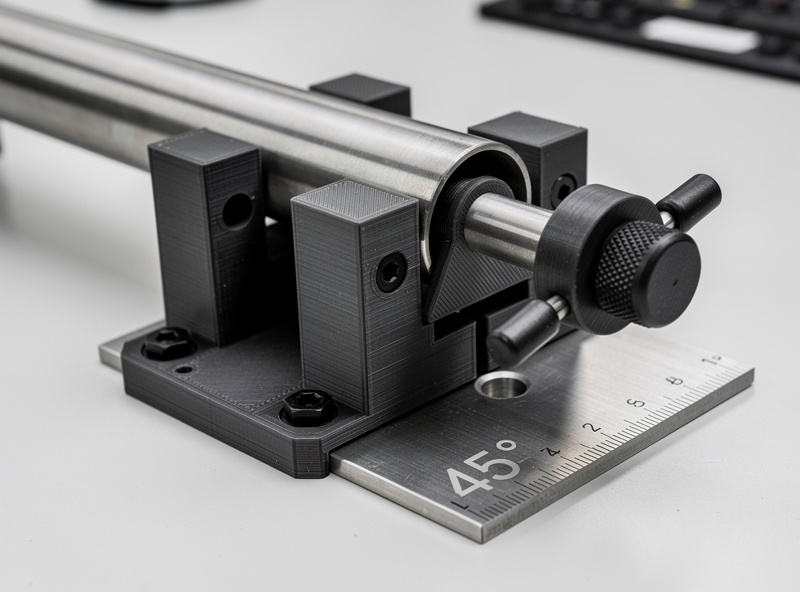
| 45° tack jig (drill-press base) | PETG | 30% gyroid + 6 walls | 2 hours | Angle finder + soapstone layout |
The 90° magnet clamp block is the jig I print first when I onboard a friend’s printer. It’s a small right-angle corner — 60 mm legs, 25 mm wide — with two press-fit pockets sized for 8 mm × 3 mm neodymium discs. The magnets sit 6 mm back from the contact face so the PETG insulates them from radiant heat during tacks. I run two blocks per joint, which gives me 70 lb of holding force across the corner. The first time I clamped a 1.5-inch tube corner with these instead of the Bessey, the magnet snap was unmistakable — a quick metallic tick instead of the slow thread-down of a screw clamp. Faster setup, lighter footprint on a crowded bench.
The V-block is what cured me of soapstone layout on round and square tube. It’s a 90 mm × 50 mm block with a V channel that drops a 1.5-inch square tube on its diagonal so I can mark the centerline or set up a fishmouth notch against the drill-press sanding drum. I printed the first one in PLA — that’s a mistake passage all on its own — and it crept the first time it sat next to a 20-minute stitch session. The current one is Polymaker PolyMax PETG, 50% gyroid, eight walls. Two years old now and the corners are still square.
The 45° tack jig bolts to the drill-press table with a single 1/4-20 heat-set insert (more on those below) and gives me a hard reference face I can push square tube against while I tack-weld a miter at the bench. Before this jig I’d fumble an angle finder, a Sharpie, and the Tillman 1338 gauntlets at the same time and end up with miters that were a degree-and-change out. After the jig: tack, flip, tack, done. Mike — my welder friend, the one with the Lincoln 210 MP — looked at it the first time and said something like “you printed an angle plate.” Yes.
Print Settings That Survive the Welding Bench
The settings that produce a good 3D-printed model don’t automatically produce a good 3D-printed welding jig. Welding-shop jigs see splash, heat soak from nearby tacks, oil and cutting fluid from the band saw (mine’s a WEN 3975 with a Lenox Diemaster 2 bi-metal blade), and the occasional drop onto a concrete floor when I’m wearing the Tillman 1338s and can’t feel them slip. Here’s what I run on the Prusa Mini for each jig type, after enough failed prints that I stopped guessing.
| Setting | Magnet clamp | V-block | Tack jig |
|---|---|---|---|
| Material | Polymaker PolyMax PETG | Polymaker PolyMax PETG | eSUN ABS+ (enclosed) or PETG |
| Nozzle temp | 245°C | 240°C | 250°C ABS / 240°C PETG |
| Bed temp | 85°C | 85°C | 100°C ABS / 85°C PETG |
| Layer height | 0.2 mm | 0.2 mm | 0.15 mm (tighter mating face) |
| Wall count | 5 walls | 8 walls | 6 walls |
| Infill | 100% at pocket / 40% body | 50% gyroid | 30% gyroid |
| Layer orientation | Contact face up, magnet pocket horizontal | V opening down on print bed | Reference face on bed |
The two settings I argue about with myself the most are wall count and material. I default to PETG because its 80°C glass transition gives me real headroom over PLA’s 55°C, and because PolyMax handles grinder splash better than the cheap PETG I started with — splash beads up and bounces off instead of sticking and melting in. ABS is harder, has a higher glass-transition (~105°C) and is worth the enclosure setup for the tack jig because the reference face takes the most abuse. But ABS warps on a Prusa Mini without an enclosure, so for the magnet clamp and V-block I stay on PETG.
Wall count matters more than infill percentage for jigs. Five to eight walls means the load is carried by solid plastic, not the gyroid lattice, and the print is effectively a thick-shell part. A 100% infill cube with 2 walls is weaker than a 30% gyroid with 8 walls for the same weight. The exception is the magnet pocket — I bump that local infill to 100% (modifier mesh in PrusaSlicer) so the magnet press-fit stays tight after thermal cycling.
Heat-Set Inserts and Magnet Pockets: The Two Tricks That Make 3D-Printed Jigs Actually Hold
These are the two techniques that separate a working jig from a piece of melted plastic, and they’re worth the extra ten minutes per jig.
Heat-set threaded inserts are brass inserts you press into a slightly undersized printed hole with a soldering iron at ~230°C. The brass melts the surrounding plastic and re-forms it around the knurling, giving you a real metal thread in a plastic part. I use M3 and 1/4-20 inserts from McMaster-Carr — about $12 for a 50-pack — and I drive them in with a Hakko FX-888D and a tapered tip at 240°C. Without these, every bolt-down jig either splits the plastic or strips its threads on the second tightening. With them, the tack jig bolts to my drill-press table fifty times a year without complaint.
Magnet pockets are where most printed welding jigs fail. The temptation is to print the pocket at exactly the magnet diameter (8.0 mm hole for an 8.0 mm magnet) and superglue it in. That works for about three tacks before the cyanoacrylate softens at 70–80°C, the magnet pops free, and you get to fish a neodymium disc out of a still-hot weld puddle. The fix: print the pocket 0.2 mm undersized (7.8 mm hole for an 8 mm magnet), no glue, press-fit only. The PETG springs around the magnet and grips it mechanically. The 100% local infill at the pocket keeps the wall from creeping under sustained heat. I’ve had the same set of magnet clamps on the bench eighteen months — still tight.
The sensory cue I trust on a freshly printed magnet clamp: snap a magnet into the pocket and listen. A correctly sized press-fit makes a sharp metallic tick as the magnet seats and the PETG closes back on it. A loose pocket — too generous on the dimension — makes a softer thump and the magnet rattles slightly when you shake the part. If you hear the thump, scrap the print and reslice with a tighter pocket. I print a small calibration test (six pockets, 7.6 to 8.1 mm in 0.1 mm steps) for every new spool of PETG because dimensional accuracy drifts between manufacturers.
The PLA Mistake I Won’t Repeat
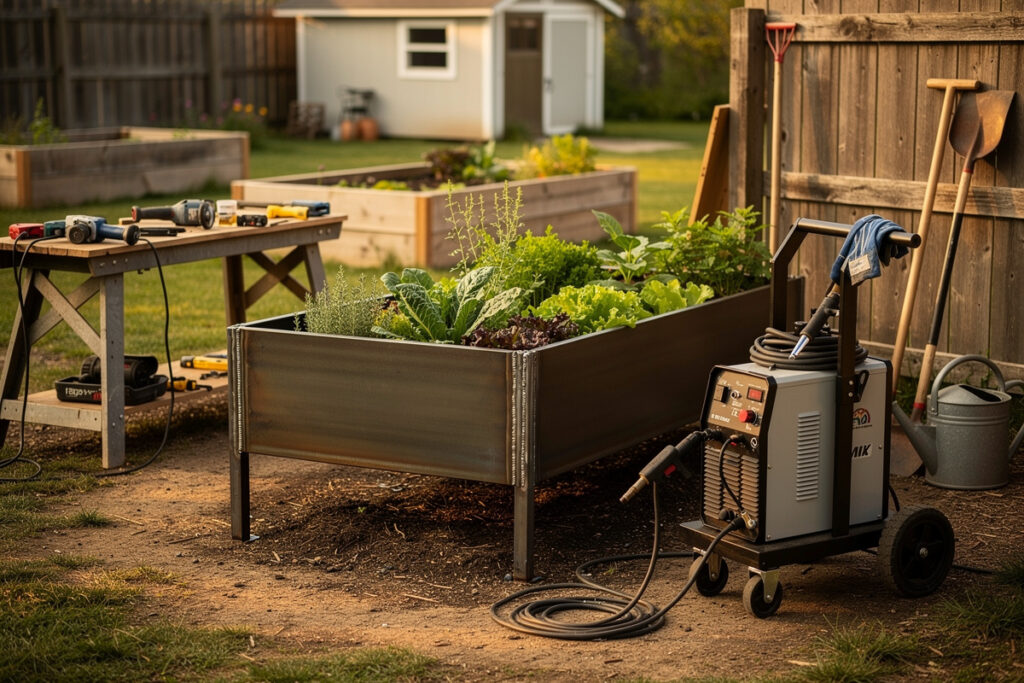
The first magnet clamp I printed was PLA — bright orange, 30% infill, five walls, the file came from Printables and I didn’t think about the material choice. I used it on a 1.5-inch square-tube garden-bed corner during a two-hour stitch-welding session. The clamp sat on the bench right next to where I was tacking, maybe two inches from the arc. The heat radiated through the clamp body, the PLA crept under the 5-lb magnet pull, and by the last weld the workpiece had shifted 2 mm — enough that the finished corner was visibly out of square and I had to grind the bead back with the DeWalt DWE402 and re-tack. Lesson: PLA is for prototypes, never for production jigs. Anything that lives on the welding bench is PETG minimum, with 100% infill at any point that takes magnetic or mechanical load. The smell when the PLA finally got too close to a tack — that acrid-sweet melted-corn-syrup note over the cleaner burnt-metal smell of the weld — is the smell that taught me to switch materials.
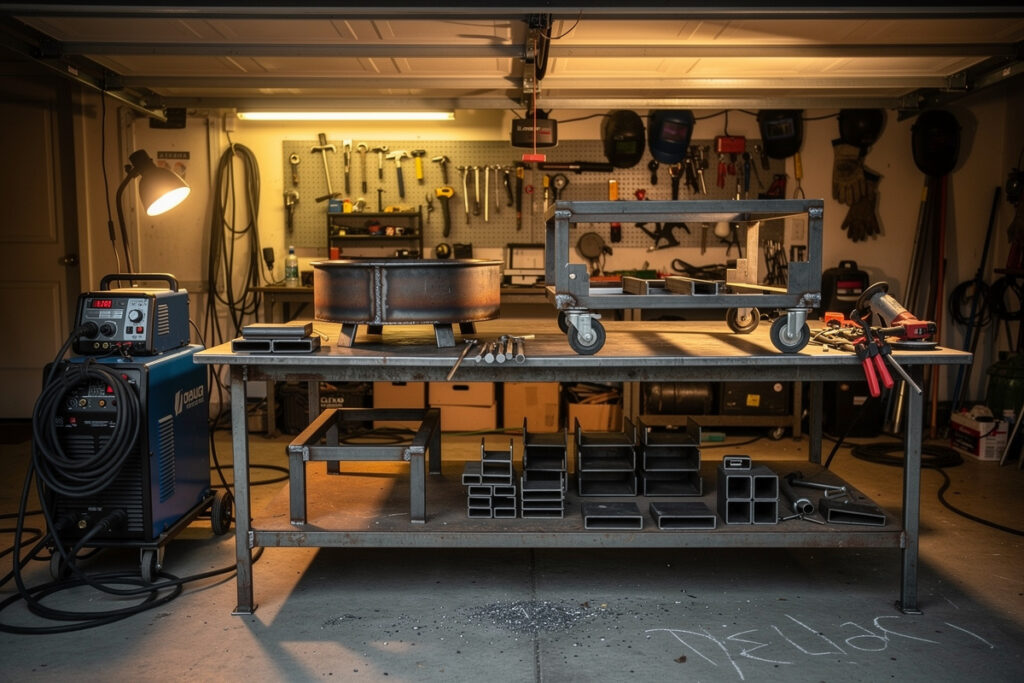
Fire Safety and Why I Keep the Printer Four Feet from the Arc
OSHA’s hot-work fire-safety rule (29 CFR 1910.252(a)(2)(iii)(A)(1), a standard that traces back to and incorporates NFPA 51B by reference) is the basis for not putting plastic anywhere near the arc strike: it requires clearing appreciable combustible material within 35 feet of the point of operation. PETG isn’t on that list explicitly, but a PETG spool’s manufacturer safety data sheet puts auto-ignition around 454°C, with decomposition starting above 350°C — and a MIG arc column runs 6,000-8,000°C at the tip, orders of magnitude past that. The four-foot distance between my Prusa Mini and the YesWelder is the minimum I’m willing to run, and I keep a welding blanket draped over the printer when I’m running long beads. The other gear consequence of being arc-adjacent: I run a heavy-gauge Iron Box 50A/250V extension cable (8/3 SOOW, 25 ft) from the panel to the welder so the cord isn’t snaked across the printer’s footprint. AWS A5.18 is the spec for my 0.030″ carbon-steel filler wire — worth knowing because the filler-metal datasheet is what tells you the puddle temperature and splash radius for the rod you’re actually burning.
The Jig I’d Print First If I Were Starting Today
If I were setting up a printed-jig library from scratch — say I just bought my first welder and my first printer — the magnet clamp block is the print I’d run first. Cheapest filament, fastest payoff, and the moment you snap two of them onto a tube corner and the joint locks square without a magnet-square cluttering the bench, you understand why the printer earns its corner. The V-block comes second because layout marking is the silent time-sink that nobody mentions in welding tutorials. The 45° tack jig is third because by then you’ll know exactly which miter angle your projects keep needing — for me it’s 45, for Mike it’s 30. The full design files I’ve settled on after two years of revisions, plus the print-settings discussion at the slicer level, live on the 3D-printing side of my workshop notes at printforgehq.com’s practical 3D printing projects guide. If you’re already comfortable with welding fixtures and you want to see how the same problem looks for other workshop projects, my welding clamps, magnets, and squares fixturing guide covers commercial options, and the welding-cart build uses several of these printed jigs to hold tube during assembly.
Frequently Asked Questions
Will a 3D-printed jig melt from welding heat?
PETG printed jigs placed 2–3 inches from the weld zone survive tack welding without deformation because the air gap and the material’s 80°C glass transition temperature provide enough thermal headroom. For continuous welding beads, use the jig for positioning and tack welding only, then remove it before running the full bead. Do not use PLA jigs — they soften at 55°C and will deform near any weld.
What magnets work best in 3D-printed welding fixtures?
Neodymium disc magnets 8–10 mm diameter and 3–5 mm thick, press-fit into slightly undersized printed pockets (7.8 mm hole for an 8 mm magnet). The press-fit holds the magnet without glue. Do not use glued magnets near welds — the heat softens cyanoacrylate and the magnet pops out, potentially landing in the weld puddle.
Can I print a fixture that holds parts for a full welding project?
Yes, but only for tack welding. Design the fixture as a positioning jig with clamping points, tack-weld the assembly while it sits in the jig, then remove the jig and run the full beads. A fixture that stays in place during continuous welding will melt regardless of material choice — the sustained heat from a MIG bead exceeds any plastic’s thermal limit.
Will PETG jigs survive grinder splash?
Polymaker PolyMax PETG holds up to incidental flap-disc and cutoff-wheel splash from a DeWalt DWE402 at arm’s length — the hot particles bead up on the surface and bounce off without sticking. Direct sustained sparks from a stationary cut will pit and melt PETG within seconds, so position the jig outside the cone of spark travel or shield it with a welding blanket. Cheaper unbranded PETG is more prone to surface scarring; spend the extra $5 on a name-brand spool for shop jigs.
What infill percentage should I use for a magnet clamp?
Use 100 percent local infill at the magnet pocket and 40 percent gyroid for the rest of the clamp body, combined with 5 perimeter walls. The 100 percent zone keeps the press-fit pocket from creeping under heat and magnetic load, while the lower body infill keeps the print time reasonable. Pure 100 percent infill across the whole clamp is overkill and adds an hour to print time without measurable strength gain — wall count matters more than fill percentage for parts under shear.
Can I print a welding fixture in ABS instead of PETG?
Yes, and ABS is the better choice for the tack jig and any fixture that contacts the reference face repeatedly. ABS has a 105°C glass transition versus PETG’s 80°C, so it handles closer arc proximity. The trade-off is that ABS warps badly on an open-frame printer like the Prusa Mini without an enclosure, and ABS fumes are not something you want venting into a welding bay. Run eSUN ABS+ in an enclosed printer with active ventilation, or stay on Polymaker PolyMax PETG for everything except the highest-heat reference surfaces.
How long do 3D-printed welding jigs last?
My oldest PETG magnet clamp is going on 18 months of regular use — three to four pulls per week — with no measurable wear in the magnet pocket and no deformation in the right-angle reference face. The tack jig is two years old. PLA jigs last hours before the first heat-creep event. The lifespan question is really a material question: pick PETG or ABS up front and the jig outlives the spool it came from.
Discussion (0)