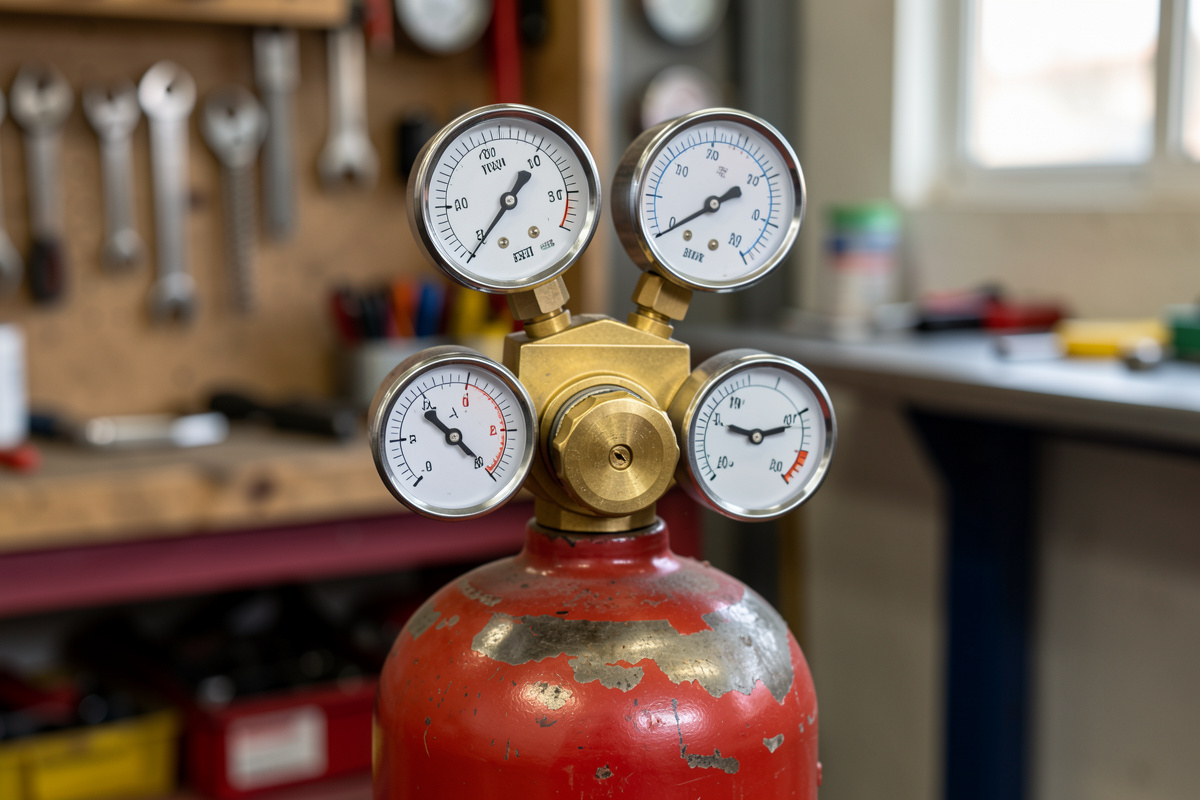

An oxy-acetylene regulator steps the high pressure in the cylinder — over 2,000 psi on a full oxygen bottle — down to a steady working pressure you weld or cut with, and holds it there as the bottle empties. Setting it correctly means mounting it clean, backing the adjusting screw out before opening the cylinder, dialing the working pressure to your tip chart, and leak-testing every joint. The acetylene side never goes above 15 psi.
The regulator is the part of the outfit people understand least and lean on most, so this guide goes deep on it. It is the regulator chapter of the oxy-acetylene and gas welding hub, and the companion to the broader setup guide. A regulator that is mounted wrong, set wrong, or quietly creeping is a leak and a hazard you cannot see — and it is also the easiest thing on the rig to get right once you know the routine.
What a Regulator Actually Does
Two gauges, one job. The high-pressure gauge reads what is left in the cylinder — bottle contents. The low-pressure gauge reads delivery, or working, pressure: what is actually reaching your torch. The adjusting screw in the center sets that delivery pressure: turn it in to raise pressure, out to lower it and shut delivery off. The regulator’s real value is that it keeps your working pressure steady even as the cylinder pressure falls from full to nearly empty, so your flame does not wander as you weld.
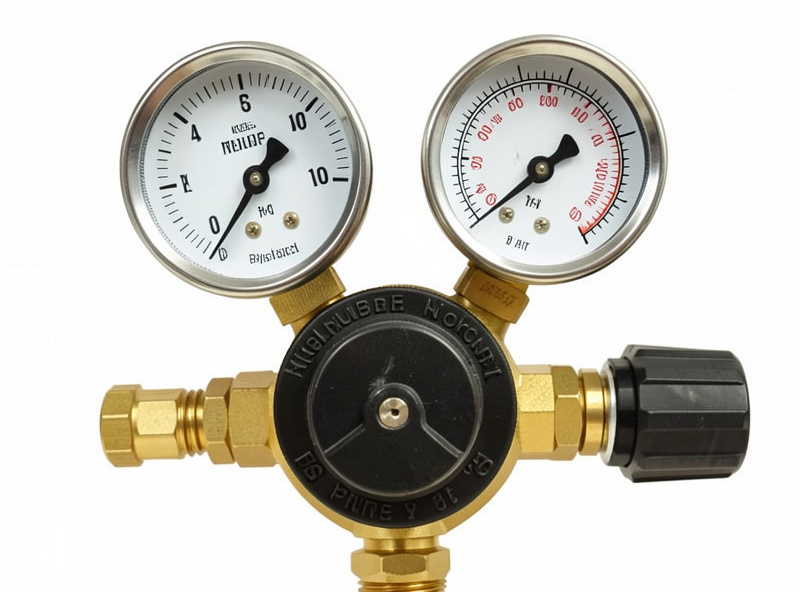
The two regulators are not interchangeable, and the fittings enforce it. Oxygen uses a CGA-540 connection with a right-hand thread; acetylene uses a CGA-510 with a left-hand thread, marked by a notch cut into the nut. You physically cannot cross them, which is one of the better bits of safety design in the whole system — but it also means you never force a fitting that does not want to thread.
Single-Stage vs Two-Stage Regulators
This is the buying decision that matters. A single-stage regulator drops cylinder pressure to working pressure in one step, which is cheaper but lets the working pressure creep up as the cylinder empties — so you re-trim it during a long job. A two-stage regulator drops the pressure in two steps and holds the delivery pressure far more constant from a full bottle to an empty one. I run Victor two-stage regulators on both bottles, and after years on this rig I will not go back — on a long cutting session the delivery pressure simply stays put, where the cheap single-stage I started out with crept up and forced me to re-trim the flame mid-cut more than once. For a home welder doing varied work I think a two-stage earns its extra cost in steadier flames and less fiddling, but a single-stage is perfectly serviceable for short jobs if you watch the gauge.
| Feature | Single-stage | Two-stage |
|---|---|---|
| Pressure drop | One step | Two steps |
| Delivery stability | Creeps up as cylinder empties | Stays constant |
| Re-adjustment needed | Yes, during long jobs | Rarely |
| Cost | Lower | Higher |
| Best for | Short or occasional jobs | Long runs, varied work |
Mounting the Regulator the Right Way
Before the regulator goes on, crack the cylinder valve — open it a hair for an instant and snap it shut — to blow grit out of the outlet, pointed away from people and any flame. Never do this near oil, grease, or an ignition source, and keep the oxygen outlet scrupulously clean, because oxygen plus hydrocarbon is an ignition hazard. Thread the regulator on by hand first to be sure it is not cross-threaded, then snug it firm with the proper wrench — firm, not gorilla-tight, which damages the seat.
Now the step beginners skip — and I skipped it once early on, cracked the oxygen bottle against a loaded regulator and watched the high-pressure needle slam over hard enough to make me flinch: back the adjusting screw all the way out before you open the cylinder, so the regulator is reading zero delivery. Opening a bottle against a loaded regulator slams full cylinder pressure into the diaphragm and can damage it. With the screw backed out, open the oxygen cylinder valve slowly and fully — it is a double-seated valve meant to seal at the top wide open — and open the acetylene valve only about three-quarters of a turn so you can shut the fuel off fast in an emergency. Stand to the side of the regulator face as you open the bottle, not in front of the gauge.
Setting Working Pressure
Set delivery pressure to match your tip and job. The honest detail most charts gloss over: working pressure is best set with gas flowing — crack the torch valve for that gas so you read the true pressure under flow, not a static reading that drops once gas moves. Turn the adjusting screw in slowly until the low-pressure gauge reads your target, with the torch valve open, then close the torch valve. Here are common starting points; the acetylene number is a ceiling, never a target to exceed.
- Light welding / brazing: 5 psi oxygen, 5 psi acetylene
- General welding (to ~3 mm): 7–10 psi oxygen, 5–7 psi acetylene
- Light cutting (to ~12 mm): 25–30 psi oxygen, 5–7 psi acetylene
- Heavy cutting / rosebud: 30–40 psi oxygen, 8–10 psi acetylene
That 15 psi acetylene ceiling is not a soft guideline — acetylene becomes unstable and can decompose above roughly 15 psi, so the fuel regulator never gets set higher, period. That ceiling is codified in OSHA 29 CFR 1910.253 and the Compressed Gas Association’s acetylene handling guidance, and the reasoning is covered in full in the safety guide.
Purging and Leak-Checking
With pressures set, purge each line on its own — open the oxygen torch valve a couple of seconds to blow the line clear, close it, then the acetylene the same way, away from ignition. Then leak-check every connection with soapy water or leak-detector fluid and a brush, never a flame. Brush from the cylinder valve through the regulator joints, hose fittings, and torch connections, and watch for bubbles that swell up fat and slow — a real leak grows a soapy dome you can see in a second or two, while a flat fingerprint of foam that just sits there is nothing. The regulator-to-cylinder joint and the hose nuts are the usual suspects.
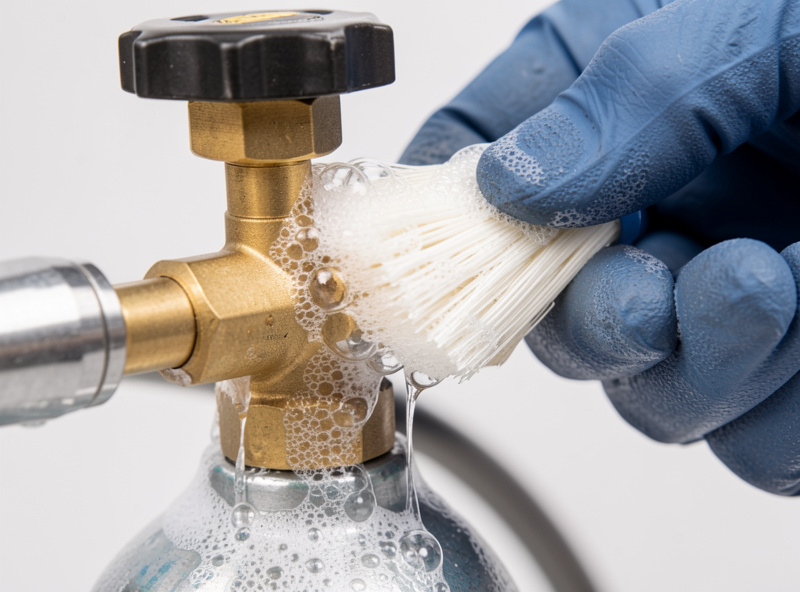
Then run the test that catches the sneaky failure: regulator creep. Set the working pressure, close the cylinder valve, and watch the low-pressure delivery gauge for a few minutes. If the delivery pressure slowly climbs, the regulator’s internal seat is leaking and the unit needs service before you trust it — a creeping regulator pressurizes a hose overnight and is a leak you would never spot otherwise. Any regulator that creeps, has a cracked gauge lens, or shows a sticky adjusting screw comes out of service until it is fixed. Never oil a regulator to free a sticky screw, especially on the oxygen side.
The PPE and Shutdown That Go With It
Regulator work has its own protection habits. Wear eye protection while cracking cylinders and opening valves — a faulty gauge can fail under sudden pressure — and keep your face out of line with the regulator face as you open the bottle. Gas goggles rated to ANSI Z87.1, shade 5, go on before you ever light the torch, because an auto-darkening arc helmet does nothing for a gas flame. Leather gloves handle cold bottles and hot work alike.
Shutdown is where you reset the regulator safely. Close both cylinder valves, then open each torch valve one at a time to bleed the hoses until both gauges read zero, then close them, and finally back out both adjusting screws so the diaphragms relax for storage. Relaxed diaphragms last longer, bled lines hold no pressure overnight, and the next time you set up, a regulator that will not hold its zero tells you something changed. Pair this routine with the full setup sequence and the safety guide, and the regulator becomes the most trustworthy part of the outfit instead of the most mysterious. Mike, my welder friend with decades in the trade, still backs both screws out on every single shutdown — when the man who has done it ten thousand times never skips the step, neither do I.
Frequently Asked Questions
What is the difference between a single-stage and two-stage regulator?
A single-stage regulator drops cylinder pressure to working pressure in one step and lets delivery pressure creep up as the cylinder empties. A two-stage regulator drops it in two steps and holds delivery pressure constant from a full bottle to an empty one, which means steadier flames and less re-adjustment.
Why do you back out the regulator adjusting screw before opening the cylinder?
Backing the adjusting screw all the way out sets the regulator to zero delivery, so opening the cylinder does not slam full bottle pressure into the diaphragm. Opening a bottle against a loaded regulator can damage the diaphragm and seat, so always open with the screw backed out.
What is regulator creep and how do you test for it?
Regulator creep is when delivery pressure slowly rises because the internal seat is leaking. Test it by setting the working pressure, closing the cylinder valve, and watching the low-pressure gauge for a few minutes. If the pressure climbs, the regulator needs service before use.
What pressure should an oxy-acetylene regulator be set to?
It depends on the tip and job: roughly 5 psi each for light welding, 7-10 psi oxygen for general welding, and 25-40 psi oxygen for cutting. Acetylene runs 5-10 psi depending on the job and must never exceed 15 psi working pressure.
Why won’t my oxygen and acetylene regulators swap?
They are built with different fittings on purpose. Oxygen uses a CGA-540 right-hand thread and acetylene a CGA-510 left-hand thread with a notched nut, so the two cannot be crossed. Never force a fitting; if it does not thread easily, you have the wrong regulator for that cylinder.
Related Guides
- Oxy-Acetylene & Gas Welding: The Complete Home-Shop Guide
- Oxy-Acetylene Welding Setup: Torch, Tanks & First Flame
- Oxy-Acetylene Safety Guide: Gas, Fire & Flashback
- Oxy-Acetylene Cutting Guide: Clean Cuts in Thick Steel
- Oxy-Fuel Brazing Guide: Strong Joints Without Melting the Base Metal
- Gas Welding vs MIG Welding: Which Belongs on Your Bench

Discussion (0)