Walking the cup and freehand are the two ways to steer a TIG torch. Walking the cup rests the ceramic cup on the joint and rocks it along for automatic, repeatable ripples — best on pipe and tube. Freehand holds the torch off the work and controls everything by hand — the only option on flat sheet, thin metal, and aluminum.
Beginners watch a pipe welder walk perfect stacked dimes and assume that is “real” TIG, then get frustrated trying to walk a cup on flat sheet where it does not work. They are two tools for two jobs. I use both, and knowing which the joint calls for saves a lot of wasted practice. This guide lays out where each one wins. For the overall process, see the TIG welding guide, and for the consumables both techniques rely on, the TIG torch parts guide.
What Walking the Cup Actually Is
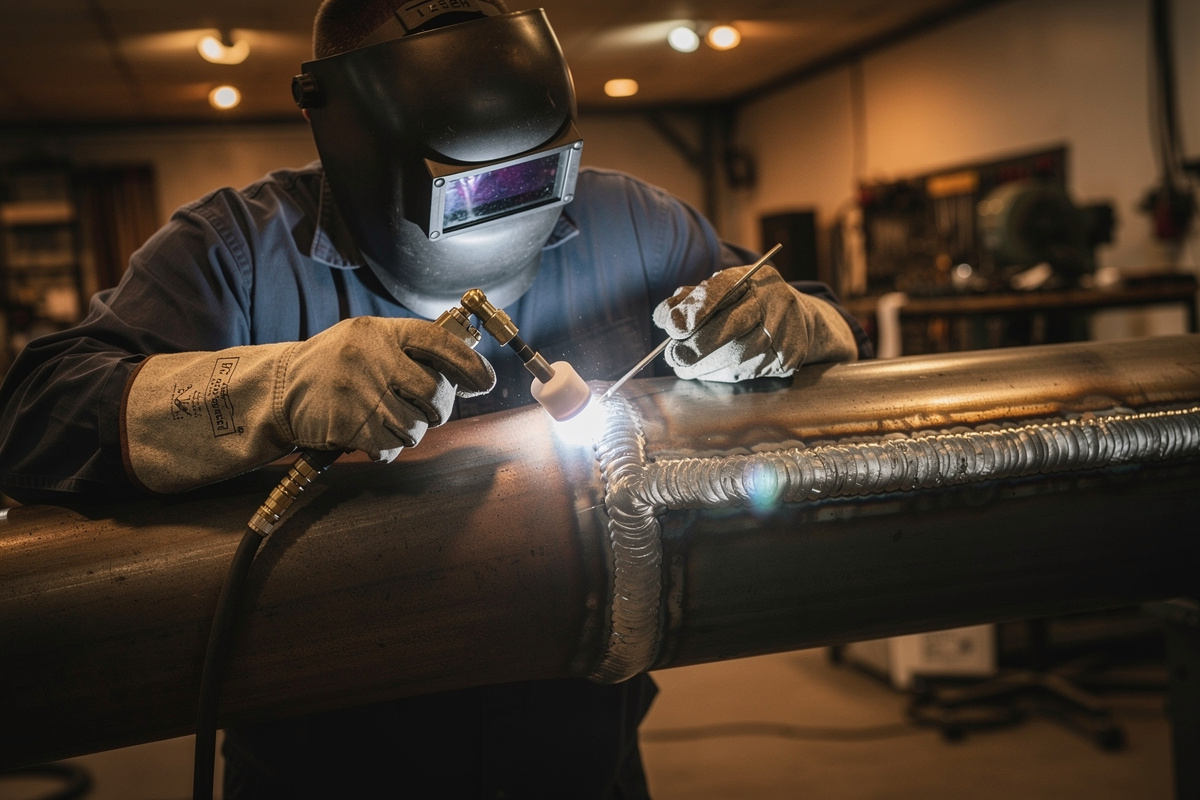
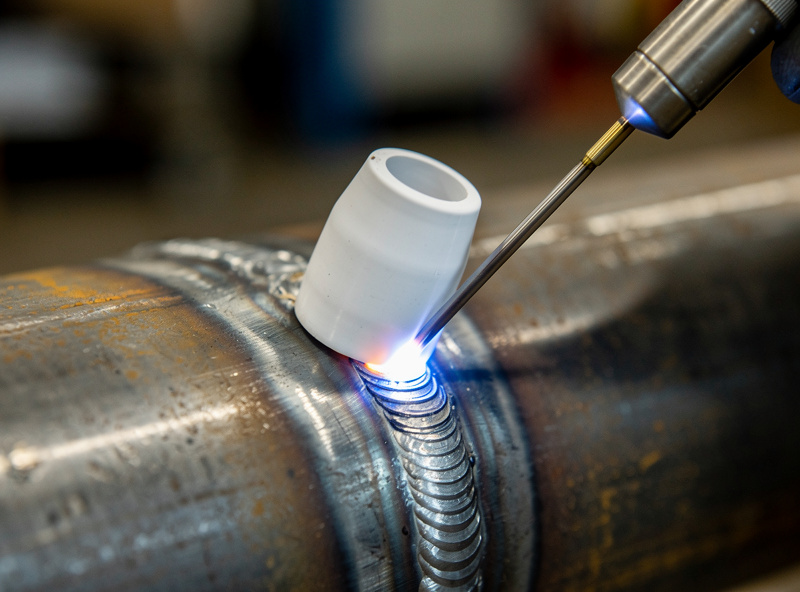
Walking the cup means resting the ceramic cup on the joint and pivoting it side to side in a rhythmic rocking motion that “walks” the torch forward. The joint geometry guides the cup, holding arc length and travel speed steady automatically — which is why it produces those even, stacked-dime ripples with far less hand skill than freehand.
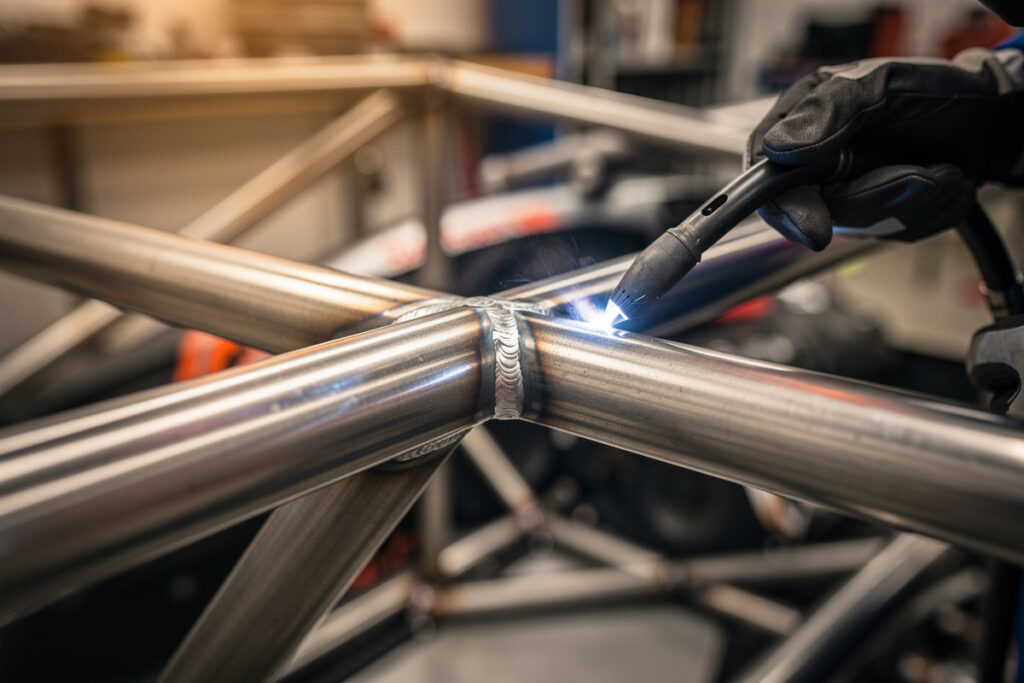
The trick only works when the cup has something to ride in. In a beveled pipe joint or a notched tube intersection, the cup sits in the groove with two contact surfaces, and as you rock it from edge to edge it advances a small, consistent step each cycle. That mechanical guidance does two things: it keeps the tungsten-to-work distance constant (so arc length never wanders) and it paces your travel for you. Each rock equals one ripple, so the bead self-stacks. This is why pipe and roll-cage welders walk the cup — on long bevel joints it is more consistent and far less fatiguing than holding a freehand arc for hours. It runs on DC for steel and stainless, needs a gas lens for the extra tungsten stickout, and rewards a slightly longer, ground tungsten.
What Freehand TIG Is and Where It Wins
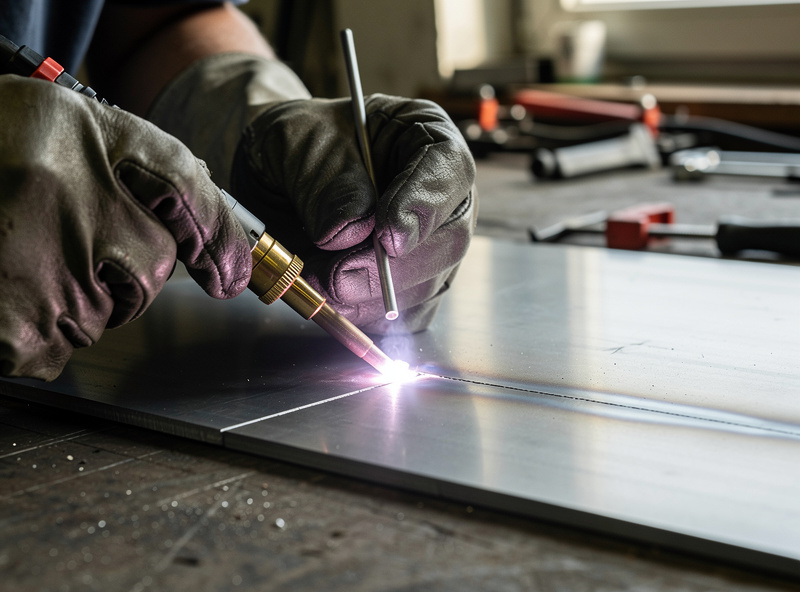
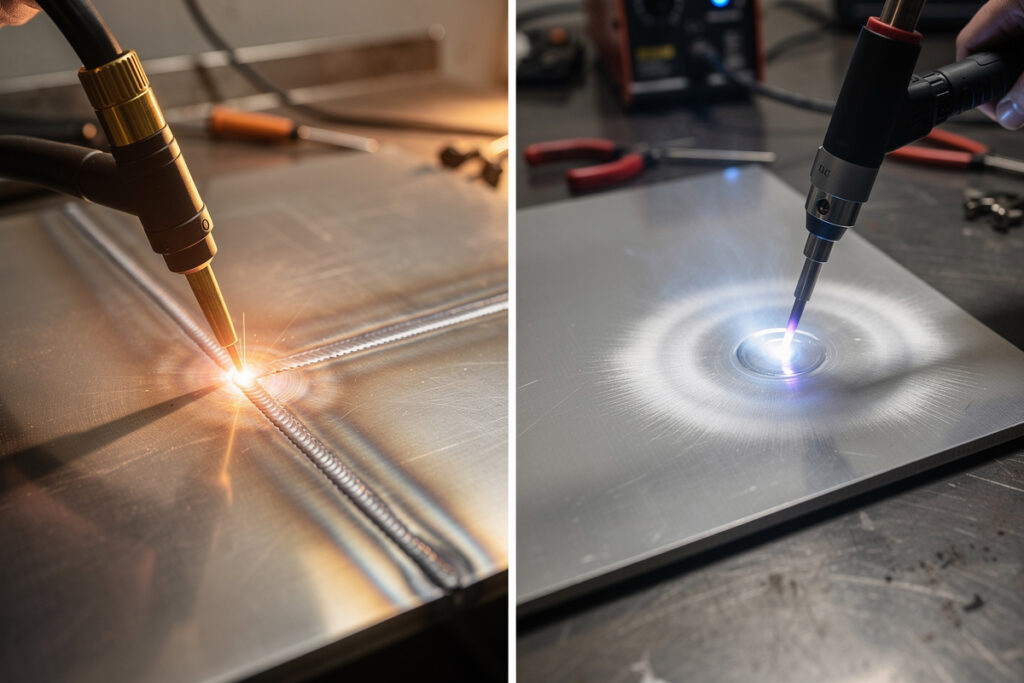
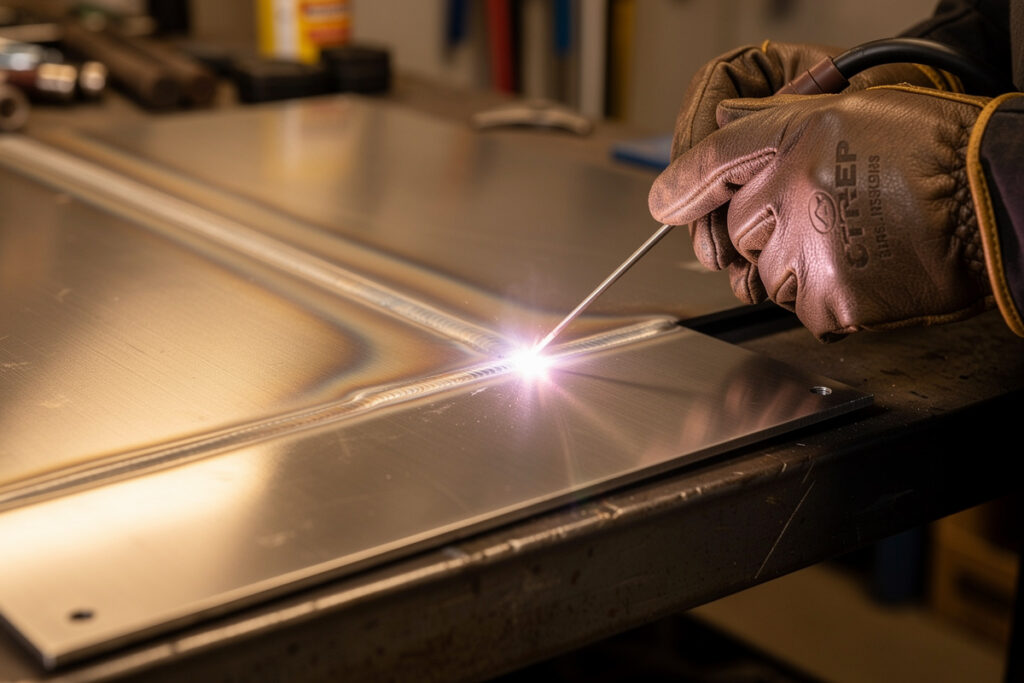
Freehand TIG holds the torch off the work at a set arc length and controls travel, arc gap, and filler entirely by hand. It is the more versatile technique: it works on any thickness, any position, and any material — and it is the only choice on flat sheet, thin metal, and aluminum, where there is nothing for a cup to ride in.
Most of what a home shop welds is freehand territory. Flat plate, sheet brackets, box tube outside corners, thin enclosures, art — none of them offer a groove for the cup to track, so you hold the torch above the joint and steer it yourself. The cost is hand skill: you have to maintain a tight, constant arc length (around 1/8 inch) without a guide, which is the core motor skill of TIG and takes real practice. Welders brace hard for it — dragging a pinky on the work, resting the heel of the hand, or sliding along a glove on the bench — to turn the whole hand into a stable platform. Freehand is also how you weld aluminum: you generally do not walk a cup on AC aluminum because the soft oxide drags and contaminates, so thin alloy work is freehand by default, as covered in the TIG aluminum guide.
Which Technique for Which Job
Pick the technique by the joint, not by preference. Walk the cup on beveled pipe and notched tube where a groove guides it; go freehand on flat sheet, thin material, aluminum, tight corners, and anywhere the cup has nothing to ride in. Most home projects are freehand; tube and pipe fabrication is where walking the cup earns its place.
If you are building a roll cage or welding a beveled pipe railing, walking the cup is the right call: the joint guides you, the ripples stack themselves, and your hand lasts the whole job. If you are tacking a sheet-metal bracket, sealing a thin aluminum box, or fitting a tight inside corner, freehand is the only thing that works — there is no groove for a cup, and forcing one drags the tungsten into the puddle. Thin material in general is freehand because the cup contact would chill and mark the surface. My honest take after running both: learn freehand first, because it is the foundation skill that transfers everywhere, then add walking the cup specifically when you start doing tube and pipe. The steel-tube sim rig build is a good first project to feel where each one fits.
| Factor | Walking the Cup | Freehand |
|---|---|---|
| Best joint | Beveled pipe, notched tube | Flat sheet, corners, any joint |
| Best material | Steel, stainless (DC) | Steel, stainless, aluminum |
| Consistency | High — joint guides it | Depends on hand skill |
| Learning curve | Easier ripples, needs a groove | Harder, but transfers everywhere |
| Fatigue (long welds) | Low — cup supports the torch | Higher — hand holds position |
| Setup | Gas lens + longer stickout | Standard or gas lens, tight arc |
| Aluminum | Rarely — oxide drags | Yes — the standard choice |
Disclosure: HomeWelder is reader-supported. As an Amazon Associate I earn from qualifying purchases made through links in this article, at no extra cost to you. I only point to gear I actually use or would buy for my own shop.
Setup Differences That Matter
Walking the cup needs a gas lens and longer tungsten stickout so the cup can ride the joint while the tungsten still reaches the puddle. Freehand runs a shorter stickout and a tight arc. Both demand a clean, properly ground tungsten — but the grind length and stickout differ between them.
For walking the cup, fit a gas lens, extend the tungsten roughly 1/4 to 3/8 inch past the cup so the arc reaches the bottom of the groove with the cup resting on the surfaces, and run a larger gas-lens cup for coverage at that stickout. The laminar flow of a gas lens is what makes the longer stickout possible without oxidizing — a standard collet body would lose coverage. For freehand, pull the stickout back to roughly the tungsten diameter and hold a tight 1/8-inch arc; you want the tungsten close so the arc stays focused and controllable. Tungsten grind matters in both: a clean, concentric point keeps the arc from wandering, and the tungsten sharpening guide covers getting it right. On stainless especially, the steadier arc length from either technique helps keep heat tint down, which ties into the stainless heat-input discipline.

The Gear That Makes Each Technique Work
Walking the cup wants a gas lens and a cup with a smooth rim that slides without grabbing; freehand wants whatever lets you brace your hand and see the puddle. A gas lens kit and a set of cups cover both, and good gloves matter more than people think for the steady hand freehand demands.
A 17-series gas lens kit is what makes walking the cup possible — the laminar flow shields the longer stickout — and it improves freehand coverage too. I keep a set of Pyrex TIG cups for freehand work where I want to watch the puddle through the cup, and because the glossy rim slides cleanly when I do walk one. For freehand, the steadiest hand comes from thin, dexterous gloves — my goatskin TIG gloves give the finger feel that bracing a pinky-drag needs, where a heavy gauntlet kills the control. None of this is expensive, and the gas lens does double duty across both techniques.
Frequently Asked Questions
Is walking the cup better than freehand TIG?
Neither is better — they suit different joints. Walking the cup is best on beveled pipe and notched tube, where a groove guides the cup for automatic, consistent ripples. Freehand is the only option on flat sheet, thin metal, and aluminum, and it is the foundation skill that transfers to every joint and position.
Can you walk the cup on flat sheet metal?
Not effectively. Walking the cup needs a groove or notch with two contact surfaces for the cup to ride in, like a beveled pipe joint. Flat sheet offers nothing for the cup to track, so flat and thin work must be done freehand with a tight, hand-controlled arc length.
Do you walk the cup on aluminum?
Rarely. Aluminum is almost always welded freehand because the soft oxide surface drags the cup and the AC arc behaves differently. Cup contact can also chill and mark thin aluminum. For aluminum, hold the torch off the work and control arc length and travel by hand.
What setup do you need to walk the cup?
Walking the cup needs a gas lens and a longer tungsten stickout, roughly 1/4 to 3/8 inch past the cup, so the arc reaches the joint while the cup rests on the surfaces. The gas lens provides laminar flow that shields that longer stickout, and a larger gas-lens cup gives the coverage.
Should a beginner learn freehand or walking the cup first?
Learn freehand first. It is the foundation motor skill of TIG — maintaining a tight, constant arc length by hand — and it transfers to every material, thickness, and position. Add walking the cup later, specifically when you start welding tube and pipe where a groove can guide it.
How do you steady your hand for freehand TIG?
Brace the whole hand into a platform: drag a pinky on the workpiece, rest the heel of your hand, or slide along a glove on the bench. The goal is to hold the tungsten a constant 1/8 inch off the work. Thin, dexterous gloves give the finger feel that steady bracing needs.
Discussion (0)