TIG welding stainless is a heat-management game: run it cold, move fast, and shield the back of the joint with argon. Stainless holds heat, so the same amps that suit mild steel will warp it, burn the chromium out, and “sugar” the root into a corroding mess.
The first stainless I ever TIG welded was a food-prep table, and I learned both lessons on it in one afternoon. I ran it too hot and the panels potato-chipped; I left the back of the seam open to air and it came out the other side gray and granular — sugared. Stainless punishes the habits that mild steel forgives. This guide is the heat-input discipline and backpurge setup I should have used the first time. For the overall process, see the TIG welding guide; for choosing the alloy itself, my stainless for welding guide compares 304, 316, and 409.
Why Stainless Is All About Heat Input
Stainless conducts heat about three times worse than mild steel, so energy piles up in the joint instead of spreading out. That trapped heat warps thin panels and, worse, holds the metal in the 800-1,500°F sensitization range long enough to wreck its corrosion resistance.
Mild steel sheds the heat you put into it; stainless hoards it. Carbon steel runs around 50 W/m·K thermal conductivity, austenitic stainless only about 16, so the puddle zone stays hotter for longer on the same amperage. Two bad things follow. First, distortion: thin stainless panels buckle and potato-chip because the heat-affected band expands hard and unevenly. Second, and the one beginners never see coming, is sensitization — held between roughly 800 and 1,500°F, chromium near the weld bonds with carbon and precipitates as chromium carbides, stripping the surrounding metal of the free chromium that makes stainless stainless. The fix for both is the same: less heat, faster travel, and patience between passes. This is why low-carbon “L” fillers exist, and why I keep an eye on interpass temperature instead of just chasing a pretty bead.
Dialing In Amps, Travel, and Filler
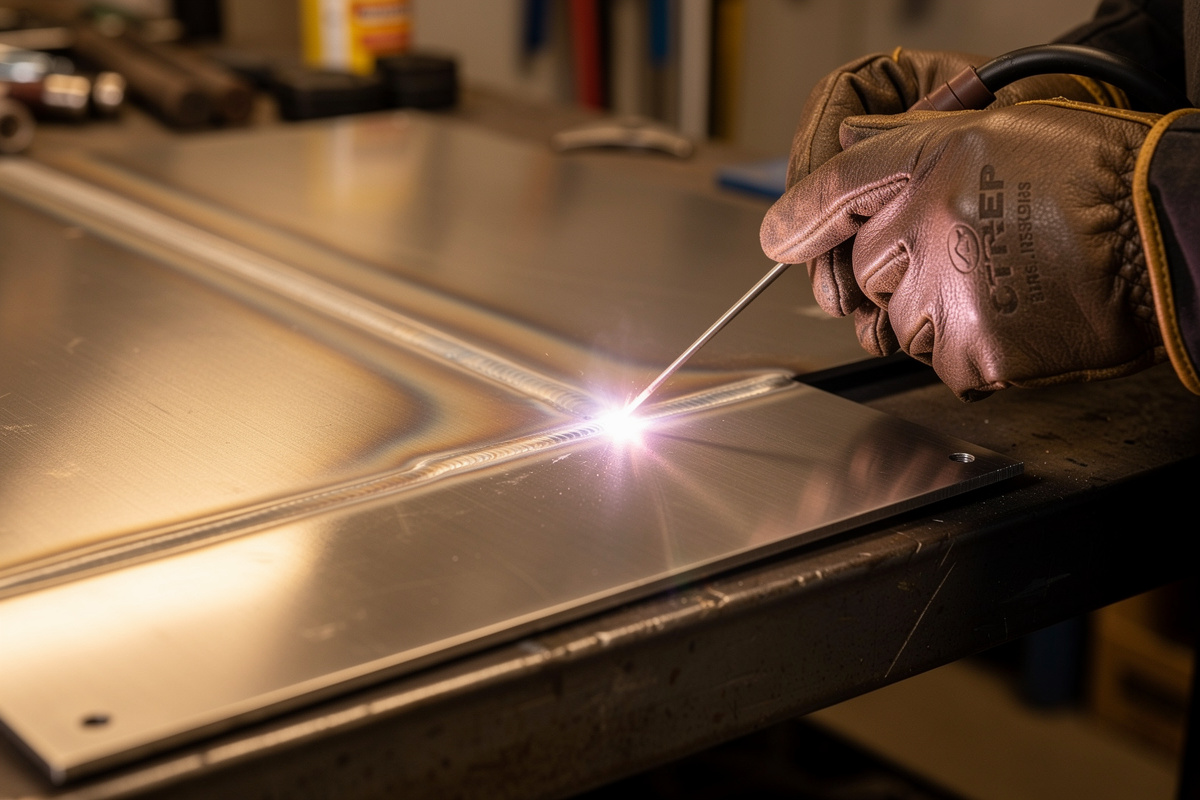
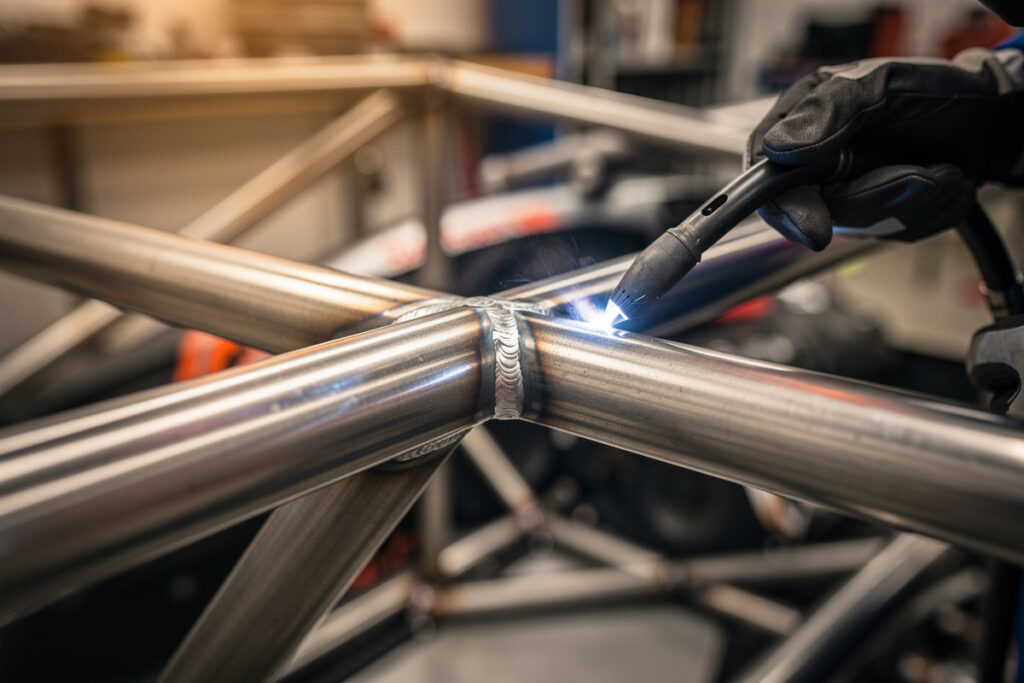
Run stainless slightly cooler than the steel rule of thumb: target about 0.8-1 amp per 0.001 inch, then travel fast to limit total heat. For 16-gauge 304, that means roughly 50-65 amps on DCEN with 3/32-inch ER308L filler and a sharp lanthanated tungsten.
Set the machine to DC electrode-negative, 100 percent argon at 15-20 CFH, a sharp-ground 2% lanthanated tungsten, and a foot pedal so you can feather the heat the moment the panel starts soaking. The filler rule follows the base alloy: ER308L for 304, ER316L for 316, and ER309L when you are joining stainless to carbon steel. The “L” is low carbon — it starves the carbide-precipitation reaction and protects corrosion resistance, which is exactly why I never substitute a non-L rod on anything that will see moisture. Pulse mode, if your machine has it, is a gift on stainless: pulsing between a high peak and low background amperage drops average heat input while still getting penetration, and it naturally times your filler dabs. The consumables guide covers filler diameters and quantities; the tungsten color chart covers electrode sizing.
Backpurging: Stopping Sugaring on the Root
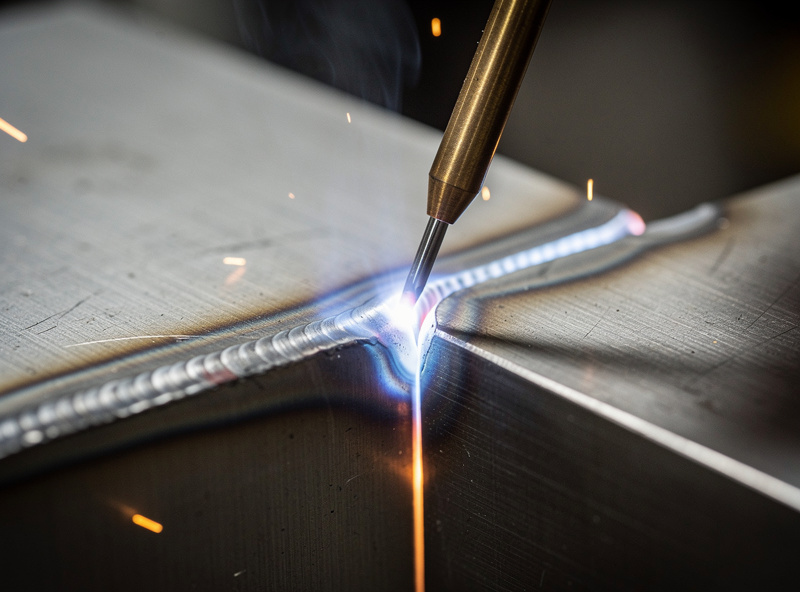
Backpurging floods the back side of the joint with argon so the hot root cannot grab oxygen. Without it, the underside of a full-penetration weld oxidizes into a gray, granular crust called sugaring — porous, weak, and a corrosion starter on anything that holds liquid.
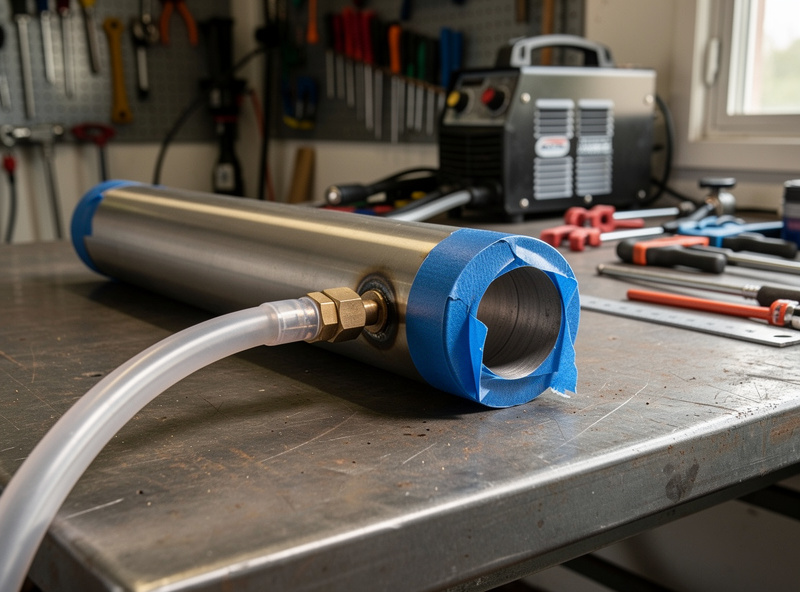
Sugaring (oxidation, or “coking”) happens because the root side of the weld is glowing hot and exposed to air; oxygen attacks the chromium-rich metal and leaves that crusty, sandpaper-textured back. On a sealed tube or a sanitary line it is an automatic reject — it traps bacteria and rusts. The cure is to displace the air with inert gas before and during the weld. For tube, I cap both ends with tape or purge dams and feed argon in one end with a bleed at the other; for an open box or tank, I build a simple dam around the joint. Run the purge long enough to sweep the air out — a rough rule is several volume changes before striking the arc, and on critical work a purge monitor confirms you are under about 1 percent oxygen (food and pharma specs want far less). I split a second argon line off the bottle for this; the same straight argon that shields the torch shields the root.
Not every stainless weld needs a purge. A fillet weld where the back never sees daylight, or a part where the underside is cosmetic-only and will be ground, can skip it. But any full-penetration butt or tube weld that matters — exhaust, railing caps, anything holding food or water — gets a backpurge or it sugars. When I cannot purge, I at least back the joint with a stainless or copper bar to chill the root and limit oxidation.
| Weld Back-Side Color | Approx. Peak Temp | Oxidation / Chromium State | Corrosion Verdict |
|---|---|---|---|
| Silver / very light straw | Under ~600°F | Minimal oxide, chromium intact | Best — full corrosion resistance |
| Straw / light gold | ~600-800°F | Thin oxide film | Acceptable for most shop work |
| Dark gold / bronze | ~800-1,000°F | Heavier oxide, mild chromium loss | Marginal — passivate if critical |
| Blue / purple | ~1,000-1,200°F | Noticeable chromium depletion | Poor for wet or food use |
| Gray / granular (sugared) | Oxidized in open air | Severe — porous, chromium gone | Reject — grind out and re-weld |
Disclosure: HomeWelder is reader-supported. As an Amazon Associate I earn from qualifying purchases made through links in this article, at no extra cost to you. I only point to gear I actually use or would buy for my own shop.
Reading Heat Tint and Keeping It Clean
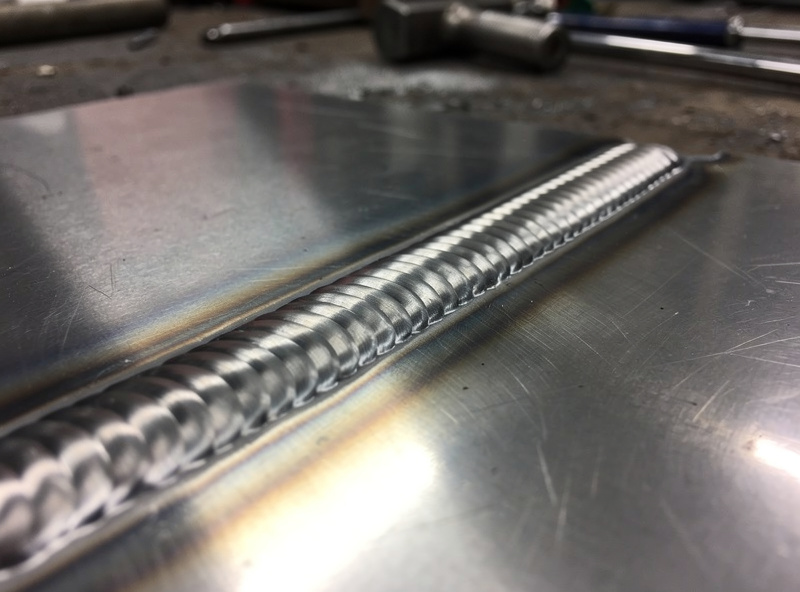
The color left on a finished stainless weld is a thermometer. Light straw means you kept it cool and the chromium is intact; blue or gray means you cooked it and corrosion resistance is compromised. Aim for the lightest tint the job allows.
I judge every stainless weld by its color before I judge it by its profile. A bright bead with only a faint straw halo tells me the heat input and shielding were right. Blue or rainbow tint means too much heat, too slow travel, or losing gas coverage at the end of the bead — which is why letting the post-flow run after you stop, keeping the cup over the cooling puddle, matters more on stainless than anything else. For corrosion-critical parts, the heat-tinted zone should be wire-brushed (stainless-only brush), pickled, or passivated afterward to restore the chromium oxide layer. Prep matters as much as on aluminum: stainless-only brush, acetone wipe, tight fitup. A separate brush keeps carbon-steel particles from embedding and rusting later. If you are chasing oxidation or porosity problems, the welding troubleshooting guide walks through causes and the welding gas guide covers shielding flow and coverage. The same low-heat discipline carries over when you move to the brighter, faster puddle of TIG welding aluminum.
The Stainless TIG Gear I Keep on the Bench
Three things make stainless behave: the right low-carbon filler, a backpurge source, and a gas lens for steady coverage on open joints. Stainless is unforgiving of contamination, so clean consumables and a dedicated brush earn their place fast.
For filler I keep ER308L stainless TIG rod on the tray for 304 and add 316L for marine or food work. A backpurge does not need a fancy rig — a TIG backpurge kit with purge dams and a second argon line off a splitter handle tube and box work. The coverage upgrade that helped my stainless most was a 17-series stubby gas lens kit — a smooth laminar gas column means less rainbow tint at the start and stop of every bead. My Tillman 1338 goatskin gloves give the finger feel the slow, deliberate filler dabbing on stainless needs, and a stainless-only wire brush stays clipped to that corner of the bench.
Frequently Asked Questions
What causes sugaring on stainless TIG welds?
Sugaring is oxidation of the weld’s root side when the hot metal is exposed to air. Oxygen attacks the chromium-rich stainless and leaves a gray, granular, porous crust. Prevent it by backpurging the back of the joint with argon, or by backing the joint with a chill bar when a full purge is not possible.
Do I always need to backpurge stainless?
No. Fillet welds where the back never sees air, or cosmetic undersides that will be ground, can skip the purge. But any full-penetration butt or tube weld that matters, such as exhaust, railing caps, or anything holding food or water, needs a backpurge or the root will sugar and corrode.
What amperage for TIG welding 16-gauge stainless?
Start around 50-65 amps on DCEN for 16-gauge 304 stainless, which is slightly cooler than the mild-steel rule. Stainless holds heat, so travel fast and use a foot pedal to back off as the panel heat-soaks. Pulse mode lowers average heat input further if your machine offers it.
Which filler rod for TIG welding 304 stainless?
Use ER308L for 304 stainless and ER316L for 316. The L means low carbon, which limits chromium-carbide precipitation that destroys corrosion resistance. Use ER309L when joining stainless to carbon steel. Never substitute mild-steel filler on stainless or the joint will rust at every bead.
Why is my stainless weld turning blue or rainbow colored?
Blue and rainbow heat tint means too much heat: slow travel, too many amps, or losing gas coverage at the end of the bead. Speed up, lower amperage, and let the post-flow run with the cup over the cooling puddle. For corrosion-critical parts, passivate the tinted zone afterward.
What is sensitization in stainless welding?
Sensitization happens when stainless is held between about 800 and 1,500°F long enough for chromium to bond with carbon and precipitate as carbides near the weld. That strips free chromium from the surrounding metal and ruins corrosion resistance. Low-carbon L fillers and low heat input prevent it.

Discussion (0)