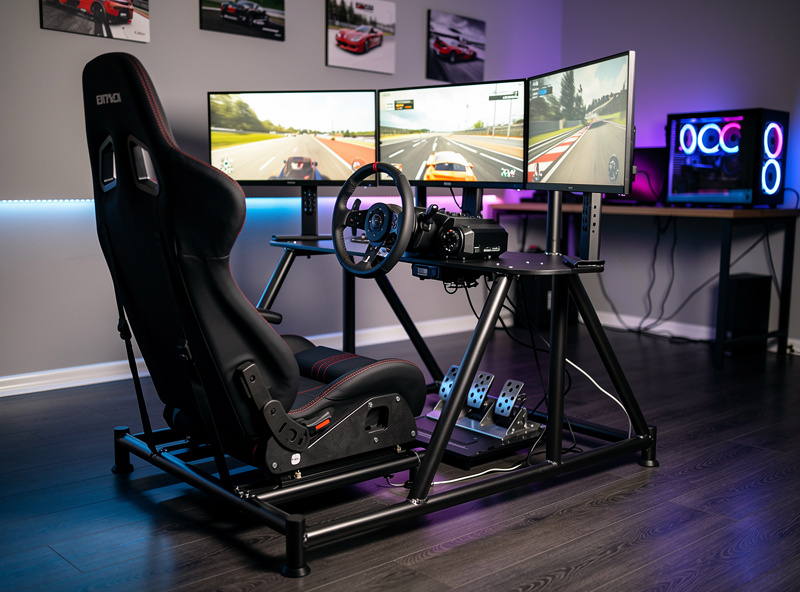
A welded steel-tube sim rig built from 1.5-inch square 11-gauge tube with MIG fillet welds delivers 0.05-0.15 mm flex at 25 N·m of wheel torque — equivalent stiffness to a $2,500 commercial pro rig for under $400 in materials and 8-12 hours of build time.
Steel-tube sim rigs sit at the high end of the DIY rig spectrum because aluminum extrusion frames hit a stiffness wall around 18-20 Nm of wheel torque — beyond that, bolted T-slot joints flex enough to mute force feedback even after every-bracket-tightened tuning. After flexing two aluminum-extrusion rigs out of usefulness on a 25 Nm Simucube, I switched to welded steel and the rig stopped creaking under hard ffb. Welding eliminates the flex by replacing 50-200 bolted joints with 12-20 continuous fillet welds. This guide covers the geometry, the joint types, and the welding technique that produces a frame that does not creak. For complete project context, see the DIY welding projects guide.
When Steel-Tube Welding Is the Right Answer
Three scenarios drive racers to welded steel:
1. 25+ Nm direct-drive wheelbases. Simucube Pro, Asetek Invicta, VRS DirectForce Pro Wheelbase. At these torque levels, even premium aluminum extrusion rigs (Sim-Lab P1-X, Trak Racer TR8 Pro) start to show measurable flex. Welded steel is the only path to sub-0.2 mm flex.
2. Motion platforms (2DOF or 3DOF). The dynamic loads from a motion rig — sustained 0.5 G accelerations, sudden direction changes — require a chassis that does not flex under cyclic load. Aluminum extrusion fatigues over months of motion use; steel does not.
For the broader DIY sim rig context (which torque levels actually need welded frames vs which stop at bolt-together aluminum), see SimRacerCentral’s DIY Sim Racing Rig: Aluminum Profile Frame Guide. The hub article is the right starting point if you have not yet decided between the bolt-together and welded paths.
3. Multi-rig builds (esports, schools, friends). When you build the same rig 3+ times, the upfront design work amortizes. Welding produces an identical rig faster than bolting once the jig is set up.
Steel Tube Selection: 11-Gauge Square Is the Sweet Spot
Three steel sizes cover almost every sim rig design:
1.5 inch x 1.5 inch x 11-gauge (0.120 inch wall) square tube. The default for the main wheel-deck rails and the seat base. Stiff enough for 25-30 Nm wheelbases, light enough that one person can move the finished rig.
1 inch x 1 inch x 11-gauge square tube. Used for cross supports, monitor wing arms, and pedal box framing. Half the weight of 1.5 inch, sufficient stiffness for non-load-bearing structure.
2 inch x 2 inch x 11-gauge square tube. Used for motion-platform rigs and 30+ Nm wheelbases where the wheel deck takes extreme cyclic loads. Adds 30-40% to total rig weight; necessary only at the high end.
Wall thickness matters more than tube size for stiffness. 11-gauge (0.120 inch / 3 mm) is the right call across all sizes — 14-gauge (0.083 inch / 2.1 mm) saves 30% weight but loses 50% stiffness, which is the wrong trade for sim rig applications. Avoid DOM (drawn over mandrel) and seamless tubes; standard ERW (electric resistance welded) cold-rolled steel tube is what every steel supplier sells and what every welder welds without trouble.
Joint Types: Mitered vs Lap vs Tab-and-Slot
Three joint geometries cover the rig:
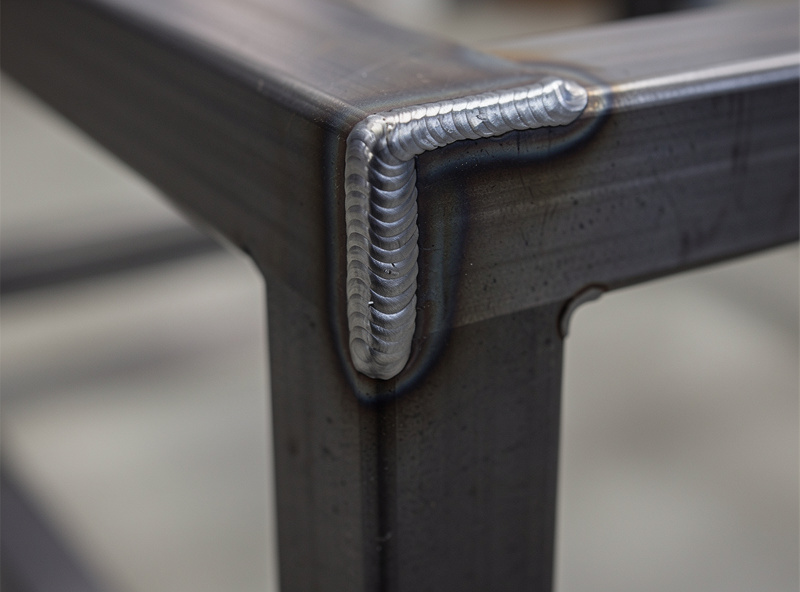
Mitered fillet welds (45° corners). The cleanest aesthetic, used at the front and rear corners of the wheel deck. Cut both tubes at 45° miters, fit, weld both sides of the joint. Stronger than butt welds, takes longer to fit accurately.
Lap (T) joints (one tube butted against another’s flat face). Used for cross supports, monitor wing arms, pedal box mounts. Cut the supporting tube to butt flat against the main rail, weld both sides of the contact. Fastest to fit; 95% as strong as mitered.
Tab-and-slot (laser-cut or plasma-cut tabs interlocking). Used for high-precision repeatable builds where geometry must be exact. Slow to design (CAD work + waterjet/laser/plasma cut), fast to weld. The right approach for multi-rig esports builds.
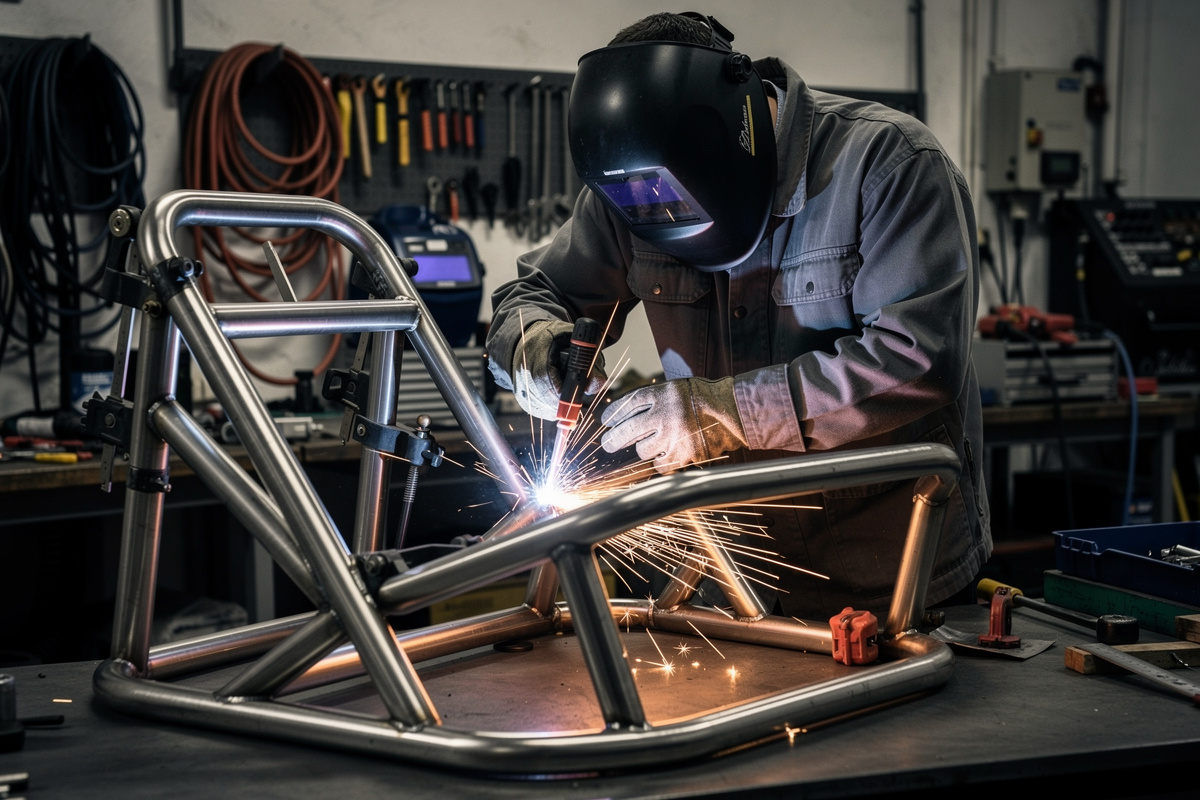
Joint preparation matters more than weld technique. The first time I welded a rig with sloppy 1-2 mm gaps at the corners, the bridging passes looked ugly and one of them cracked at the heat-affected zone within six months. Tubes that fit with no visible gap weld easily; gap-bridging passes are 30-50% weaker per AWS D1.1 § 5.22 fit-up tolerance. Spend the extra hour with a chop saw, a metal file, and a square — the welding gets dramatically easier.
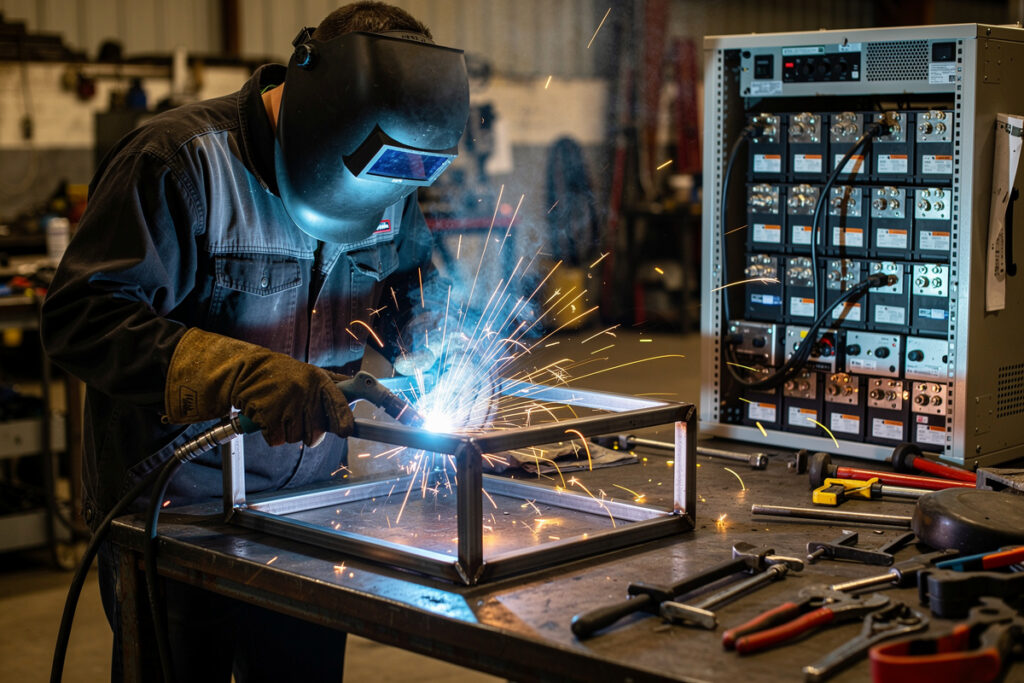
The MIG Process: Settings That Work
MIG welding on 11-gauge steel tube uses:
- Wire: 0.030 inch (0.8 mm) ER70S-6 solid wire per AWS A5.18. Cheap, forgiving, available everywhere — the deoxidizers tolerate any mill scale you missed during prep.
- Gas: 75% argon / 25% CO2 (C25). The standard “MIG mix” for steel.
- Voltage: 18-19 V on most home machines (Hobart Handler 140, Lincoln Power MIG 140, Miller Multimatic 215).
- Wire speed: 200-220 IPM for 11-gauge tube. Calibrate with a test piece of scrap before the rig.
- Travel speed: 8-10 inches per minute. Steady drag angle, watch the puddle.
The single most common mistake on a first welded rig is too-cold settings — the welds look ropey and lack penetration. Listen for the steady frying-bacon hiss; a popping or sputtering sound means voltage is too low or stick-out is wrong. Run a stringer bead on a piece of scrap tube, cut it open with a hacksaw, and verify the weld penetrated 50-75% through the tube wall. Too little penetration = increase voltage or slow travel speed.
Build Sequence (8-12 Hours Active Time)
The build proceeds in this order to keep tolerances tight:
- Cut all main rails and cross supports to length on a chop saw with a metal-cutting blade. Verify each piece against the cut list.
- Tack-weld the wheel-deck rectangle on a flat reference surface (welding table or flat steel plate). Two short tack welds per corner. Verify squareness with a 3-4-5 triangle measurement.
- Tack-weld the seat-mount rectangle to the wheel deck at the design angle (typically 12-18° rake).
- Tack the cross supports and pedal box. All tacks first, no full welds yet.
- Verify entire frame geometry with a digital level and tape measure. Adjust by gentle hammer taps if needed.
- Full-weld every joint, working diagonally across the rig to manage heat distortion. Welding all joints on one side first will warp the rig 2-5 mm. The first time I full-welded one side before the other, the finished rig had a 4 mm twist that I had to ground out and re-tack — adding three hours to the build.
- Grind welds for aesthetic where visible. Hidden welds can stay raw.
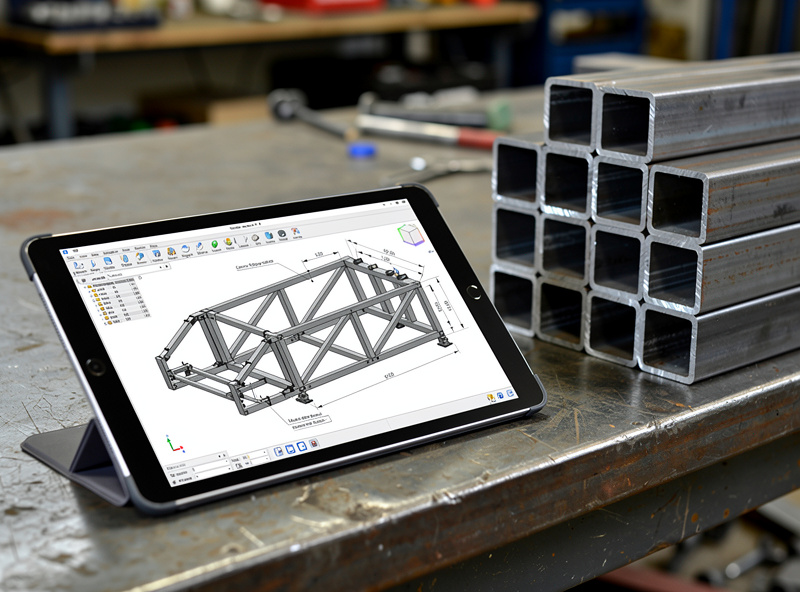
- Drill mounting holes for the wheelbase plate, pedal plate, and seat slider. CNC-cut plates from Fusion 360 or Carbide Create bolt to the welded frame.
- Paint or powder-coat. Steel rusts; protect with at least one coat of primer plus topcoat.
Cost and Time Comparison Table
| Approach | Material Cost | Build Time | Tools Needed | Flex at 25 N·m |
|---|---|---|---|---|
| Bolt-together 80×40 aluminum (per SR guide) | $400-$700 | 4-6 hr | Hex keys | 0.4-0.7 mm |
| Welded 1.5 inch square 11-gauge steel | $300-$500 steel + $80-$100 wire/gas | 8-12 hr | MIG welder + chop saw + grinder | 0.05-0.15 mm |
| Hybrid steel base + CNC aluminum upper | $2,500-$3,500 | 40-70 hr | MIG + CNC | 0.05-0.15 mm |
| Commercial pro rig (Sim-Lab P1X-Pro) | $2,500-$3,200 | 2 hr assembly | Allen keys (provided) | 0.1-0.2 mm |
Welding Safety for Sim-Rig Work
Three safety items that matter even more on indoor sim-rig builds:
Auto-darkening hood (Lincoln Viking 3350 or equivalent, ANSI Z87.1 certified). The hood pays for itself in eye fatigue savings on a multi-day build. Cheaper hoods work; the premium hoods are noticeably less tiring.
Welding gloves and a fire-resistant jacket. Sim rigs have a lot of joint angles and the splatter goes everywhere. Long-sleeve cotton minimum; a proper FR jacket is the right call. NFPA 51B requires combustibles cleared 35 feet from welding — strip the floor of cardboard and rags before you strike up.
Ventilation. MIG fumes are a documented respiratory irritant per OSHA 29 CFR 1910.252(c). Garage door open, exhaust fan running, or work outside on dry days. For full safety coverage, see the welding safety guide and the welding ventilation home garage guide.
The Single Most Important Build Discipline
If you only do one thing right, it is this: tack everything before you full-weld anything. Every welded sim rig that comes out warped started with someone full-welding the first joint while there were still un-tacked members elsewhere on the frame. The discipline of “tack the entire skeleton, then verify squareness, then full-weld diagonally” is what produces a flat rig the first time. The hour I lost to that twist on my second build was the cheapest welding lesson I have ever paid for, and I have never skipped the tack-everything step since.
Frequently Asked Questions
Why weld a sim rig instead of using aluminum extrusion?
For 25+ Nm direct-drive wheelbases or motion-platform setups, welded steel is the only path to sub-0.2 mm flex. Aluminum extrusion frames hit a stiffness wall around 18-20 Nm of wheel torque. Below that, bolt-together aluminum is the right answer; above it, welding wins by a clear margin.
What steel tube size and gauge should I use?
1.5 inch x 1.5 inch x 11-gauge (0.120 inch wall) square tube for main wheel-deck rails. 1 inch x 1 inch x 11-gauge for cross supports and monitor wing. 2 inch x 2 inch x 11-gauge only for motion-platform or 30+ Nm setups. Wall thickness matters more than tube size; do not drop below 11-gauge.
Can a beginner welder build a sim rig?
Possible but expect a longer learning curve. Plan to weld 50-100 stringer beads on scrap tube before attempting the rig — destructive-test (cut open) at least 5 of those to verify penetration. The rig itself is 12-20 fillet welds; if you can run those reliably on scrap, the rig is doable.
How long does it take to build a welded steel sim rig?
8-12 active hours for the first one (cutting, tacking, full welding, grinding, painting). Subsequent rigs from the same design take 6-8 hours because the cut list and joint fits are known. Spread across 2-3 weekend days for a comfortable pace.
What welder do I need?
A 140-amp MIG welder runs 11-gauge steel comfortably. Hobart Handler 140, Lincoln Power MIG 140, Miller Multimatic 215 all work. The 140-amp class is borderline for 1/4 inch steel but more than enough for sim rig framing. Stick welders work too but are harder for beginners on tube.
How much does a welded steel sim rig cost in materials?
300 to 500 dollars for the steel itself (10-15 sticks of 1.5 inch square tube at 6-foot lengths from a local steel supplier), plus 80 to 100 dollars for MIG wire and gas, plus 40 to 60 dollars for primer and paint. Total under 600 dollars in materials, comparable to bolt-together aluminum but yielding pro-rig stiffness.
Discussion (0)