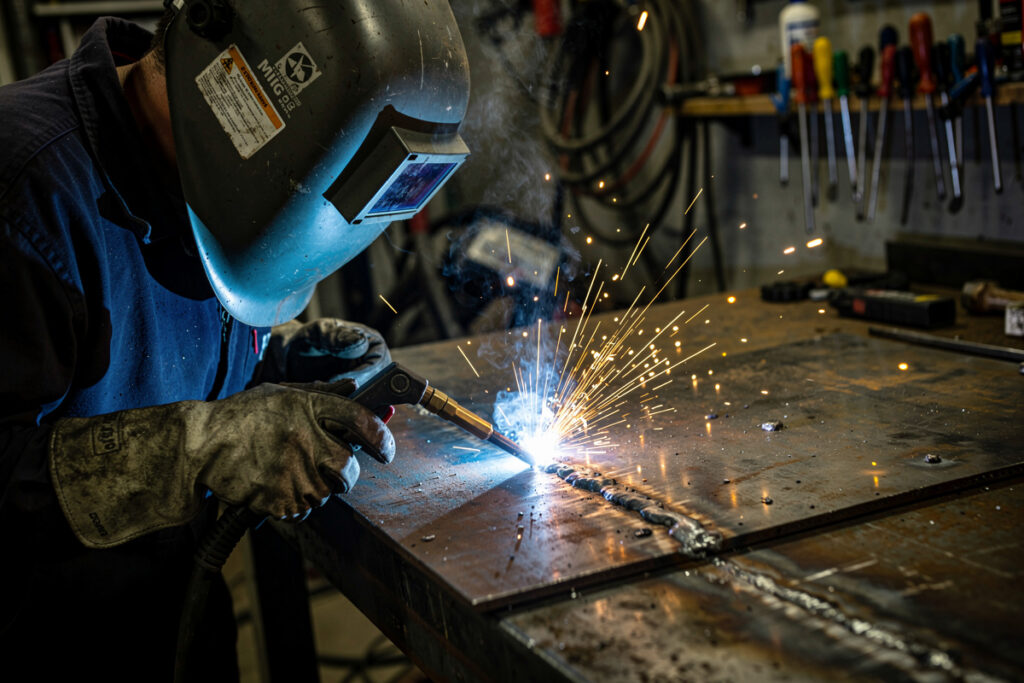
A weld is only as good as what it does under load, and the only way to know is to test it. On my home bench, weld testing runs from a two-minute visual check to a destructive bend test that folds a coupon flat — and the destructive ones are the honest ones. A weld that survives a 180-degree guided bend has fusion you can trust. A pretty bead that cracks open the moment you bend it never did.
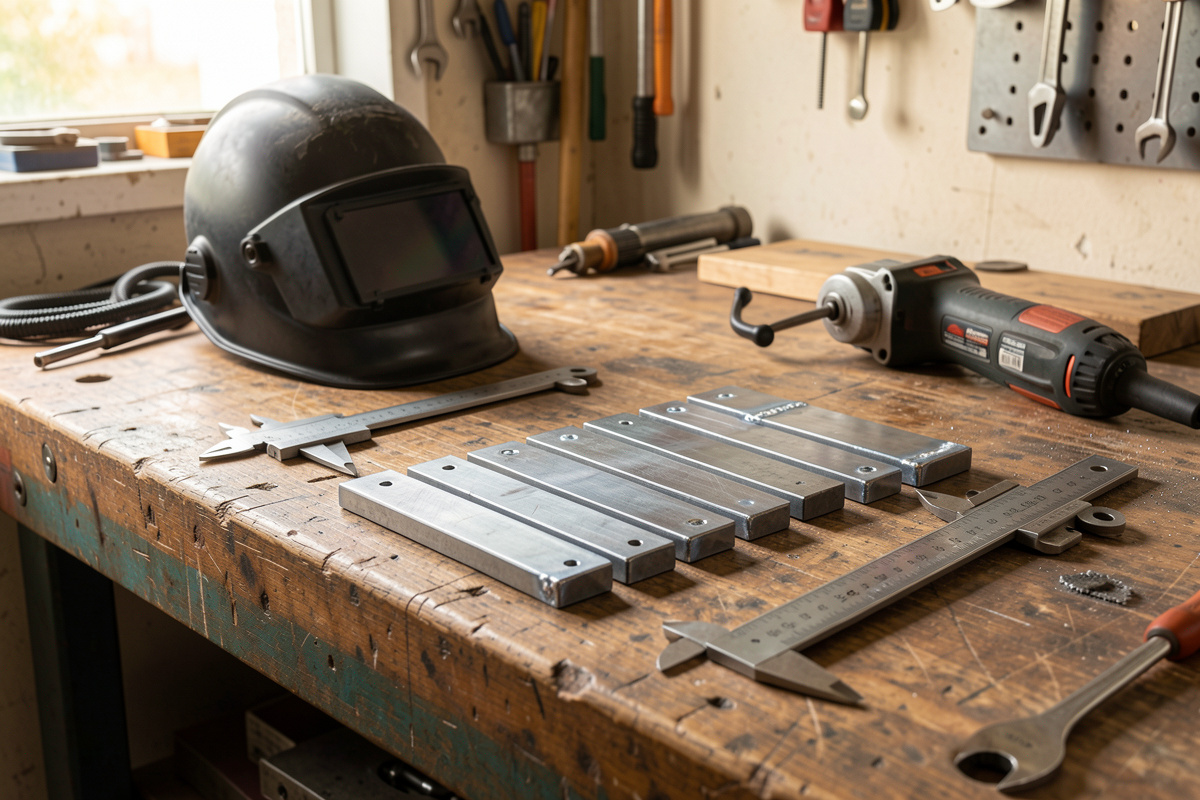
This is the hub for everything I do to prove a weld on a hobby bench: visual inspection, the hammer-and-vise destructive tests anyone can run, the bend test that mirrors how the trades qualify a welder, and the honest line between what I can verify at home and what only a coded inspector can sign off. I run a YesWelder MIG-PRO205DS for daily MIG, strike stick for dirty outdoor work, and I am climbing the TIG curve on a TIG-250P — and I test welds off all three the same way. My welder friend Mike, decades in the trade, is the one who taught me that the test rack matters more than the Instagram bead, and where I hand the topic off to him, I will say so.
Why a Home Welder Should Test Welds at All
You test welds to separate the welds that hold from the welds that only look like they hold. Surface appearance hides the two failures that actually drop a structure — lack of fusion and internal porosity — and the only way to expose them on a budget is to break a sample and read the broken face. Testing is cheap; a failed weld on a trailer hitch or an engine stand is not.
For years I treated a clean-looking bead as proof. Then Mike had me cut and bend my first coupon, and it tore along the toe with almost no fusion into the base metal — a textbook cold lap that looked perfect from the top. That single broken sample taught me more than fifty pretty welds. Now every new joint type, every new filler, every new machine setting gets a test coupon before it gets a real job. The bench reality is simple: you cannot see inside a weld, so you have to break one to learn what the rest are doing.
There is a second reason that matters more as your projects grow. A home weld holding a garden trellis is low stakes. A weld holding a motorcycle on a maintenance stand or carrying the frame of a battery rack is not. Knowing how to test your own work is what lets you decide, honestly, which projects you are ready to build and which ones still belong to a coded fabricator.
The Two Worlds: Home QC vs Coded Certification
There are two separate things people mean by “testing a weld,” and confusing them is the most common mistake I see. Home quality control is what you do to prove your own welds to yourself. Coded certification is a formal, witnessed process where an accredited inspector qualifies you or your weld procedure against a written standard like AWS D1.1 or EN ISO 9606. They use some of the same physical tests, but they are not the same thing, and one never substitutes for the other.
Everything on this site lives in the first world. I can show you how to run a bend test, read a fracture face, and catch undercut with a flashlight — and that genuinely makes you a better, safer welder. What I cannot do, and will never pretend to do, is certify you. A weld that passes my home bend test is good evidence for me; it carries zero legal or code weight on a job that requires certification. When a build is structural, pressure-bearing, or anything a failure could hurt someone over, that is coded territory. Mike is qualified; I am not, and the honest move is to say so and send you to a real testing house or a community college welding program.
Keep that line in your head as you read the rest of this guide. The skills transfer beautifully — learning to bend-test your coupons is exactly how you prepare for a real qualification test one day. But the certificate itself only comes from an accredited body, witnessed and stamped. Skill you can build at home; the credential you cannot.
Visual Inspection: The First and Cheapest Test
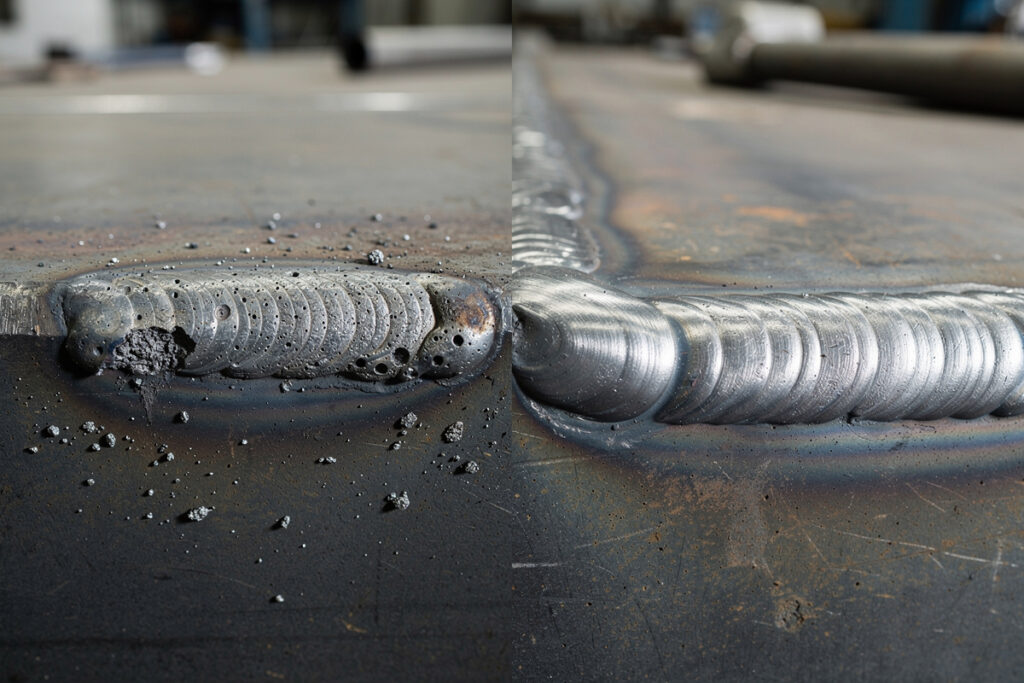
Visual inspection is the test you run on every single weld, and it catches more problems than any other method because it is the only one you do 100 percent of the time. Industry data consistently puts visual inspection as the most-used weld examination method — it requires nothing but light, a few cheap gauges, and a trained eye, and it screens out the obvious failures before you waste time on destructive checks.
What I look for, in order: undercut along the toes, where the arc has melted away the base metal and left a notch; overlap or cold lap, where the bead sits on top of the base instead of fusing into it; surface porosity, the little blowholes that signal gas contamination; crater cracks at the ends of stops; and bead consistency, because a wandering, lumpy bead usually means my travel speed or technique fell apart mid-pass. A bright LED held at a low raking angle throws shadows into undercut and overlap that look invisible head-on.
The gauges that earn their place are a fillet weld gauge set for checking leg size and throat, and a simple set of calipers. I keep an inexpensive fillet weld gauge set in the drawer for exactly this. As an Amazon Associate I earn from qualifying purchases. Visual inspection has a hard limit, though, and you must respect it: it tells you nothing about what is happening below the surface. A flawless face can sit on top of total lack of fusion. That is why visual is the start of testing, never the end of it. The full method is in my visual weld inspection guide.
Destructive Testing You Can Actually Do at Home
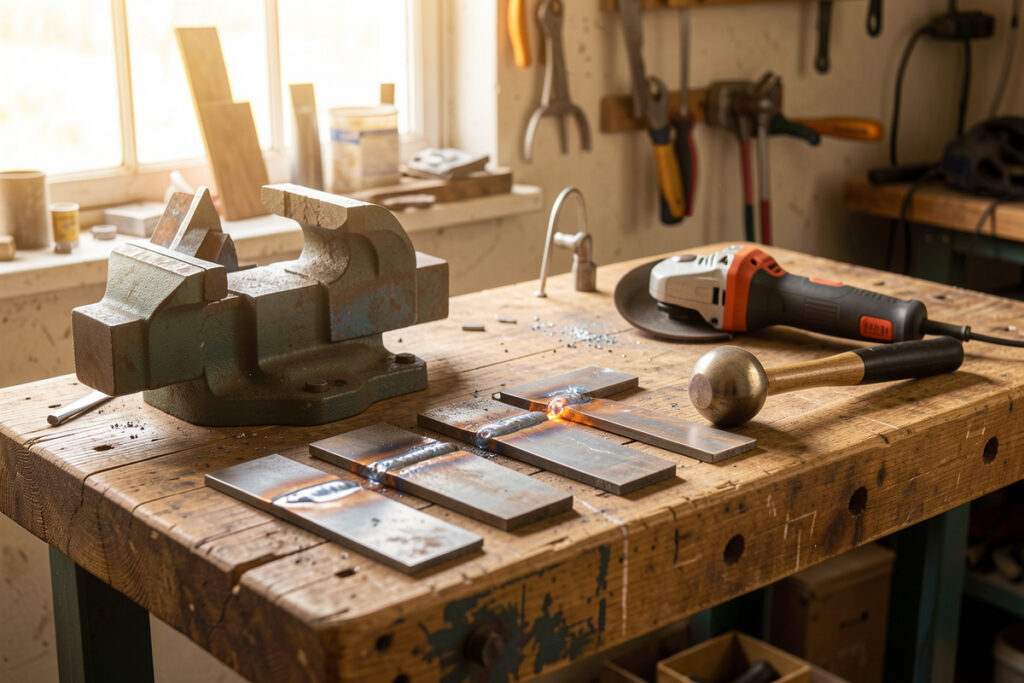
Destructive testing means you sacrifice a sample weld to see what is inside it, and for a home welder it is the single most valuable thing you can do because it shows you ground truth. The three I run constantly are the break test, the nick-break, and the bend test — none of them need anything beyond a vise, a hammer, an angle grinder, and a hacksaw or chop saw.
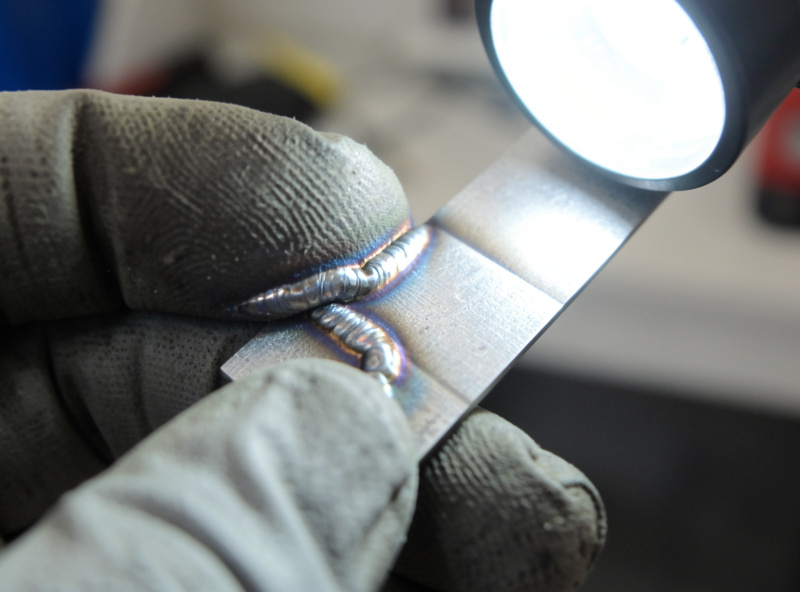
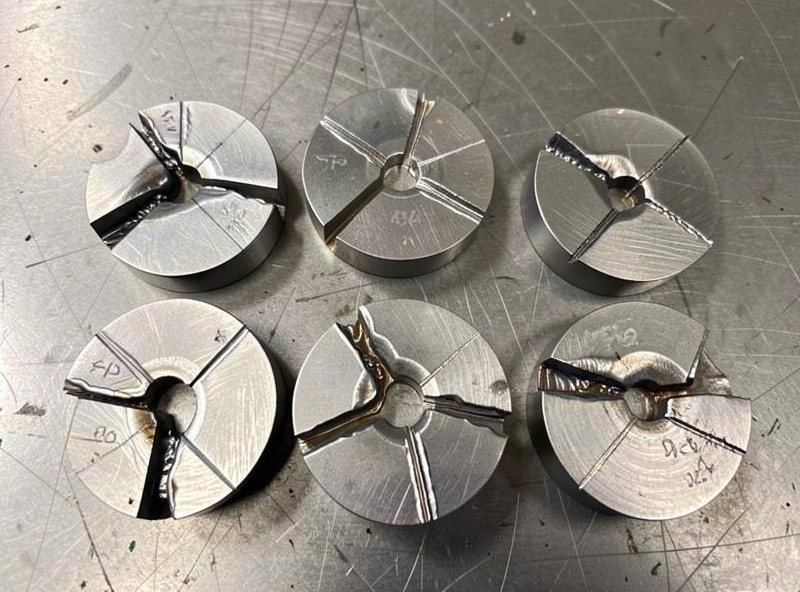
The break test is brutal and informative: clamp a fillet-welded T-joint in the vise and hammer the upright over until it tears off. Then read the fracture. Good fusion shows the weld tearing chunks out of the base plate; bad fusion shows a clean weld peeling off the unmelted surface like a sticker. The nick-break does the same for a butt weld — you saw a notch into each end of the weld, then snap it, and read the broken face for porosity, slag, and lack of fusion you could never have seen otherwise. These cost you one coupon and ten minutes, and they are the fastest feedback loop in welding. I lay out the whole set in my DIY weld testing methods guide.
The first time you run a break test, weld two coupons with deliberately wrong settings — voltage too low, wire speed too high — and break them next to a good one. Seeing cold lap in the flesh, against a properly fused weld, rewires how you read your own beads forever. I do this with new welders on my bench and it is the moment the whole thing clicks. It also exposes the classic defects directly: this is where you finally understand lack of fusion and undercut instead of just reading about them.
The Bend Test: The Home Welder’s Gold Standard
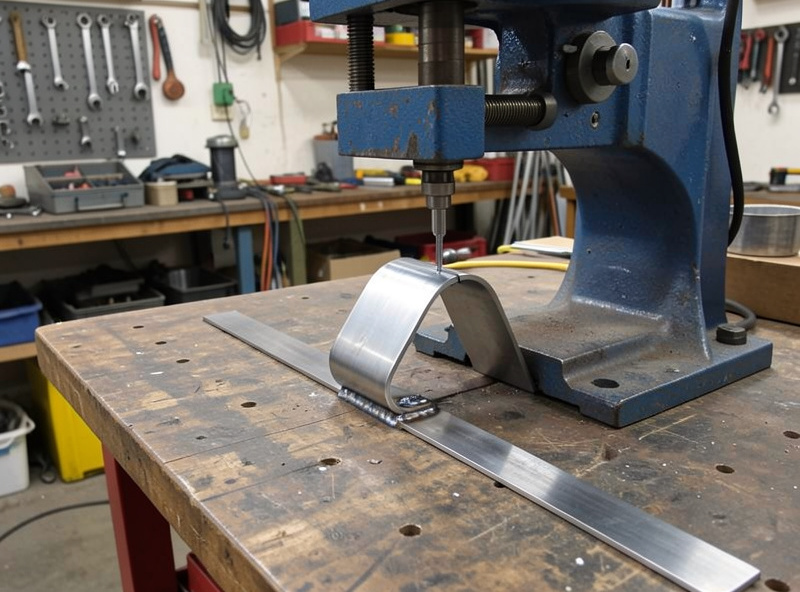
The bend test is the closest a home welder gets to how the trades actually qualify a weld, and it is the test I trust most. You cut a strap across a butt weld, then bend it 180 degrees — face up (face bend), face down (root bend), or sideways (side bend) — and inspect the stretched surface for cracks and openings. The acceptance criterion most procedures use is simple: no single discontinuity over 1/8 inch (3 mm) on the convex face. Pass that, and you have proven fusion, ductility, and root penetration all at once.
You can run a guided bend in a shop press with a simple die you weld up yourself, or a free bend over a pipe in the vise. The press version is repeatable and mirrors the real qualification fixture; the vise version is rougher but still honest. When my coupon folds flat with a clean, unbroken outer face, I know the root fused, the weld is ductile rather than brittle, and my settings are sound for that thickness. When it splits open at the root, I have a root-penetration problem to chase — and I would much rather find that on a coupon than on a finished frame. The complete fixture build and pass/fail reading is in my bend test guide for home welders.
This is also the test that bridges home QC and certification. A real welder qualification test under AWS or ISO is, at its core, a guided bend test on a witnessed coupon. Practicing bends at home is the most direct preparation there is for sitting a formal test — the physical skill is identical, only the witnessing and paperwork differ.
Reading Common Weld Defects
Every test you run is only useful if you can name what it reveals, and the home welder’s defect vocabulary is short and worth memorizing: porosity, lack of fusion, undercut, overlap, and cracking. Each has a distinct signature on a fracture face or a bent coupon, and each points back to a specific cause you can fix at the machine.
Porosity — gas trapped as the weld froze — shows as round voids on a broken face and usually traces to contamination, wind blowing your shielding gas away, or a wet consumable. Lack of fusion shows as a smooth, unmelted boundary and means not enough heat or bad torch angle. Undercut is a melted-away notch at the toe from too much heat or a steep angle. Cracking is the serious one and gets its own diagnosis — my guide on weld cracking causes and prevention covers hot, cold, and crater cracks in detail. I keep a weld color chart on the wall too, because heat tint on stainless tells its own story about how hot you ran.
Learning to connect a test result back to a setting is the whole game. A bent coupon that cracks at the root is not a mystery; it is a message about penetration. The full catalog, with the fracture-face photos and the fix for each, lives in my common weld defects inspection guide and the broader welding troubleshooting guide.
Nondestructive Testing: What Is Realistic at Home
Nondestructive testing (NDT) checks a weld without breaking it, and while the heavy methods belong to industry, two of them are genuinely doable on a home bench: dye penetrant and a simple air or water leak test. The rest — radiography, ultrasonic, magnetic particle — need equipment, training, and in the case of X-ray, licensing that no hobbyist should improvise.
Dye penetrant testing is the one I actually use. You clean the weld, spray a low-viscosity colored dye, let it seep into any surface-breaking crack or pore, wipe it off, then spray a white developer that pulls the dye back out and shows the flaw as a bright line. A penetrant kit costs little and reliably finds tight surface cracks and pinhole porosity the eye misses. Its limit is that it only finds surface-breaking defects — anything fully buried stays invisible, exactly like visual inspection.
Leak testing is the other practical one, and it is how I check anything that holds fluid or gas — a small tank, a coolant line, a planned hull section. Cap the part, put a few PSI of air in it, and brush soapy water over the welds; bubbles mark the leak. For the aluminum boat I am working toward, leak-testing welded seams will be routine before anything goes near water. Beyond these two, NDT crosses into coded-inspector territory, and I send it to the professionals rather than fake it.
Welding Certification: What It Is and How to Get It
A welding certification is a formal document, issued by an accredited body and witnessed by a certified inspector, stating that you welded a specific test coupon to a specific code and it passed. It is tied to a position, a process, a material, and a thickness range — you are not “a certified welder” in the abstract, you are certified to weld, say, 3G MIG on carbon steel. This is the credential I keep telling you I do not hold, and it is genuinely valuable if welding is going to be more than a hobby for you.
The path, broadly, is this: you train until your welds reliably pass bend tests, you book a test at an accredited facility or a community college testing center, you weld a coupon under supervision to the chosen code, and your coupon goes to bend testing or radiography. Pass, and you hold a certificate, usually with a maintenance requirement to keep it current. The specifics of standards, costs, and which certification to chase are in my how to get a welding certification guide, and the practical run-up — how to prepare your technique so you do not waste a test fee — is in my welding qualification test preparation guide.
Here is Mike’s honest take, and I trust it over anything I could invent: most hobbyists do not need certification, but everyone benefits from training as if they will be tested. The discipline of welding to a standard and proving it by bend test makes your everyday welds dramatically better, certificate or not. Where coded standards, procedure qualification, and code-critical or structural work are concerned, that is Mike’s world, not mine, and I defer to the accredited process every time.
Weld Test Methods Compared
| Test Method | Type | What It Finds | Home Cost | Home Feasible? |
|---|---|---|---|---|
| Visual inspection | Non-destructive | Surface defects: undercut, overlap, surface porosity, profile | Under $30 (light + gauges) | Yes — every weld |
| Break / nick-break test | Destructive | Internal fusion, porosity, slag inclusions | Free (vise + hammer) | Yes — easiest |
| Guided bend test | Destructive | Fusion, ductility, root penetration | Low (shop press + DIY die) | Yes — gold standard |
| Dye penetrant (PT) | Non-destructive | Surface-breaking cracks and pores | About $30 kit | Yes |
| Leak test (air/water) | Non-destructive | Through-wall leaks in vessels and seams | Free to low | Yes |
| Radiography (RT) | Non-destructive | Buried porosity, lack of fusion, slag | High plus licensing | No — coded labs only |
| Ultrasonic (UT) | Non-destructive | Internal flaws and sizing | High plus training | No — certified techs |
| Coded certification test | Witnessed destructive | Qualifies welder or procedure to a standard | Test-center fee | Accredited body only |
Building a Simple Home Weld-Test Routine
A weld-test routine does not need to be elaborate to be effective — it needs to be consistent. Mine is three tiers, and I apply them by how much a failure would cost. Every weld gets a visual pass with a raking light. Every new setting, filler, or joint type gets a destructive break or bend coupon before it touches a real project. And anything that holds fluid, gas, or a meaningful load gets a leak or dye-penetrant check on top.
The habit that makes this stick is welding a coupon alongside the real part whenever you change anything. Same material, same thickness, same settings, run right after the real joint — then break the coupon. If the coupon is sound, you have strong evidence the real weld is too. This is exactly how production shops run witness coupons, scaled down to a home bench, and it costs you a scrap offcut and a few minutes. It is also how you build the muscle memory that a real qualification test rewards.
None of this replaces good fundamentals upstream. Clean prep, dry consumables, the right gas, and correct settings prevent most defects before they happen — testing just confirms it. If your coupons keep failing, the fix is rarely the test and almost always the setup, which is why I lean on my MIG settings guide and distortion control work as much as the test bench. Test to verify, not to discover what you should have controlled from the start.
Frequently Asked Questions
Can I certify my own welds at home?
No. You can test your own welds at home with bend tests, break tests, and visual inspection, and that genuinely proves quality to you. But certification is a formal, witnessed process by an accredited inspector against a standard like AWS D1.1. Home testing builds the skill; only an accredited body issues the certificate.
What is the best weld test for a home welder?
The guided bend test. You cut a strap across a butt weld and bend it 180 degrees, then inspect the stretched face for cracks over 1/8 inch. It proves fusion, ductility, and root penetration at once, needs only a shop press and a DIY die, and mirrors how the trades qualify welders.
How do I know if a weld has good penetration without cutting it?
You cannot fully confirm penetration without a destructive test such as a bend or nick-break. Visual cues like a consistent backside bead or even reinforcement suggest good penetration, but they are not proof. For anything load-bearing, weld a matching coupon, break it, and read the fracture face.
What is the difference between destructive and nondestructive testing?
Destructive testing breaks a sample weld to see what is inside it. Break tests and bend tests are the home-shop staples. Nondestructive testing checks a weld without damaging it; dye penetrant and leak tests are realistic at home, while radiography and ultrasonic require certified technicians and equipment.
Do I need a welding certification for home and hobby projects?
No. Hobby, repair, and most DIY projects need no certification. Certification matters for paid structural, pressure, or code-critical work. That said, training as if you will be tested, and proving welds by bend test, makes your everyday welds far better whether or not you ever sit a formal test.
How much does a welding certification cost?
Test-center fees vary widely by region and code, typically from roughly 300 to 1,000 dollars for a single position and process, sometimes more with retests. Many community colleges bundle testing into welding courses. Confirm current pricing directly with an accredited testing facility, as rates change and depend on the standard.
Related Guides in This Cluster
- How to Get a Welding Certification
- DIY Weld Testing Methods
- Bend Test for Home Welders
- Visual Weld Inspection Guide
- Welding Qualification Test Preparation
- Common Weld Defects Inspection Guide
Discussion (0)