
Plasma cutting uses an electrically ionized gas stream at 30,000°F to slice through any conductive metal up to 1 inch thick with clean, dross-free edges. A budget plasma under $500 cuts 1/4-inch mild steel at 15 inches per minute.
The first time I plasma-cut a 24-inch line through 1/4″ plate, the kerf finished in 90 seconds and the edge was square enough to weld without grinding. The same cut on my 4.5″ angle grinder took 11 minutes, three cutoff wheels, and left rough edges I had to clean before tacking. Plasma is not for every cut — angle grinders win on tight curves, and OSHA 29 CFR 1910.252(a)‘s 35-foot clear zone applies just as strictly to plasma as to welding — but for project breakdown work, plasma is the time-saver that pays for itself in the first 10 hours. This guide covers fundamentals, equipment selection, metal prep, and the plasma-vs-grinder-vs-oxyfuel comparison. For first-time-welder context, see welding for beginners; the broader equipment landscape is in essential welding equipment; the safety companion is the welding safety guide.
For home welders, plasma cutting solves the most time-consuming part of any project: cutting metal to size. Where an angle grinder takes 2 minutes to cut through 1/4-inch angle iron with rough, heat-distorted edges, a plasma cutter does it in 15 seconds with a nearly clean edge ready for welding. Understanding when plasma is the right tool — and when other cutting methods win — saves money and produces better project outcomes.
How Plasma Cutting Works
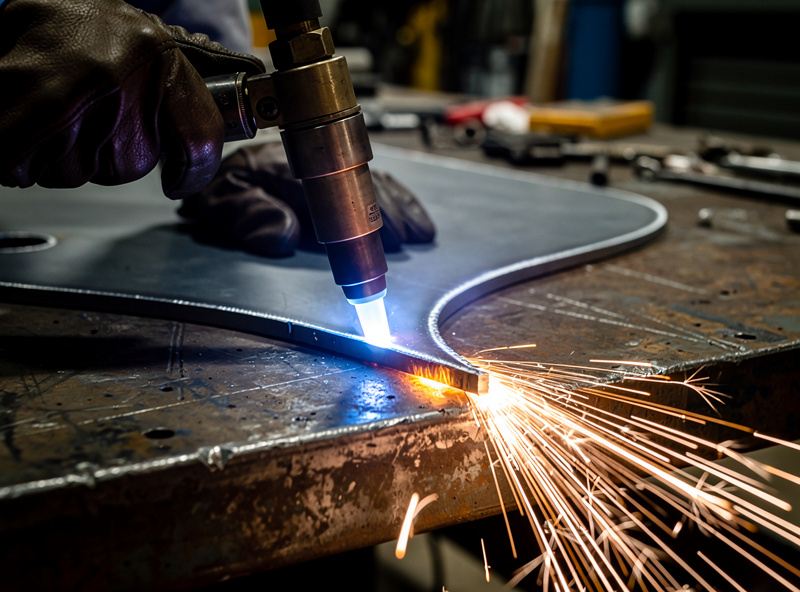
A plasma cutter forces compressed air or nitrogen through a narrow nozzle at 60-100 PSI while a high-voltage pilot arc ionizes the gas into plasma. This superheated plasma stream conducts electricity to the workpiece, melting the metal instantly. The high-velocity gas blasts the molten metal through the cut, leaving a narrow kerf typically 1/16 to 1/8 inch wide.
The cutting arc starts with a high-frequency or blow-back pilot arc that ionizes the air path between the electrode and nozzle. Once the pilot arc establishes conductive plasma, the main cutting arc transfers to the workpiece. Modern inverter-based plasma cutters use blow-back start mechanisms that do not generate electromagnetic interference, making them safe to use near electronics in your home shop.
Cutting capacity depends on the machine’s amperage output. A 40-amp plasma cutter handles 1/2-inch clean cuts and 3/4-inch severance. A 60-amp unit cuts 3/4-inch cleanly and severs 1-inch steel. For most home welders, a 40-amp plasma cutter running on 220V covers 90 percent of cutting tasks. The best plasma cutters under $500 comparison covers specific models with tested cut ratings and duty cycles.
Choosing a Plasma Cutter for Home Use
Plasma cutter selection comes down to three factors: input power, rated cutting thickness, and duty cycle. For home garage use on a 30-amp 220V circuit, a 40-amp inverter plasma cutter provides the best balance of capability, portability, and cost.
Input power determines where you can use the machine. 120V plasma cutters are convenient because they run from any standard outlet, but they top out at 1/4-inch cutting capacity with slow travel speeds. 220V machines deliver full rated capacity — a 40-amp 220V cutter slices through 1/2-inch steel at practical speeds. Dual-voltage models that run on either 120V or 220V give you maximum flexibility, though you sacrifice cutting speed on 120V.
Duty cycle matters for production work but is less critical for hobbyist use. A 60 percent duty cycle at 40 amps means you can cut for 6 minutes out of every 10 minutes before the machine needs to cool. For a typical home project that involves cutting 20 to 50 parts, even a 35 percent duty cycle is adequate — you spend more time measuring and marking than cutting. If you plan to cut more than 100 pieces in a session, invest in a 60 percent or higher duty cycle machine.
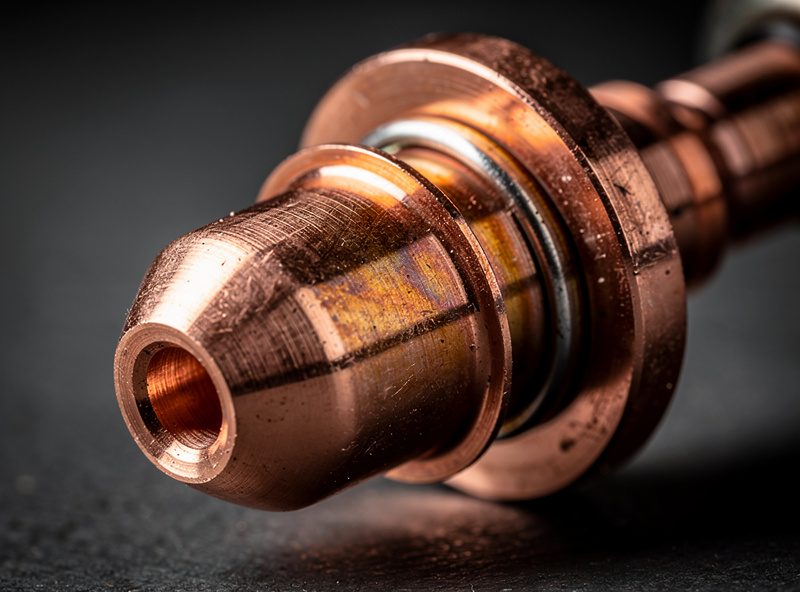
Consumable cost is the ongoing expense. A set of electrodes and tips costs $5 to $15 and lasts 200 to 800 starts depending on amperage and material. Budget consumables from aftermarket suppliers work adequately for mild steel cutting. Save OEM consumables for stainless and aluminum where cut quality matters most. Always keep 2-3 spare electrode/tip sets in your shop — a worn consumable produces tapered cuts and excessive dross. My full breakdown of plasma cutter consumables covers how electrodes and nozzles wear and the habits that double their life.

Plasma Cutting vs Angle Grinder
Both tools cut metal, but they serve different roles in a home shop. Understanding when to reach for each one prevents frustration and wasted consumables.
A plasma cutter excels at cutting sheet metal, plate, and complex shapes that are difficult or impossible with an angle grinder. Cutting curves in 16-gauge steel, making interior cutouts for pass-throughs, and cutting stainless or aluminum without changing tools are plasma cutter territory. The cut edge is straighter, produces less heat distortion, and requires minimal grinding before welding. For cuts longer than 6 inches or any curved cut, the plasma cutter saves 5 to 10 times the time compared to an angle grinder with a cutoff wheel. Stainless cuts at the same settings as mild steel but the edge needs care afterward; I lay out the stainless and cast iron settings and why cast iron cuts so badly in a dedicated guide.
An angle grinder wins for short straight cuts on thick stock, cutting in tight spaces, and situations where you need to cut and grind in the same operation. A 4.5-inch angle grinder with a thin cutoff wheel cuts through 1/4-inch angle iron in about 90 seconds. It also deburrs, bevels edges for weld prep, and removes spatter — tasks a plasma cutter cannot do. The plasma cutter vs angle grinder comparison covers specific scenarios with time and cost analysis for each tool.
The practical answer for home welders is own both. A $45 angle grinder and a $350 plasma cutter together cover every cutting scenario you will encounter. The grinder handles 80 percent of cuts by volume (short straight cuts on bar stock and angle). The plasma handles the 20 percent that would take forever by grinder (long cuts, curves, sheet metal, stainless, aluminum).
Plasma Cutting vs Oxy-Acetylene
Oxy-acetylene cutting was the standard thermal cutting process for over a century. Plasma cutting has largely replaced it for metal under 1 inch thick due to speed, cut quality, and safety advantages.
Plasma cuts 3 to 5 times faster than oxy-acetylene on steel under 1/2-inch thick. The cut edge is cleaner with less dross and no heat-affected zone widening. Plasma cuts stainless steel and aluminum — materials oxy-acetylene cannot cut because they form refractory oxides that prevent the oxidation reaction oxy-fuel cutting depends on. Plasma also requires no fuel gas storage, eliminating the explosion risk of acetylene cylinders in a home garage.
Oxy-acetylene still wins for cutting steel thicker than 1 inch, where plasma capacity runs out. It also doubles as a heating torch for bending, straightening, and pre-heating thick sections before welding. If your work involves steel thicker than 1 inch regularly, keeping an oxy-acetylene setup alongside a plasma cutter gives you maximum versatility. For home welders working primarily with 16-gauge through 1/2-inch material, a plasma cutter alone is sufficient. I put all three processes head to head, plus where a fiber laser fits, in my plasma vs oxy-acetylene vs laser comparison, with the thickness limits and costs for each.
Cost comparison: a quality oxy-acetylene setup with two cylinders, regulators, and a cutting torch costs $400 to $800. A 40-amp plasma cutter costs $300 to $500 and needs only compressed air and electricity. Refilling oxy-acetylene bottles costs $40 to $80 per pair. Plasma consumables cost $5 to $15 per set lasting hundreds of starts. Over 5 years of home use, plasma cutting costs roughly half as much as oxy-acetylene.
Metal Preparation Before Welding
Clean metal produces strong welds. Regardless of how you cut your pieces — plasma, grinder, bandsaw, or shear — the edges must be free of mill scale, rust, oil, and paint before welding. Plasma cutting adds a thin oxide layer to the cut edge that should be ground off for critical welds.
For MIG welding, a quick pass with a flap disc on the cut edge removes plasma dross and surface contamination. The ER70S-6 wire deoxidizers handle light mill scale, but heavy rust or paint must come off completely. For TIG welding, grind the cut edge to bright metal and wipe with acetone to remove any residual oils from your hands or cutting fluid.
Plasma-cut edges are square enough for most butt joint fit-ups without additional grinding. If you are cutting pieces for a tight-fit butt weld, plasma produces a better starting edge than an angle grinder because the kerf is narrower and straighter. On 16-gauge and thinner, plasma cutting introduces less heat distortion than a grinder, which matters for maintaining dimensional accuracy on sheet metal assemblies.
For projects requiring precise dimensions — like a sim rig frame — plasma cut your pieces 1/16 inch oversize and grind to final dimension with a flap disc. This gives you the speed of plasma cutting with the precision of grinding for critical fit-up. On structural projects like battery enclosure frames, plasma-cut edges are accurate enough to weld directly without additional prep.
Plasma Cutting Aluminum at Home
Aluminum cuts well with plasma because the process does not depend on oxidation like oxy-fuel cutting. A 40-amp plasma cutter slices through 1/4-inch 6061 aluminum cleanly, producing edges that need only light deburring before TIG welding.
Use compressed air as your plasma gas for aluminum under 1/4-inch. For cleaner cuts on thicker aluminum or where edge quality matters, switch to nitrogen or an argon/hydrogen mix if your machine supports it. Compressed air leaves a slight oxide coating on the cut edge that is easily removed with a stainless steel wire brush.
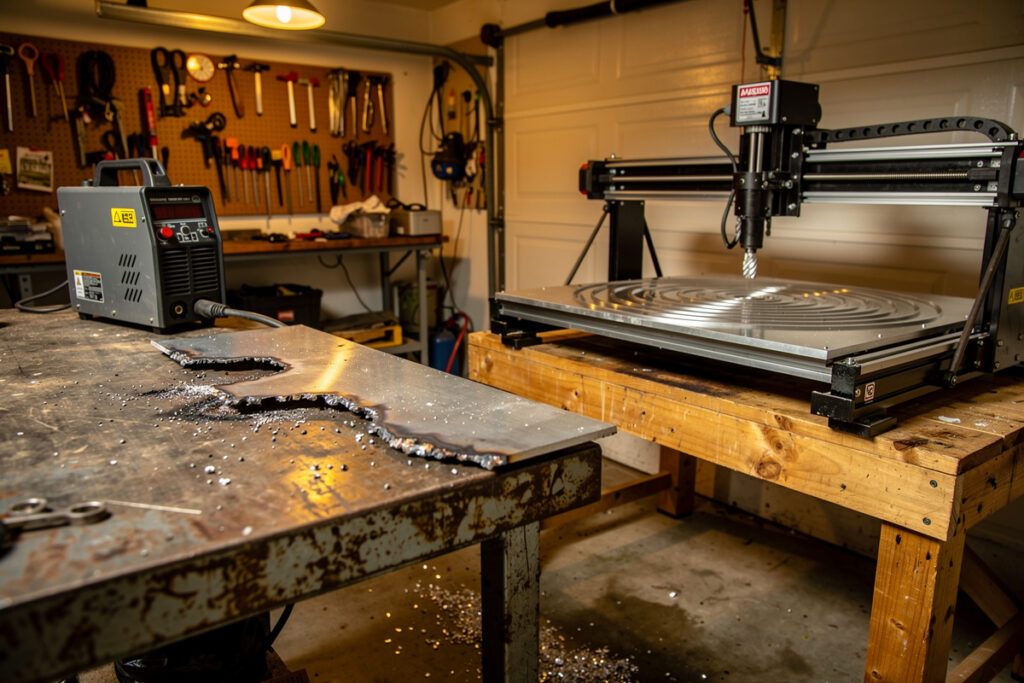
Aluminum conducts heat 4 times faster than steel, so the cut edge cools quickly and heat distortion is minimal. This makes plasma the preferred method for cutting aluminum sheet and plate for welding projects. The plasma cutting aluminum guide covers specific settings, consumable considerations, and when a CNC router might be a better option for repetitive aluminum cuts.
Cutting Tips and Techniques
Good technique produces clean, straight cuts with minimal dross. The four variables to control are arc-on height, travel speed, torch angle, and standoff distance.
Start the arc on the edge of the material and move into the cut. Drag the torch along a straightedge for straight cuts, or follow a template for curves. Maintain a consistent 1/8-inch standoff distance — the gap between the nozzle tip and the workpiece. Too close and the tip drags in the molten pool, shortening consumable life. Too far and the arc wanders and the cut narrows. For weld-ready edges I clamp a guide rather than trust my hand; my walkthrough on cutting a straight line with a plasma cutter covers the straightedge offset, a roller standoff, and reading travel speed.
Travel speed controls cut quality more than any other variable. Too slow produces excessive dross on the bottom edge and widens the kerf. Too fast leaves the cut incomplete with a raised ridge of dross on the bottom. The correct speed produces a clean, square cut with minimal dross that flakes off with a light tap. On 1/4-inch mild steel at 40 amps, a travel speed of 15-20 inches per minute produces clean cuts.
For piercing (starting a cut in the middle of a plate rather than the edge), tilt the torch 15-20 degrees and approach slowly. The initial blowback from piercing can damage the nozzle if the torch is perpendicular to the plate. After the arc penetrates, bring the torch to vertical and begin your cut path. On material thicker than 1/4-inch, drill a 1/4-inch start hole instead of pierce-starting to protect consumables.
Comparison Table: Plasma vs Other Cutting Methods
| Feature | Plasma Cutter | Angle Grinder | Oxy-Acetylene | Abrasive Chop Saw |
|---|---|---|---|---|
| Cutting Speed (1/4-inch steel) | 15-20 in/min | 2-3 in/min | 5-8 in/min | 30-60 seconds per cut |
| Edge Quality | Clean, minimal dross | Rough, heat-distorted | Rough, heavy dross | Rough, sparks everywhere |
| Max Thickness | 1/2 to 1 inch (by amperage) | 1/4-inch practical | Unlimited | 4-6 inch depending on blade |
| Stainless/Aluminum | Yes — same settings | Yes with correct wheel | No for aluminum | Yes with correct blade |
| Curved Cuts | Excellent — freehand | Difficult — freehand | Good with practice | No — straight only |
| Interior Cutouts | Yes — pierce and cut | No — need drill start | Yes — pierce and cut | No |
| Equipment Cost | $300-$500 | $30-$80 | $400-$800 | $100-$250 |
| Operating Cost | Low — air + consumables | Low — cutoff wheels | High — fuel + oxygen | Medium — abrasive wheels |
| Portability | Good — 20-40 lbs | Best — 5 lbs | Poor — 2 cylinders | Poor — bench-mounted |
| Heat Distortion | Low — narrow kerf | High — slow, wide cut | Medium — moderate | Low — fast cut |
For home workshop cutting under 1/2-inch steel, a plasma cutter paired with an angle grinder covers every scenario. The plasma handles long cuts, curves, sheet metal, and stainless/aluminum. The grinder handles short cuts, deburring, beveling, and tight spaces. Oxy-acetylene only makes sense if you regularly cut 1-inch or thicker steel, and an abrasive chop saw is best for repetitive straight cuts on bar stock and tubing.
Safety Considerations for Plasma Cutting
Plasma cutting generates intense UV radiation, hot metal sparks, toxic fumes, and high noise levels. Proper PPE and workspace setup prevent injuries common to home plasma cutting.
Wear ANSI Z87.1 safety glasses as a bare minimum for a quick tack, but for actual cutting sessions you need a real shade lens — OSHA’s own shade chart puts plasma arc cutting (PAC) under 300 amps at shade 8 minimum, with ANSI/AWS recommending shade 9, which covers every hobby and home-shop plasma cutter — noticeably darker than the shade 3-6 range that covers oxy-fuel torch cutting. The plasma arc produces real UV radiation and prolonged exposure without the correct shade causes arc eye just like a welding arc does. Wear leather gloves, a long-sleeve shirt or leather jacket, and leather boots. Synthetic clothing melts onto skin when hit by sparks.
Cut on a metal table or over a fireproof surface. Plasma-cutting drops are molten metal that ignites wood, cardboard, and concrete dust. Keep a fire extinguisher within arm’s reach and clear all combustible materials from the cutting area. If cutting indoors, use a cutting table with a water tray beneath the workpiece — molten drops fall into the water and are extinguished immediately. If you find yourself cutting the same parts over and over, that water tray scales up into a full CNC plasma table; I weigh the retrofit, build, or buy routes for a home shop and what each really costs.
Generate adequate ventilation when cutting galvanized steel, stainless steel, or painted metal. Zinc fumes from galvanized steel cause metal fume fever — flu-like symptoms appearing 4-10 hours after exposure, peaking around 18 hours. Stainless steel cutting releases hexavalent chromium, a carcinogen regulated under OSHA’s welding/cutting ventilation standard. Cut these materials outdoors or with a fume extraction system positioned 6-12 inches from the cut. Plain mild steel produces fewer toxic fumes but still requires basic ventilation in a closed garage.
Frequently Asked Questions
Can a plasma cutter cut stainless steel?
Yes, plasma cutting works on any conductive metal including stainless steel. A 40-amp plasma cutter cleanly cuts 304 stainless up to 3/8-inch thick. Use the same compressed air supply as mild steel cutting. The cut edge on stainless requires less grinding than an angle grinder cut because plasma introduces less heat distortion.
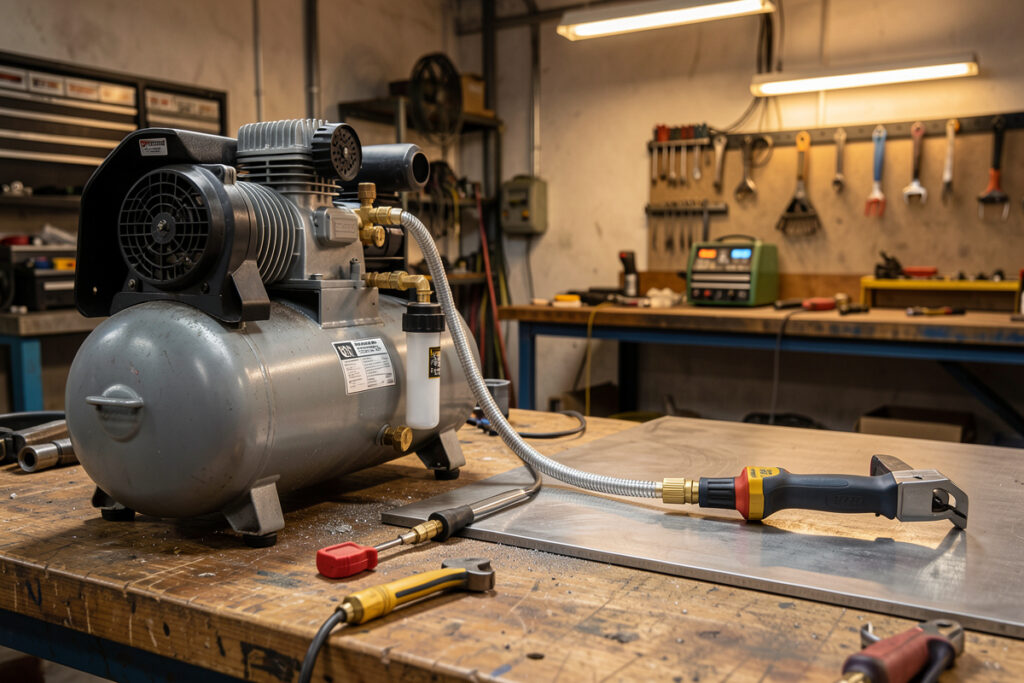
What air pressure does a plasma cutter need?
Most plasma cutters require 60-100 PSI compressed air at 4-6 CFM. A small 20-gallon compressor with a 5 HP motor delivers adequate air for hobbyist use. If your compressor cycles constantly, add a dedicated air dryer and 50-foot hose as a buffer reservoir between the compressor and plasma cutter.
Is a plasma cutter better than an angle grinder for cutting?
For cuts longer than 6 inches, curves, sheet metal, and stainless or aluminum, a plasma cutter is 5-10 times faster with cleaner edges. For short straight cuts on thick stock and deburring, an angle grinder is more convenient. Most home welders own both tools and use each for its strengths.
Can you plasma cut aluminum?
Yes, aluminum cuts cleanly with a plasma cutter. Aluminum’s high thermal conductivity actually helps — the cut edge cools fast with minimal heat distortion. Use compressed air as plasma gas for aluminum under 1/4-inch. A 40-amp plasma cutter handles aluminum sheet and plate up to 3/8-inch thick for home projects.
How long do plasma cutter consumables last?
A set of electrode and nozzle tips lasts 200 to 800 arc starts depending on amperage and material. At 40 amps on mild steel, expect 400-600 starts per consumable set. Cutting stainless and aluminum at higher amperage reduces consumable life to 200-300 starts. Budget $5-15 per consumable set.
What size breaker does a plasma cutter need?
A 40-amp plasma cutter on 220V needs a dedicated 30-amp breaker and 10-gauge wire. On 120V, a 20-amp breaker handles a 25-30 amp plasma cutter. Never share a circuit with your welder or compressor — the inrush current from either can trip the breaker during a cut.
Do you need a welding helmet for plasma cutting?
A dedicated welding helmet is not required, but you do need real shade protection, not just clear safety glasses. OSHA’s shade chart puts plasma arc cutting under 300 amps at shade 8 minimum (ANSI/AWS recommend shade 9), which covers every home-shop plasma cutter. A welding helmet set to shade 8-9, or a dedicated shade 8-9 cutting face shield, both work.
The One Thing That Makes Plasma Worth It
If you are deciding whether to add a plasma cutter to your shop, the single deciding question is project breakdown time, not project finish quality. Plasma trades 30 minutes of grinder cleanup per project for 30 seconds of plasma cuts plus 5 minutes of light deburring — the time savings on a typical fire pit, sim rig, or trailer-fender job is 2-4 hours. If you build more than four projects per year that need 1/4″ or thicker plate cut to size, the $400 plasma pays back in saved hours within the first 12 months. If your projects are smaller (sheet metal brackets, thin-wall tube), an angle grinder and a chop saw together cover the same range and you skip the consumables cost. Match the tool to your actual project flow.
Related Articles
- Best Plasma Cutter Under 500 Dollars
- Plasma Cutter vs Angle Grinder
- Plasma Cutting Aluminum at Home
- MIG Welding Settings Chart
- How to Identify Mystery Steel
- Welding for Beginners
- Essential Welding Equipment Guide
- MIG Welding Complete Guide
- Welding Safety Guide
- Welding Ventilation for Home Garage
- Welding Troubleshooting Guide
- DIY Welding Projects Guide
- Welded LiFePO4 Battery Enclosure
- Welding a Steel-Tube Sim Rig Frame
- Welding vs CNC Routing
- Where to Buy Steel for Welding Projects
Discussion (0)