Welding for beginners starts with choosing the right process — MIG, TIG, or stick — based on the metals you plan to join and your budget. A basic MIG setup costs $200-$500 and produces clean welds within your first week of practice.
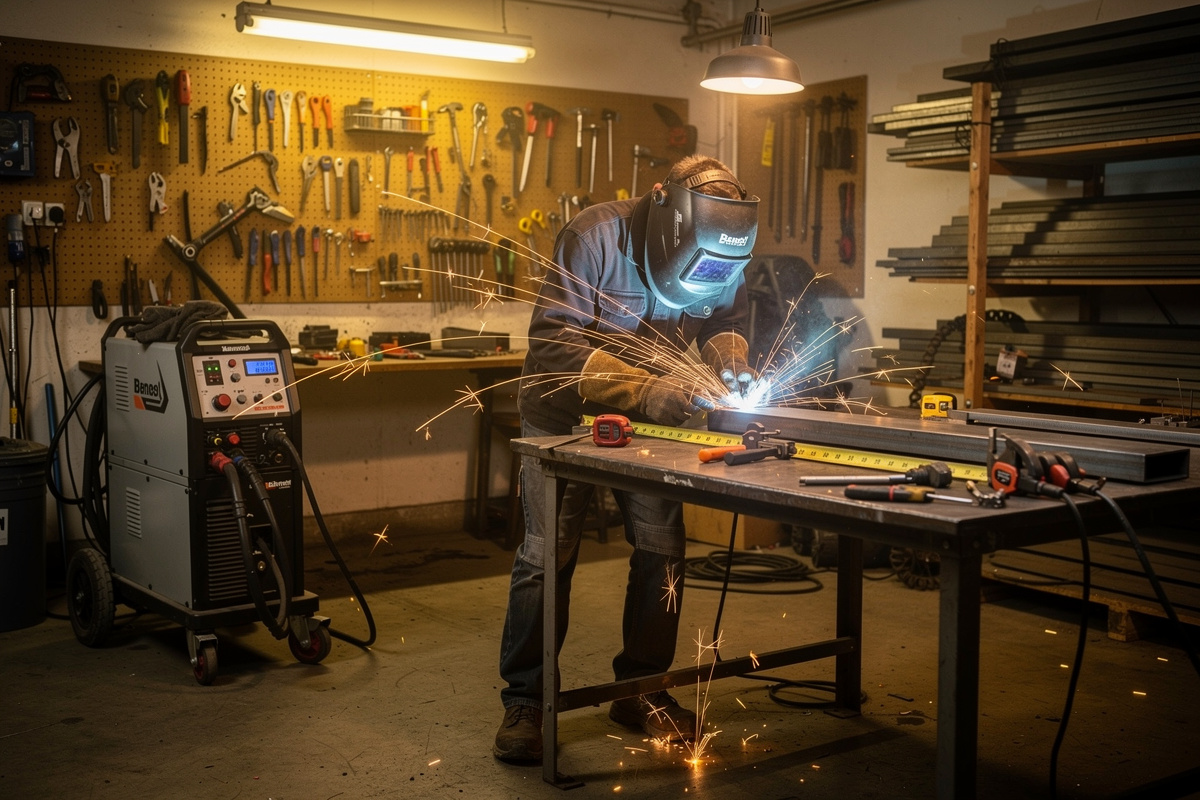
I taught myself to weld in 2019 with a $230 inverter, a $50 helmet, and a stack of 1/8″ flat bar from the local steel supplier — and I still use the welds-on-coupons approach with every beginner I mentor. Tools matter less than 30 minutes a day for two weeks. This guide covers every decision a first-time welder faces: which process to learn, what equipment to buy, how much it costs to get started, and which safety gear is non-negotiable. Whether you want to build furniture, repair truck frames, or fabricate workshop projects, the fundamentals are the same.
Which Welding Process Should a Beginner Learn First?
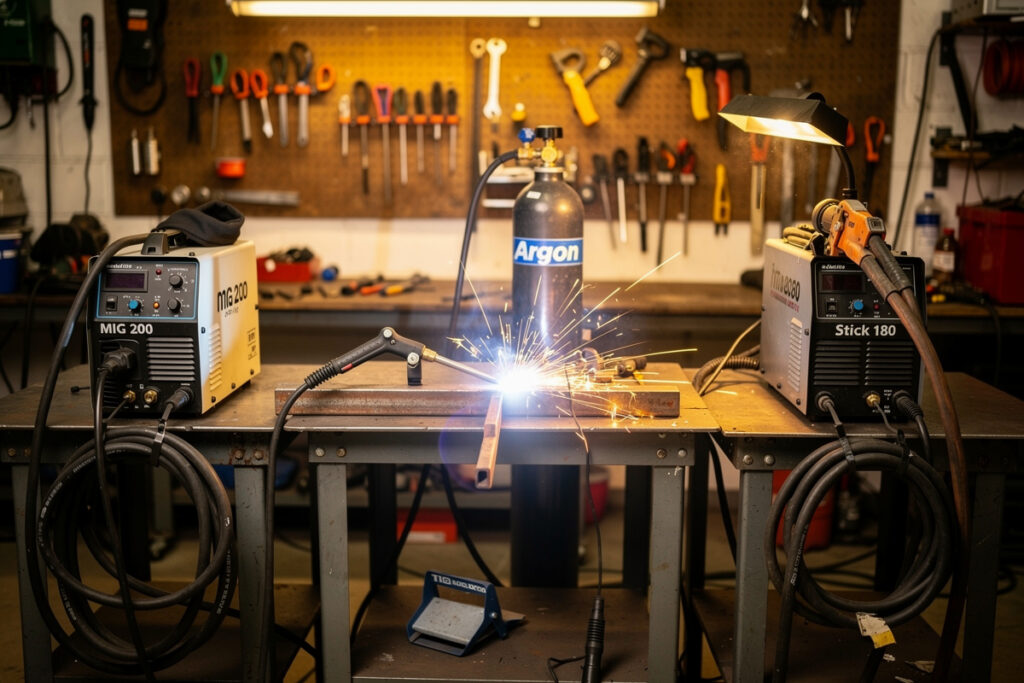
MIG welding is the best starting process for beginners because it uses a continuously fed wire electrode and produces clean beads with minimal practice. MIG is the process most welding schools and shop mentors put in front of beginners first, because of its forgiving arc characteristics and straightforward machine setup.
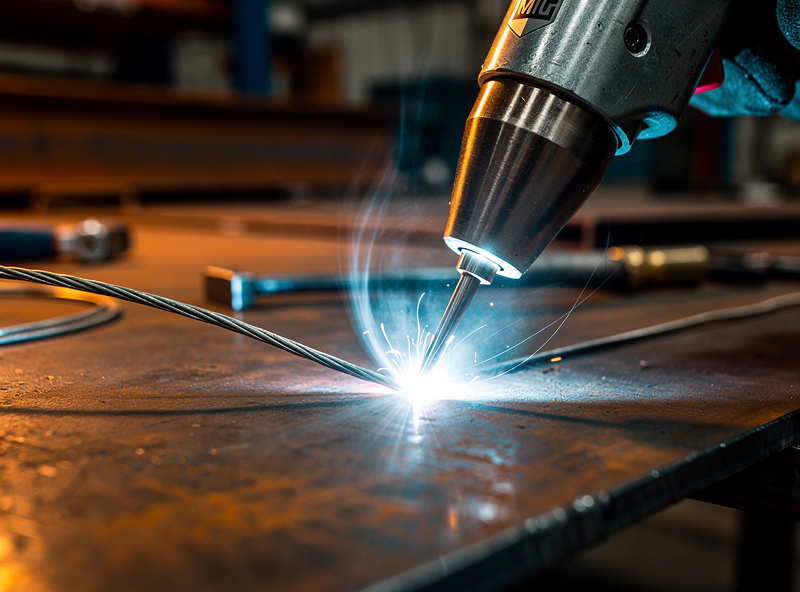
Each of the three main welding processes has a different learning curve. MIG welding uses a wire feed system that automatically feeds filler metal into the joint, so you only need to control travel speed and gun angle. TIG welding requires feeding a separate filler rod with one hand while controlling the torch with the other, making it the most technique-intensive process. Stick welding uses a consumable electrode coated in flux and works well on dirty or rusty metal, but produces more spatter and requires slag chipping between passes. The complete process comparison is in MIG vs TIG vs stick welding, and the deep dive on each lives in the MIG welding complete guide and TIG welding guide.
For home shop work on mild steel up to 1/4 inch thick, MIG with a gas-shielded setup (75% argon / 25% CO2 — labelled C25) gives the cleanest results. The wire on most spools is ER70S-6 per AWS A5.18; the deoxidizers tolerate any mill scale you missed during prep. If you plan to weld aluminum or stainless steel eventually, starting with TIG makes sense despite the steeper learning curve. Stick welding is the most affordable entry point and excels on outdoor repairs where wind would blow away shielding gas.
Most beginners who practice 3-4 hours per week can produce structurally sound MIG welds within 10-15 hours of practice. TIG welding typically takes 30-40 hours of practice before consistent results. Stick welding falls in between at 15-25 hours.
How Much Does It Cost to Start Welding at Home?
A complete beginner MIG welding setup costs $400-$800, including the welder, helmet, gloves, and consumables. A basic 110V MIG welder runs $200-$350, an auto-darkening helmet costs $40-$100, and a pair of leather welding gloves is $15-$30. The full breakdown by process and tier is in cost to start welding at home.
The total startup cost depends on which welding process you choose and whether you already have a suitable workspace. Here is a breakdown of typical beginner costs by process:
| Item | MIG Setup | TIG Setup | Stick Setup |
|---|---|---|---|
| Welder (110V) | $200-$350 | $400-$800 | $100-$250 |
| Auto-darkening helmet | $40-$100 | $40-$100 | $40-$100 |
| Welding gloves | $15-$30 | $20-$40 | $15-$30 |
| Shielding gas cylinder | $80-$150 | $100-$200 | Not required |
| Consumables (first 6 months) | $30-$60 | $40-$80 | $20-$40 |
| Angle grinder | $30-$60 | $30-$60 | $30-$60 |
| Clamps and magnets | $20-$40 | $20-$40 | $20-$40 |
| Total | $415-$790 | $650-$1,320 | $225-$520 |
Beyond the initial equipment, budget $30-$60 per month for wire, gas refills, and replacement tips. A 80-cubic-foot argon/CO2 cylinder lasts roughly 4-6 months of weekend welding. If you already own an angle grinder and clamps from other workshop work, subtract $50-$100 from the totals above. The complete equipment selection logic is in the essential welding equipment guide.
A 220V outlet is not required for beginners. Every major welder manufacturer makes 110V MIG units that plug into a standard garage outlet. The first welder I bought was a 120V flux-core unit; it ran every project I tackled in my first 18 months. You will eventually want 220V for welding steel thicker than 3/16 inch, but a 110V machine handles 90% of beginner projects including furniture, brackets, garden structures, and light automotive repair. The buyer’s logic on each tier is in best MIG welder for home garage and best budget welder under $300.
Essential Welding Safety Gear Every Beginner Needs
The four pieces of safety gear every welder needs are an auto-darkening helmet (shade 10-13, ANSI Z87.1+ certified), leather welding gloves, a flame-resistant jacket or long-sleeve shirt, and safety glasses worn under the helmet. These items prevent the two most common beginner injuries: arc flash burns to the eyes and spatter burns to exposed skin. The first time I caught a single drop of spatter inside my glove cuff, the burn left a scar I still see — half a second of skin contact at 1,500°F. Cuffs go over wrists, not under them.
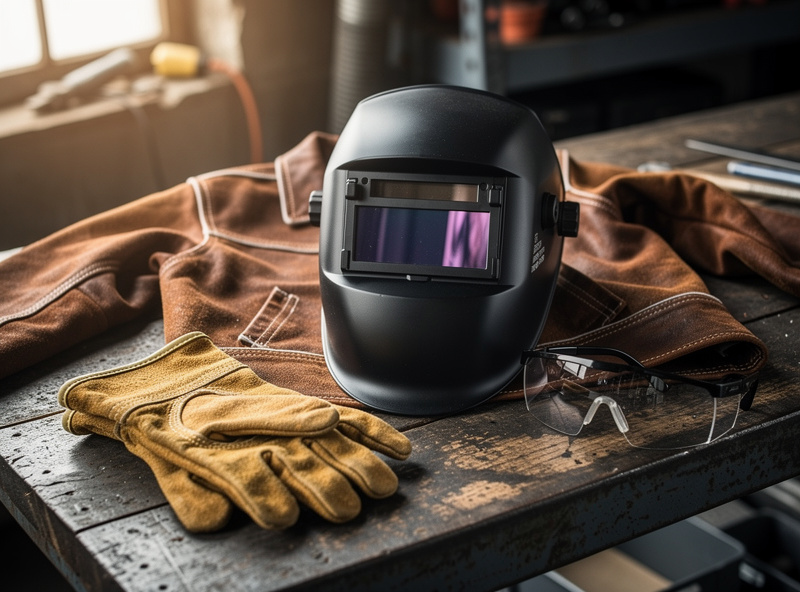
Auto-darkening helmets have largely replaced fixed-shade helmets for beginner use because they automatically switch from shade 3 (clear viewing) to shade 10-13 (welding protection) within 1/25,000 of a second when the arc strikes. This eliminates the need to nod your helmet down before striking an arc, which is when most beginners lose their starting position. Look for helmets with adjustable shade settings, sensitivity controls, and a grind mode for grinding welds without removing the helmet. The complete helmet selection is in best welding helmet for home use.
Leather MIG welding gloves should be thick enough to protect against spatter but flexible enough to feel the gun trigger. TIG welding gloves are thinner and more form-fitting because TIG requires precise finger control. Never use MIG gloves for TIG work or vice versa — the wrong glove thickness makes each process harder than it needs to be.
Your workspace needs adequate ventilation even when welding with the garage door open. Welding produces metal fumes that contain manganese — peer-reviewed research on welders’ manganese exposure links it to measurable neurobehavioral effects — and, on stainless or chrome-alloy work, hexavalent chromium, compounds that accumulate with repeated exposure. OSHA 29 CFR 1910.252(c) sets the real bar: mechanical ventilation at 2,000 CFM per welder (or local exhaust/a respirator instead) in any space under 10,000 cubic feet per welder or under a 16-foot ceiling — a description that fits most home garages, so an open door alone doesn’t reliably clear it on paper even though it moves real air. A local-capture fume extractor pulling air from near the arc is the realistic way to hit real compliant CFM at home; the full math is in the linked ventilation guide below. For stainless steel or galvanized metal, a dedicated fume extractor rated at 200+ CFM near the arc is a reasonable minimum.
Learn more about ventilation requirements and OSHA standards for home welding — and the broader welding safety guide covers PPE, fire prevention per NFPA 51B, and the burn-care protocol every garage welder should know.
What Is the Easiest Metal for Beginners to Weld?
Mild steel is the easiest metal for beginners to weld because it has a wide melting range, forgives inconsistent travel speed, and works with all three welding processes. Hot-rolled mild steel (typically A36 plate or A500 tube) from a hardware store or metal supplier costs $2-$5 per foot in common thicknesses and produces clean welds with basic MIG settings.
Beginner welders should avoid aluminum, stainless steel, and cast iron until they have mastered mild steel joints. Aluminum conducts heat five times faster than steel, requiring higher amperage and faster travel speeds that are difficult to control without experience. Stainless steel is more prone to warping and discoloration from heat input. Cast iron requires pre-heating and specific filler rods to prevent cracking.
Start with 16-gauge to 1/8-inch mild steel flat bar and angle iron. These thicknesses are forgiving enough to practice on without burning through, yet thick enough to produce visible bead profiles. Avoid sheet metal thinner than 20 gauge for your first month — the thinner material burns through easily and teaches bad habits about heat control.
How to identify different metals when buying from scrap yards — and the where to buy steel for welding projects guide compares online and local sourcing.
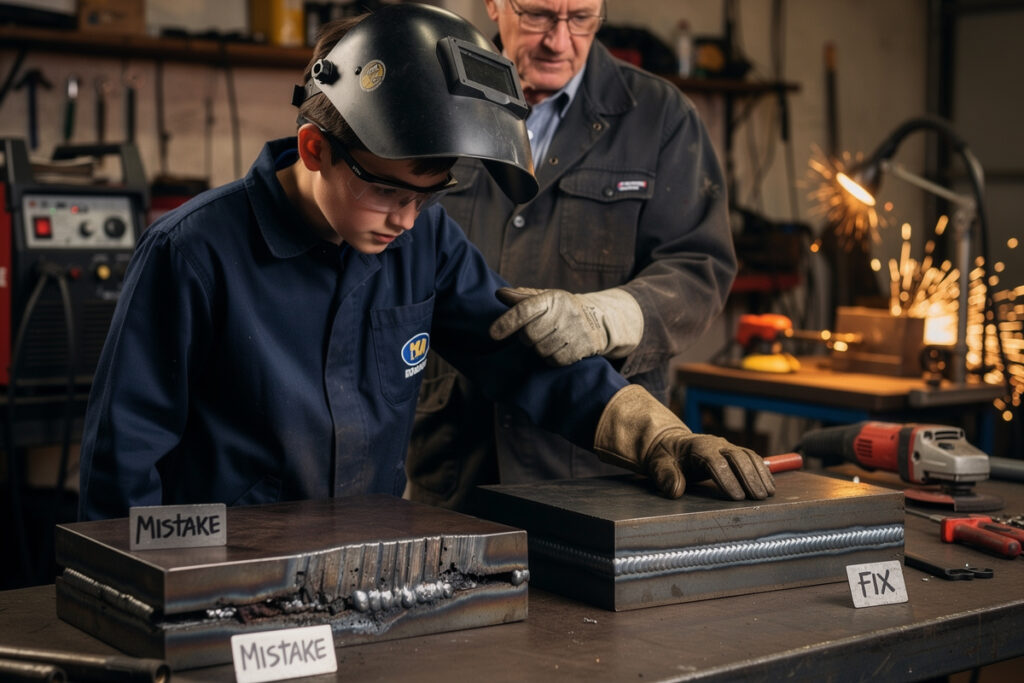
Common Beginner Welding Mistakes and How to Avoid Them
The five most common beginner welding mistakes are incorrect wire speed, wrong travel speed, improper gun angle, contaminated metal, and insufficient gas flow. Each of these mistakes produces visible defects — porosity, spatter, burn-through, or lack of fusion — that can be diagnosed and corrected immediately. The complete diagnostic playbook is in the welding troubleshooting guide.
Wire speed and voltage must be matched to the metal thickness you are welding. Running too hot (high voltage, low wire speed) burns through thin material. Running too cold (low voltage, high wire speed) produces a tall, narrow bead that sits on top of the metal instead of fusing into it. Listen for the steady frying-bacon hiss; popping or sputtering means your settings are wrong. Every MIG welder ships with a settings chart on the inside door — follow it for your first 20 hours, and the MIG welding settings chart covers the gaps the manufacturer chart leaves out.
Travel speed controls how much heat you put into the joint. Moving too fast produces a thin, raised bead with poor fusion. Moving too slow puts too much heat into the metal, causing warping and burn-through on thinner material. A good rule of thumb: your bead width should be roughly 1.5 times the diameter of your wire.
Gun angle matters for both MIG and stick welding. For MIG, maintain a 10-15 degree push angle (tilting the gun in the direction of travel). For stick welding, use a 15-20 degree drag angle. Using the wrong angle traps shielding gas, causes porosity, and produces excessive spatter.
Detailed breakdown: 10 causes of spattery MIG welds and exact fixes
How Long Does It Take to Learn to Weld?
Most beginners can produce structurally sound MIG welds after 10-15 hours of practice. This means running flat beads on scrap steel, then progressing to lap joints, T-joints, and butt joints. Consistent, visually appealing welds on all joint types typically take 40-60 hours of practice.
The learning timeline varies by process. MIG welding has the shortest learning curve because the wire feed automates filler metal delivery. TIG welding requires 30-40 hours to develop the hand coordination needed for simultaneous torch and filler rod control. Stick welding takes 15-25 hours because you must maintain a consistent arc length while the electrode burns down.
Practice structure matters more than total hours. Welding for 30 minutes every other day produces better results than marathon 4-hour sessions once a week. Your hands and eyes develop muscle memory faster with frequent, shorter practice sessions. Run 10-15 practice beads per session, then stop and evaluate each one before continuing.
YouTube tutorials and welding forums accelerate the learning process significantly. Video feedback — filming your own welding and comparing it to experienced welders — is the fastest way to identify technique problems. Most beginners self-correct within 2-3 practice sessions once they can see their own travel speed and gun angle on video.
What Can You Build as a Beginner Welder?
Beginner welders can build functional projects including welding carts, fire pits, plant stands, shelving brackets, and simple furniture within their first 20-30 hours of practice. These projects use basic joint types (butt joints, lap joints, T-joints) on mild steel flat bar, angle iron, and square tubing. The complete project sequence is in the DIY welding projects guide.
Start with projects that have straight cuts and simple joint geometry. A welding cart, for example, uses only 90-degree cuts, T-joints, and lap joints — the same joints you practice on scrap steel. More complex projects with curves, tight tolerances, or multiple angles should wait until you can consistently produce clean beads on all four basic joint types.
The best beginner project sequence is: practice beads on scrap (hours 1-5) → lap joint coupons (hours 5-10) → T-joint coupons (hours 10-15) → welding cart or fire pit (hours 15-25) → furniture or automotive repair (hours 25+). This progression builds skills in the order you need them for increasingly complex fabrication.
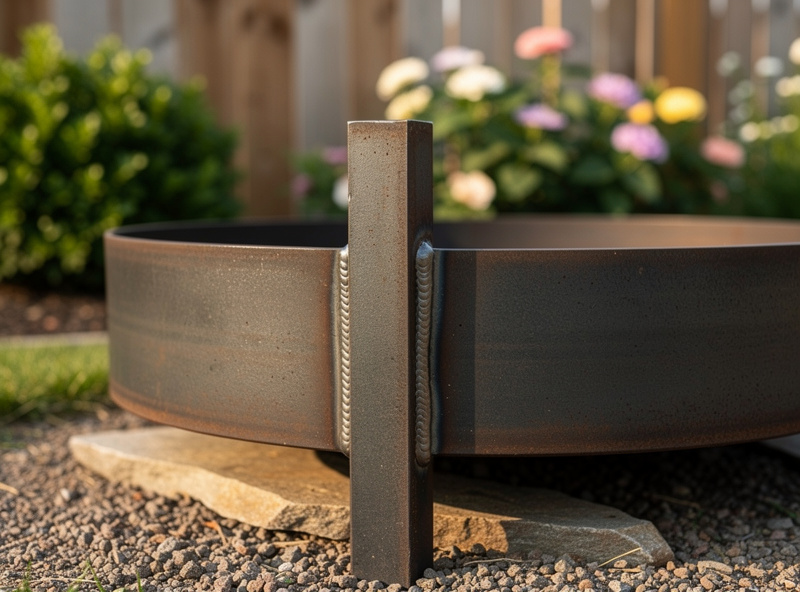
Garden and outdoor projects are especially forgiving for beginners because cosmetic perfection is not critical. Welded raised bed frames, tomato cage supports, fire pit rings, and grill grate stands all tolerate slightly uneven beads while still providing years of functional service. The angle iron beds I welded eight years ago for our garden have not failed mechanically; they fail at the coating-to-steel boundary if I skip the annual repaint, which is the more useful lesson for an outdoor project.
Indoor furniture projects — coffee tables, shelving frames, desk legs — demand cleaner welds because the finished piece is visible every day. Save furniture projects for after your 25-hour mark, when your beads are consistent enough to grind smooth and finish with paint or clear coat. Many beginner welders find that their welding cart is their first furniture-quality project because it combines every skill in a single practical build.
Step-by-step: How to build a welding cart with cut list and weld guide
DIY welded fire pit with steel ring design
Welded steel raised bed frames for permanent garden beds
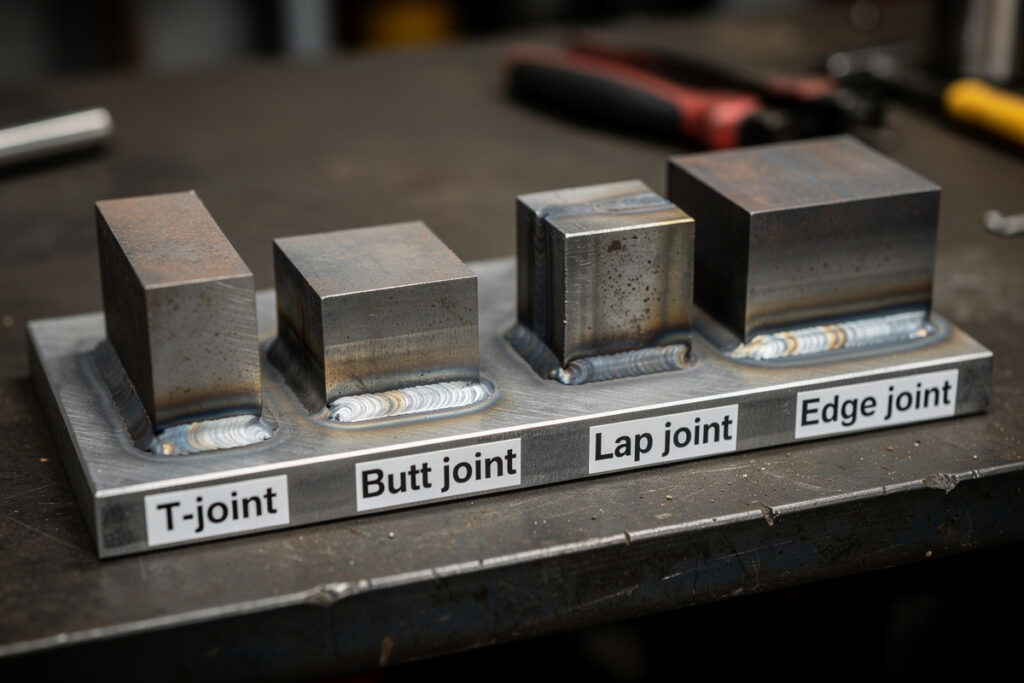
Welding Joint Types Every Beginner Should Know
There are five basic welding joint types: butt, lap, T-joint, corner, and edge joints. Beginners should master the first three before attempting complex fabrication. In my own shop and with every beginner I’ve mentored, the overwhelming majority of home welding projects use only butt, lap, and T-joints.
A butt joint connects two pieces of metal along the same plane, edge to edge. This is the most common joint in sheet metal work, pipe welding, and panel fabrication. Butt joints on material thicker than 3/16 inch typically require a beveled edge (groove) to ensure full penetration. For beginner practice, butt joints on 1/8-inch flat bar do not need beveling — run one pass from each side for full strength.
A lap joint overlaps two pieces of metal and welds along the edge of the top piece. Lap joints are stronger than butt joints in shear because the weld bears load across two planes. They are common in bracket fabrication, sheet metal assemblies, and structural repairs. Practice lap joints by welding two pieces of 1/8-inch flat bar with a 1-inch overlap.
A T-joint connects two pieces at 90 degrees, forming a T shape. T-joints appear in nearly every structural welding project — frames, stands, brackets, and furniture legs. The vertical member (called the stem) is welded to the horizontal member (called the flange). T-joints require careful arc control because the heat conducts differently into the two pieces — the flat piece absorbs heat faster than the vertical piece.
Corner joints and edge joints are less common in beginner work. Corner joints connect two pieces at right angles along their edges, common in box and frame fabrication. Edge joints weld the parallel edges of two overlapping sheets, used primarily in thin-gauge panel work. Master butt, lap, and T-joints first — corner and edge joints use the same techniques with slightly different positioning.
How to Set Up Your First Welding Station at Home
A home welding station needs four things: a flat work surface, grounding point, ventilation path, and fire-safe surroundings. A steel welding table rated for 300+ pounds is ideal, but a sturdy steel-top workbench or even a 4×4 piece of 3/8-inch plate steel on sawhorses works for beginners. The complete station setup logic is in the welding table buying guide.
Your grounding clamp must connect to the workpiece or work surface, not to the table legs or unrelated metal. Poor grounding causes inconsistent arcs, porosity, and frustration that beginners often mistake for technique problems. Welding tables with built-in ground clamps solve this permanently. If using a flat plate, clamp your ground directly to the workpiece within 6 inches of the weld joint.
Position your welding station near the garage door for natural ventilation, or install a box fan on a stand that exhausts fumes toward the nearest opening. Keep a fire extinguisher (ABC-rated) within 10 feet of your welding area. Remove all flammable materials — cardboard, rags, sawdust, fuel cans — from a 35-foot radius (the clearance OSHA 29 CFR 1910.252(a) uses to trigger fire-watch and floor-sweeping requirements), as welding sparks can travel that far and ignite materials hours after welding. Maintain a fire watch for 30 minutes after the last weld.
Store your gas cylinder upright and chained to a wall or cylinder cart. A falling cylinder can break its valve and become an unguided rocket. Most home welders use a 40 or 80 cubic foot cylinder — the 80 lasts twice as long and costs only $20-$40 more to refill. Mount a cylinder cart to your welding table or wall bracket for permanent safety.
Organize consumables — wire spools, contact tips, nozzles, and collets — in a labeled drawer or bin near your welder. Running out of contact tips mid-project means a trip to the store or waiting for an online order. The full consumables selection is in the welding consumables guide. Keep at least 10 spare contact tips and one spare nozzle on hand at all times.
If I Were Starting Today
If I were learning to weld today with the benefit of seven years of mistakes, here is the order I would do it: buy a $300 inverter MIG (110V), spend the first 5 hours running stringer beads on $20 of scrap flat bar — no projects, just beads. Once the beads look consistent, run lap and T-joint coupons for another 5 hours. Then build a welding cart as the first real project — it teaches every fundamental joint type in a single useful artifact. Skip stick and TIG until year two. The single most common reason beginners give up is that they buy a project’s worth of steel before they can run a clean bead, then waste it producing parts they have to grind off and re-weld. Reverse that: practice on coupons until the bead looks right, then build something. The first project will be cleaner, faster, and survive a real-world load test the first time you put weight on it.
Frequently Asked Questions
What type of welding is best for beginners?
MIG welding is the best process for beginners because it uses a continuous wire feed that automates filler metal delivery. Most beginners produce clean, structurally sound welds within 10-15 hours of MIG practice, compared to 30-40 hours for TIG welding.
How much does it cost to start welding at home?
A complete beginner MIG welding setup costs $400-$800 including welder, helmet, gloves, gas, and consumables. A 110V MIG welder runs $200-$350 and plugs into a standard garage outlet. Budget an additional $30-$60 per month for wire and gas refills.
Can I teach myself to weld?
Yes. Most self-taught welders produce structurally sound MIG joints within 10-15 hours of practice using YouTube tutorials and manufacturer settings charts. Practice 30 minutes every other day for the fastest muscle memory development.
Do I need a 220V outlet to weld at home?
No. Every major manufacturer makes 110V MIG welders that plug into a standard garage outlet and handle steel up to 3/16 inch thick. You only need 220V for welding material thicker than 3/16 inch.
What metal is easiest to weld?
Mild steel is the easiest metal to weld because it has a wide melting range and forgives inconsistent travel speed. Start with 16-gauge to 1/8-inch flat bar and angle iron before attempting aluminum or stainless steel.
How long does it take to learn welding?
Most beginners produce structurally sound MIG welds after 10-15 hours of practice. Consistent, visually appealing welds on all joint types typically require 40-60 hours. TIG welding takes 30-40 hours, and stick welding takes 15-25 hours.
Related Articles
- Welding Joint Types Guide — Butt, lap, T, corner, and edge explained
- Gas vs Gasless MIG Explained — Which setup for your first welder
- Common Beginner Welding Mistakes and How to Avoid Them — The 11 mistakes every beginner makes and their fixes
- 10 First Welding Projects That Teach Core Skills — Skill-building projects in the right order
- How Long Does It Take to Learn Welding? — Realistic hour-by-hour timeline for home welders
- Welding Terms Glossary — 50+ essential terms for home welders
- How to Set Up a Home Welding Workshop — Power, space, ventilation, and layout checklist
- MIG vs TIG vs Stick Welding: Beginner Comparison
- Cost to Start Welding at Home in 2026
- Best Welding Helmet for Home Use
- Best Budget Welder Under $300
- Welding Ventilation for Home Garage
- MIG Welding Complete Guide
- TIG Welding Complete Guide
- Essential Welding Equipment Guide
- Welding Safety Guide
- DIY Welding Projects Guide
- Plasma Cutting and Metal Prep Guide
- Welding Troubleshooting Guide
Discussion (0)